Yes, this project takes forever, and yes, you’ll be cutting what feels like a millions squares with your paper cutter, but it’s so worth it. The kids’ interest levels stay in it for most of the time. The results are stunning. I want to frame them all in my house or make a massive modern mega collage. We made these again at the very beginning of the year, and I passed them back to the students at the end of the year. They loved seeing them again and oohed and ahhed when I handed them back after having not seen them for several months.
 This project is based on Wassily Kandinsky‘s Farbstudie Quadrate painting, 1913 (circles in squares). We studied Kandinsky, his paintings, and talked about how he has synesthesia. We discussed what abstract art is and what it isn’t. We’ll be reading Barb Rosenstock’s book, The Noisy Paint Box, next time I teach this.
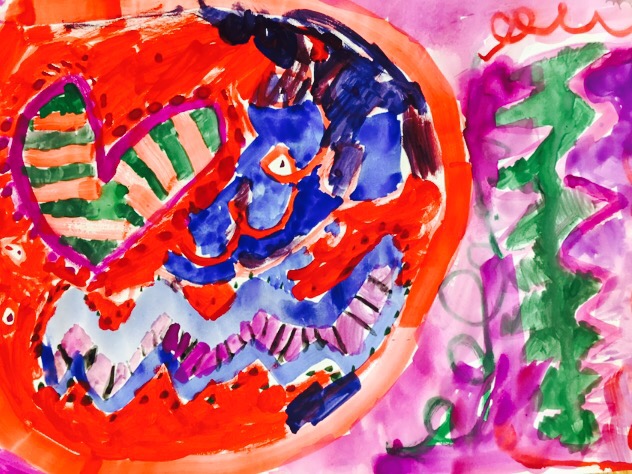
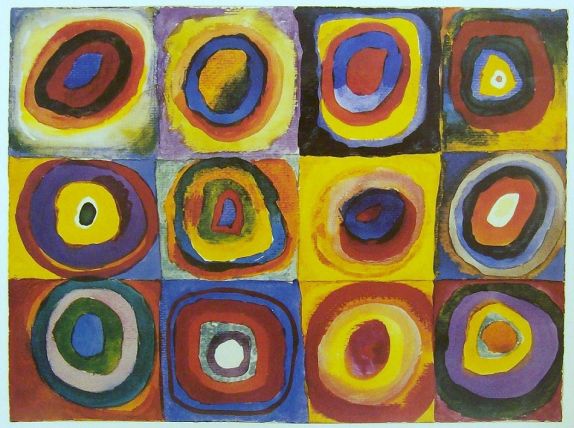
Wassily Kandinsky, Farbstudie Quadrate (Circles in Squares), 1913
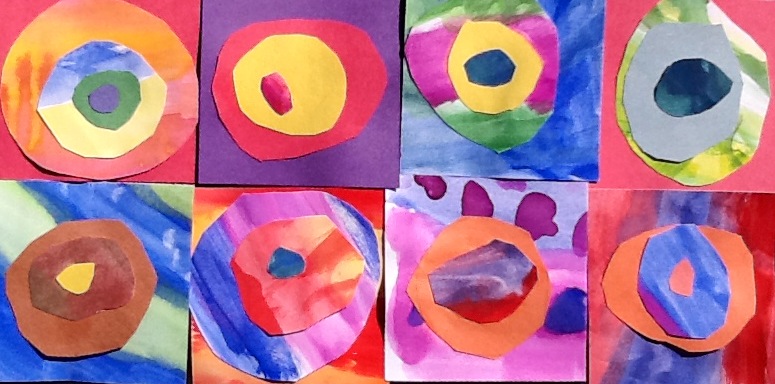
We created out own abstract paintings with tempera paint on a huge sheet of paper (for 2nd graders) – 18″ x 24″. They came out so gorgeous this year that I decided to cut half of the paper as it’s own project. 2 projects in one!
We talked about what concentric circles are, and then we brainstormed some concentric circles or shapes either in the art room or that we’ve seen somewhere (rippling water, a Gobstopper, an onion, Russian nesting dolls, a spider web, growth rings in a tree, an eyeball’s pupil and iris, a banded agate, etc.) Before I saw them next, I cut their paintings into 3″ x 3″ squares. I also pre-cut several 3″ x 3″ construction paper squares. And then I cut even more 3″ x 3″ squares but cut a corner off. This creates a diamond shaped piece that someone called the Superman paper plus the baby triangle that was cut off.
Their 3″ x 3″ square is the base, then they cut a big circle out of their Superman cut, then they cut a small circle out of their baby triangle. They glue them all together in a concentric circle and boom! One of their concentric circle collages are done.
Once they’ve created at least 4, we glued them onto a black base of (you guessed it) pre-cut paper.
This is a fantastic project to teach about high contrast and low contrast. I reminded the students about putting a solid next to a painted piece in both the circles in one square and in the backgrounds of each square next to each other, and alternating that way. They also should alternate with colors if they happened to have, for example, a red piece of construction paper circle on a painted red square (hopefully it’s caught before the glue is dry!) To reinforce understanding the concept of high contrast that they learned while they created their squares, there’s something else you can do. Right before the students glue them onto the black background, have each student make a pile of only their own circles in squares. (If you have 6 circles in squares, your pile will have 6 total. Another student might have 9 total, but keep the piles separate.) Then ask the students to move one seat to the right while they leave their piles of squares on the table. Tell them to very gently and carefully create high contrast with their neighbor’s squares. This is helpful because there’s already a familiarity with their own squares and they can see someone else’s with fresh eyes.
 Differentiation is so easy with this project for your speedy artists who go quickly and your more meticulous and/or distracted artists! If some students finish up before the others, they have the option to continue making their layers of concentric circles on squares, or they could add several layers of concentric circles to make it more detailed. This project times out to have even the slower artists in your class being able to finish 4 squares (the minimum needed) of concentric circle.
 This project helped build a collaborative spirit. If one person ended up with 5 squares but needed 6, we politely asked someone who had some squares to spare if they would share. Each time the artist shared, and I was proud of them every time.
 These projects can be displayed all together without spacing “quilt style” to fit almost any bulletin board. They’re really powerful all together!
Most students figure out how to cut the circles out of paper, but a few really struggled with this step. Once the student tried it more than once but struggled, I let them search the room to find a circle with the right circumference and trace it before cutting. Have fun! Please tag me to share how yours turn out on Instagram at @juliaforsythart and on Twitter at @wowartproject.

