This project has the students engaged from the very beginning. They’re fascinated by the Northern Lights phenomenon, and it’s fun for them to share out facts they already know about it. I love how this project teaches them about science too but is still 100% “real art.”

We watched a time lapse video of Northern Lights as our hook, and then talked together about what we thought was amazing about it. Then I passed out the pre-cut black paper, white tempera paint in bowls – just a little bit – and paint toothbrushes.

They got the toothbrush bristles barely wet with white paint and then flicked it by quickly running their fingers across the bristles as they angled the brush towards the paper. Sounds dangerous, doesn’t it? I demo’ed the right way and the wrong way to do it, and they did a great job.

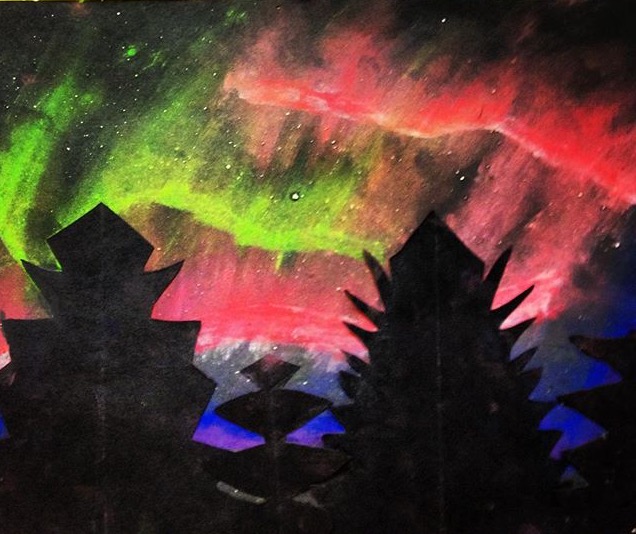
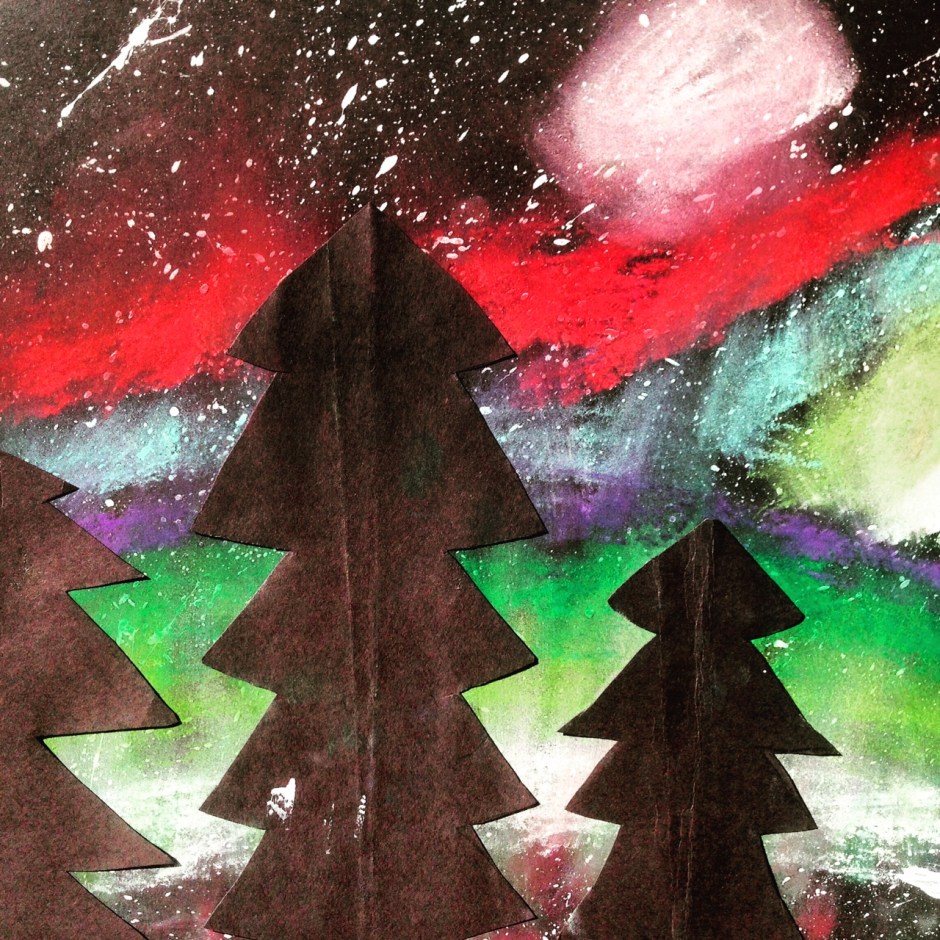
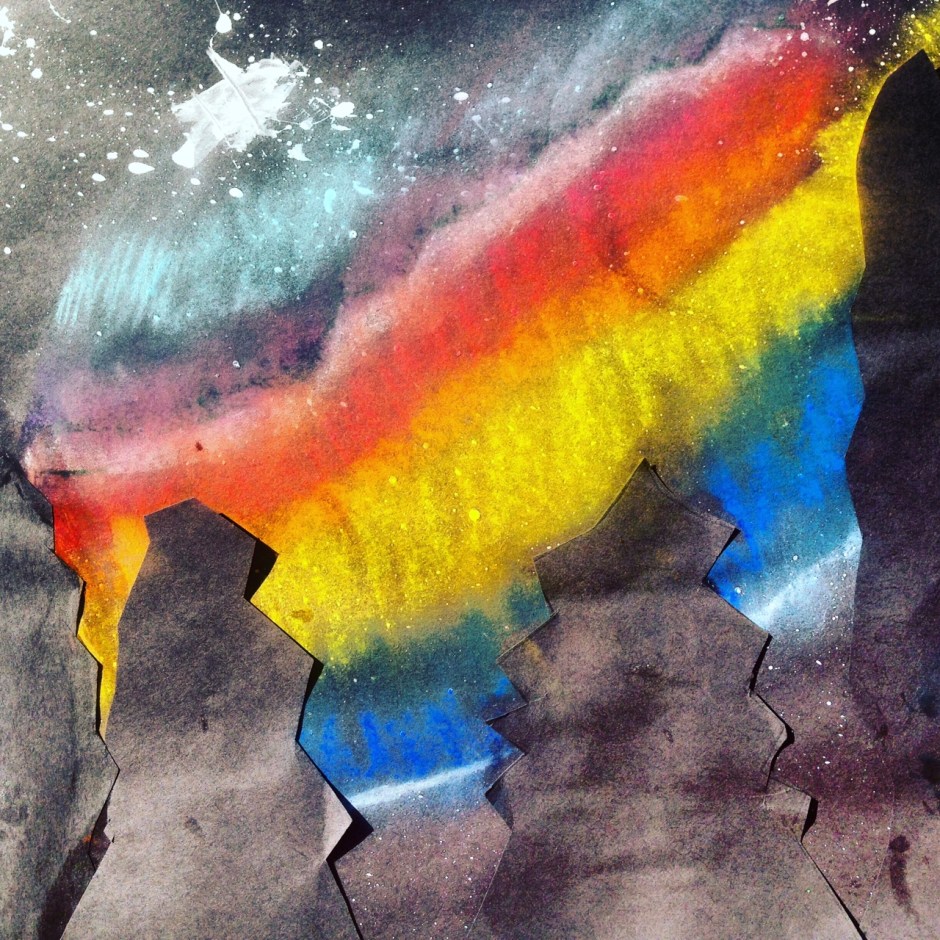
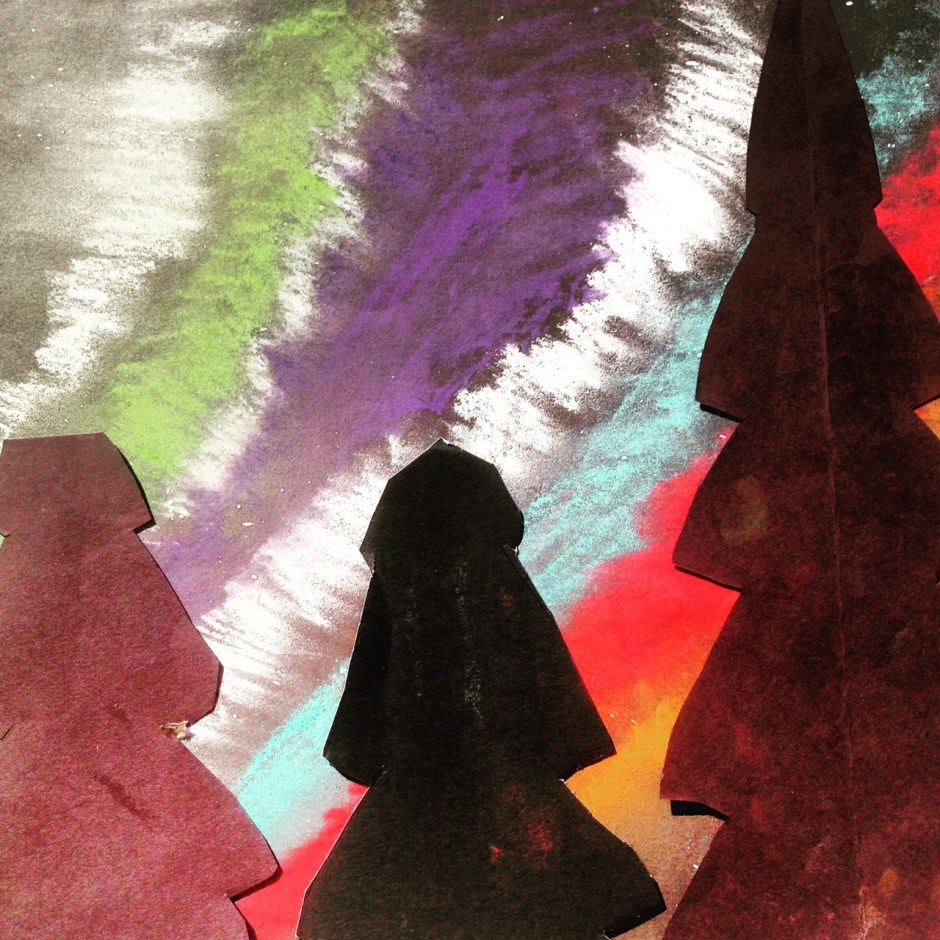
Then we looked at several still images on the SmartBoard for various shots of the Northern Lights, and we picked our favorite one for inspiration. I demo’ed how to blend the chalk pastel on the paper, and then they went for it. They loved this material!

The last step was the hardest, even though I thought it would be the easiest! I showed them how to take a rectangle piece of paper, fold it vertically in half (go Team Hotdog!), draw a zigzag line diagonally from the top corner to the bottom corner, and then cut it. This was so tricky for at least half the class and really caught me by surprise. I’m thinking about doing this part first next time to get it out of the way when they’re on the freshest end of their project stamina instead of at the very end.

Once they cut about 4-6 trees, they glued them onto their Aurora Borealis drawing and voila!
Editor’s note: some of these trees look orange-ish instead of black. I accidentally ordered the dreaded gray-black instead of the regular black. I tried to get them blacker in the pics but a couple of them went orange-black instead of pure black. 😦


Pingback: Kindergarten Eric Carle-inspired Painted Paper Flower on a Splatter Paint Background | Wow Art Project