
This is my 3rd time teaching printmaking, and the tricky parts of it fade from my memory until I teach it again. The student prints turn out gorgeous, and when a print is revealed, especially for the first time, there’s a class-wide “ooh and ahh” moment of amazement. However, the perfect number of people printing at one table is 3, so that leaves the rest of the class needing a 2nd project to work on independently while others print. So, taking this printmaking project on is like taking on 2 projects at once to teach. But…even though it’s challenging to teach, it’s an art process that broadens the students’ “art process repetoires.” So pick out your independent 2nd project, and let’s make some skyscraper prints!

I was inspired by the queen of student printmaking, Mrs. Knight, and her amazing student printmakers. They completed an art project inspired by James Gulliver Hancock‘s beautiful drawings of buildings. Here we go!
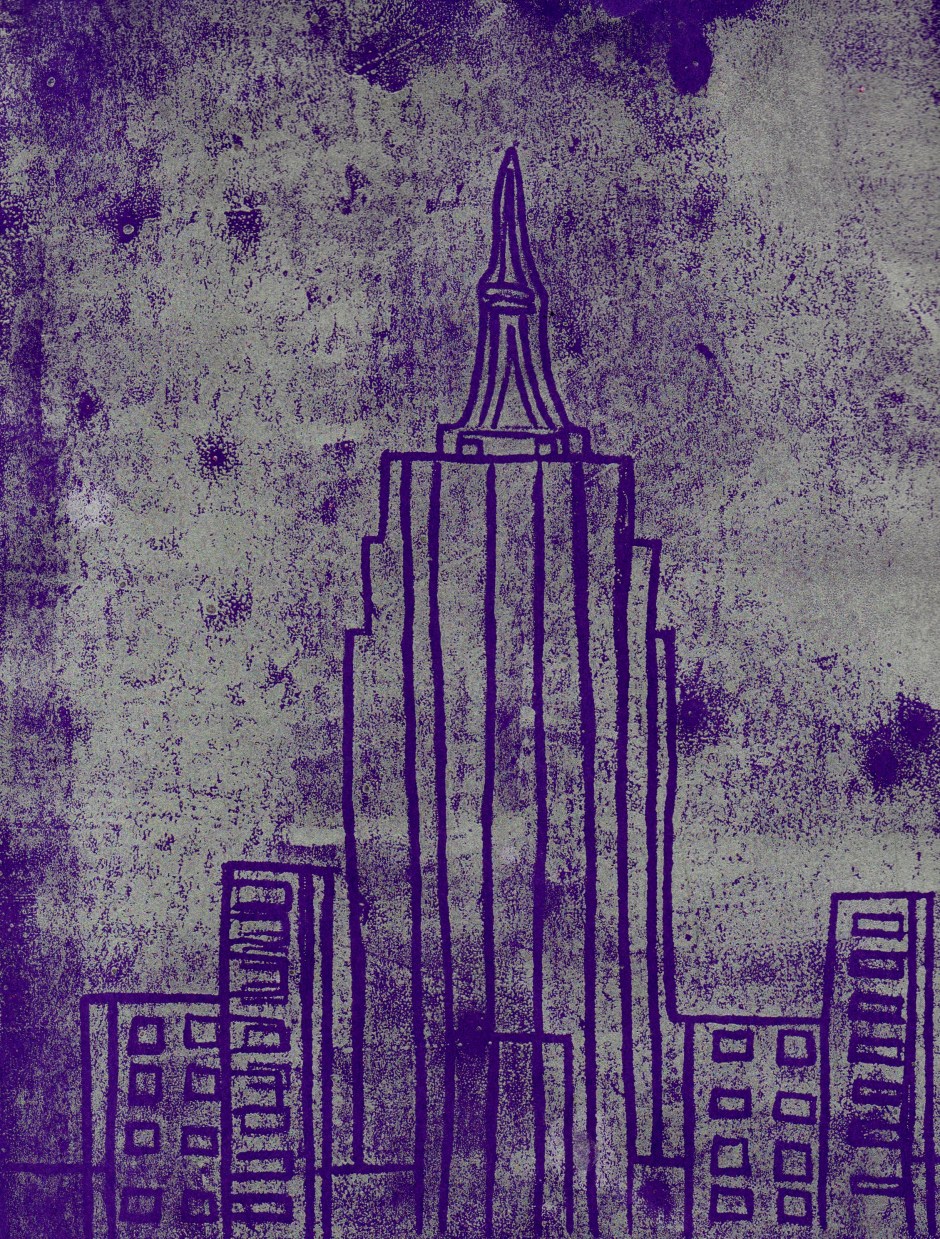
We started learning about the skyscrapers of the world and locally in Dallas, Texas. Some of the students said they thought it would be too hard to draw some of them, but we talked about looking for patterns and shapes and estimating how big the spaces were in between all the patterns and shapes.

The classes created their own drawings, and I showed them how to use a strip of masking tape longer than their index finger to make a taped hinge that connected their drawing to a sheet of art styrofoam (sometimes called scratch board.) Then they re-drew into their styrofoam sheet with a pencil to make their lines deep enough to print.
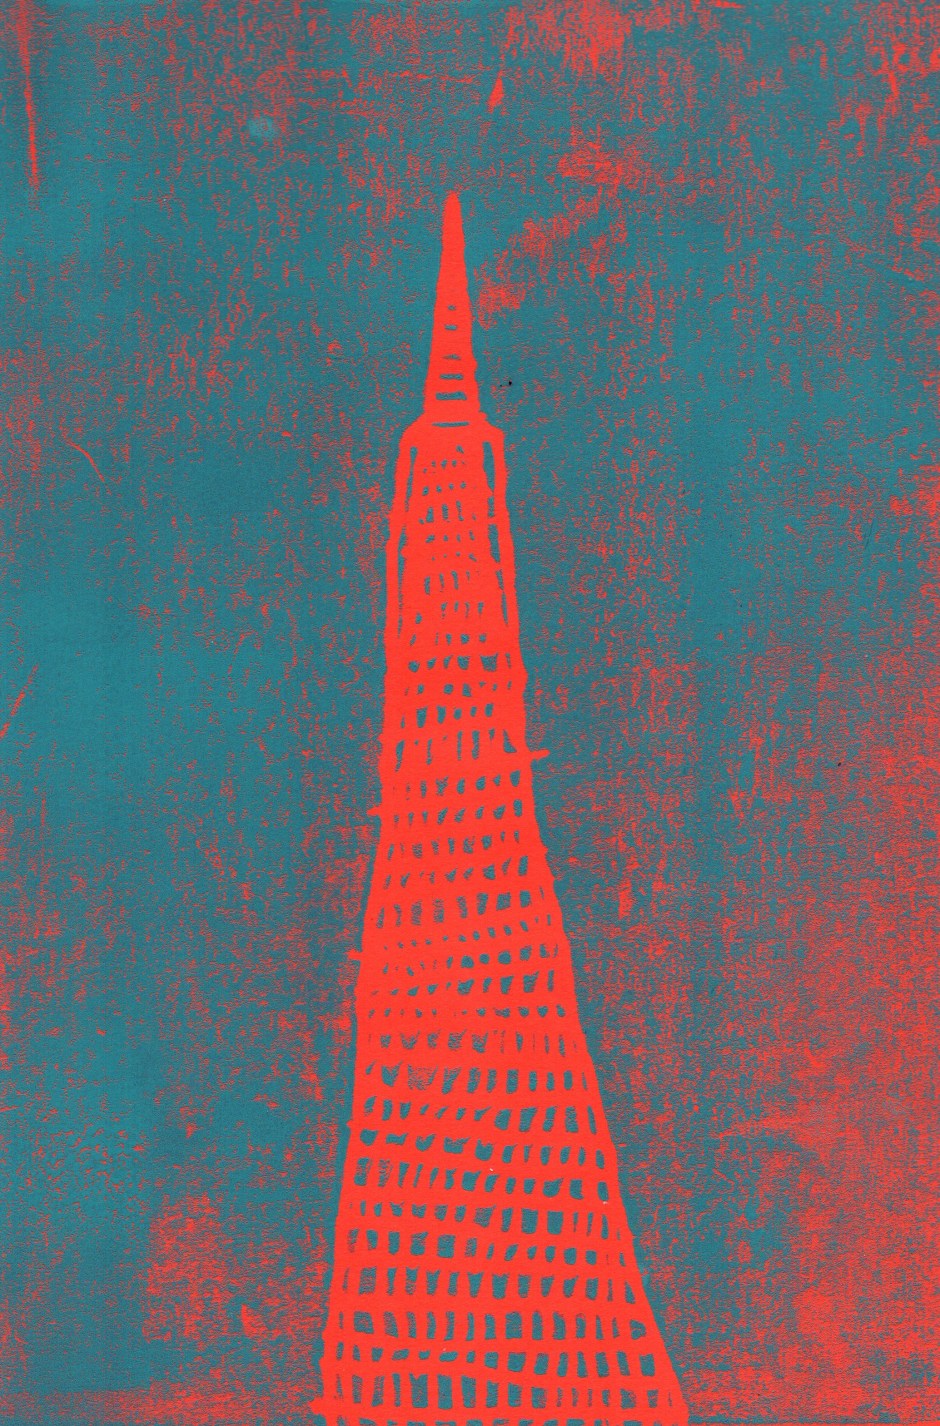
Now the exciting day is finally here – print day in the art room! After working for weeks on our drawings and then basically re-drawing it twice to get the lines just right on our styrofoam, we get to see art blossom before our eyes.

I showed the class how to scoop out the right amount of block printing ink onto their tray or squeeze the right amount onto their tray. I learned that I need to closely watch this step as they’re doing it because they can grossly over-estimate how much they need and waste a ton of precious printing ink by accident. Plus way too much ink on the roller doesn’t even make a good print either, so correct ink amount is key to a great print.

They charged their brayers, inked up their styrofoam, and placed their paper over their freshly-inked styrofoam. Every once in a while, a student would want to make it harder and messier than needed by inking up their styrofoam, then picking it up and placing it on their paper, so I made sure that I taught it the easy way and told them not to add steps they didn’t need when I demo’ed it to them.

Now that the paper was on the inked styrofoam, I showed them how to stick it to the ink by rubbing your hands on the back of the paper. We discovered that’s not enough pressure to get the ink off the plate. We designated certain brayers as “no ink” brayers and then rolled them on the back of the paper as the final step.

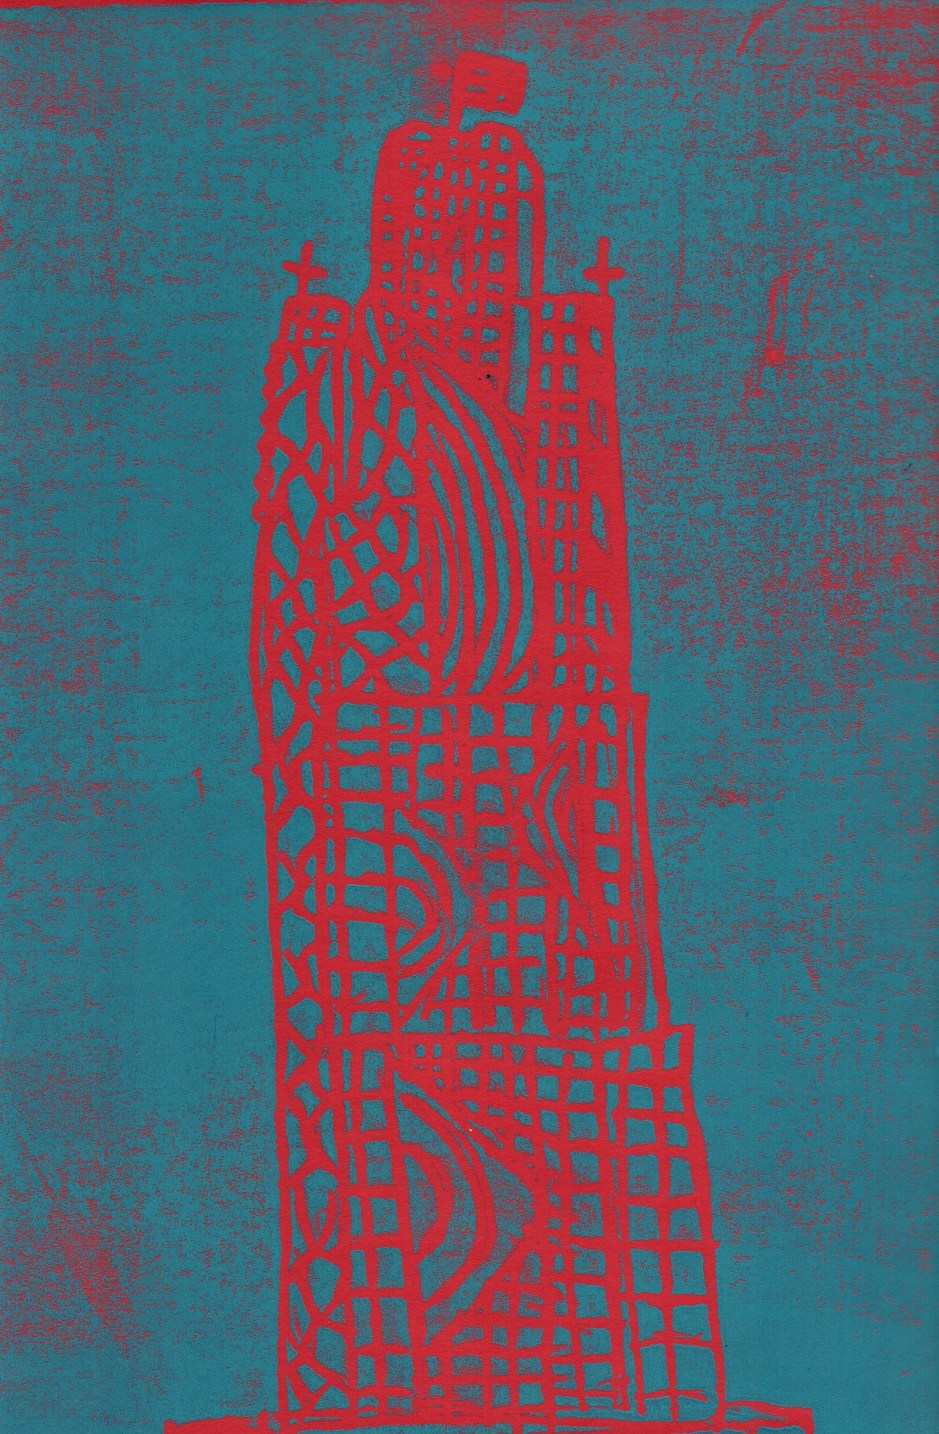
The best part – the reveal! It’s so fun to see their excitement as they peel the paper off and see it all come together in a moment. I also showed them how to create a ghost print by getting another sheet of paper and rolling the remaining ink onto it for a lighter version.

I learned that Akua ink, my very favorite ink to use professionally on my linocuts, doesn’t work as well on styrofoam prints. Just regular block printing ink works the best. Have fun with this one!
