“Hello 1st grade artists! We’re going to draw a giraffe today.”
Cue a suddenly panicked 1st grade art classroom. “Mrs. Forsyth, I don’t know how to draw a giraffe. Giraffes are so hard to draw!”
I respond encouragingly and calmly as I tell them, “If you can draw a line and a circle, then I can teach you everything else you’ll need to draw a giraffe.”

Shh, art teacher secret – some art teachers look down a little on guided drawings with the incorrect assumption that all the projects come out with a boring cookie-cutter sameness AND that you’re giving artists a “drawing crutch” by allowing a guided drawing. Poor misunderstood guided drawings…

The traditional drawing formula for art projects is to provide artists a photo reference (or some reference – memory or brainstorming) to focus on + they look at their photo reference (or think of their memory, etc.) to create their own version of the subject + they add lots of personal customization = their own wonderful drawing.

However, there’s nothing but respect in my art classroom for the occasional guided drawing. I think both drawing approaches complement each other instead of jostling for “the only” way to approach a drawing. Let’s count together the ways guided drawings carry their own weight in an art classroom…
- Guided drawings are a super way to teach and review lines, shapes, our artist’s vocabulary, even spoken and drawn fractions in English. I demonstrate on the SmartBoard one example of how to draw a section of the drawing as I tell them how to draw it (draw a double wavy line – we all draw our double wavy lines, draw a long vertical straight line that connects to the circle – we draw that, draw a zigzag line 3/4 of the way up the oval – we draw that, etc.)
- The artists teach themselves how any completed drawing can be broken down into several smaller, easily achievable drawing steps made up of lines, shapes, and personal details. I show them my completed teacher drawing before we begin so they have an idea of where all these lines and shapes are headed when we’re done.
- We move at a pace where everyone draws each step at about the same time, so we learn not to have a meltdown by learning instead how to creatively problem-solve. What an amazing skill to begin through a guided drawing project.
- Guided drawings are especially helpful for the less confident artists. Remember the students who assured me at the beginning of this project that they didn’t know how to draw a giraffe? It warms my heart to see all the artists completely proud of themselves as they admire their giraffe drawings when we’re done.
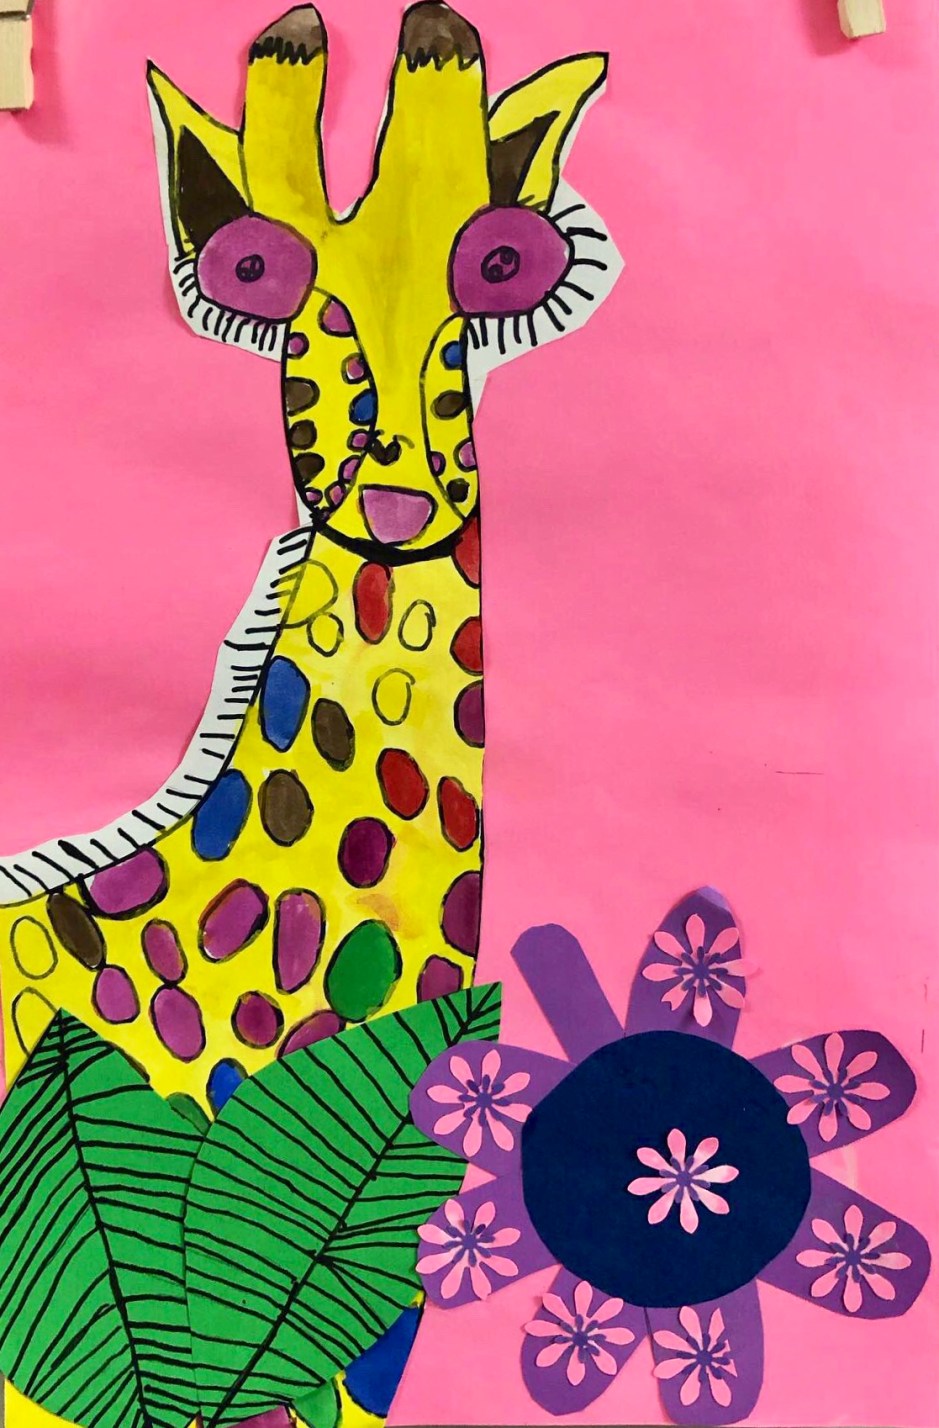
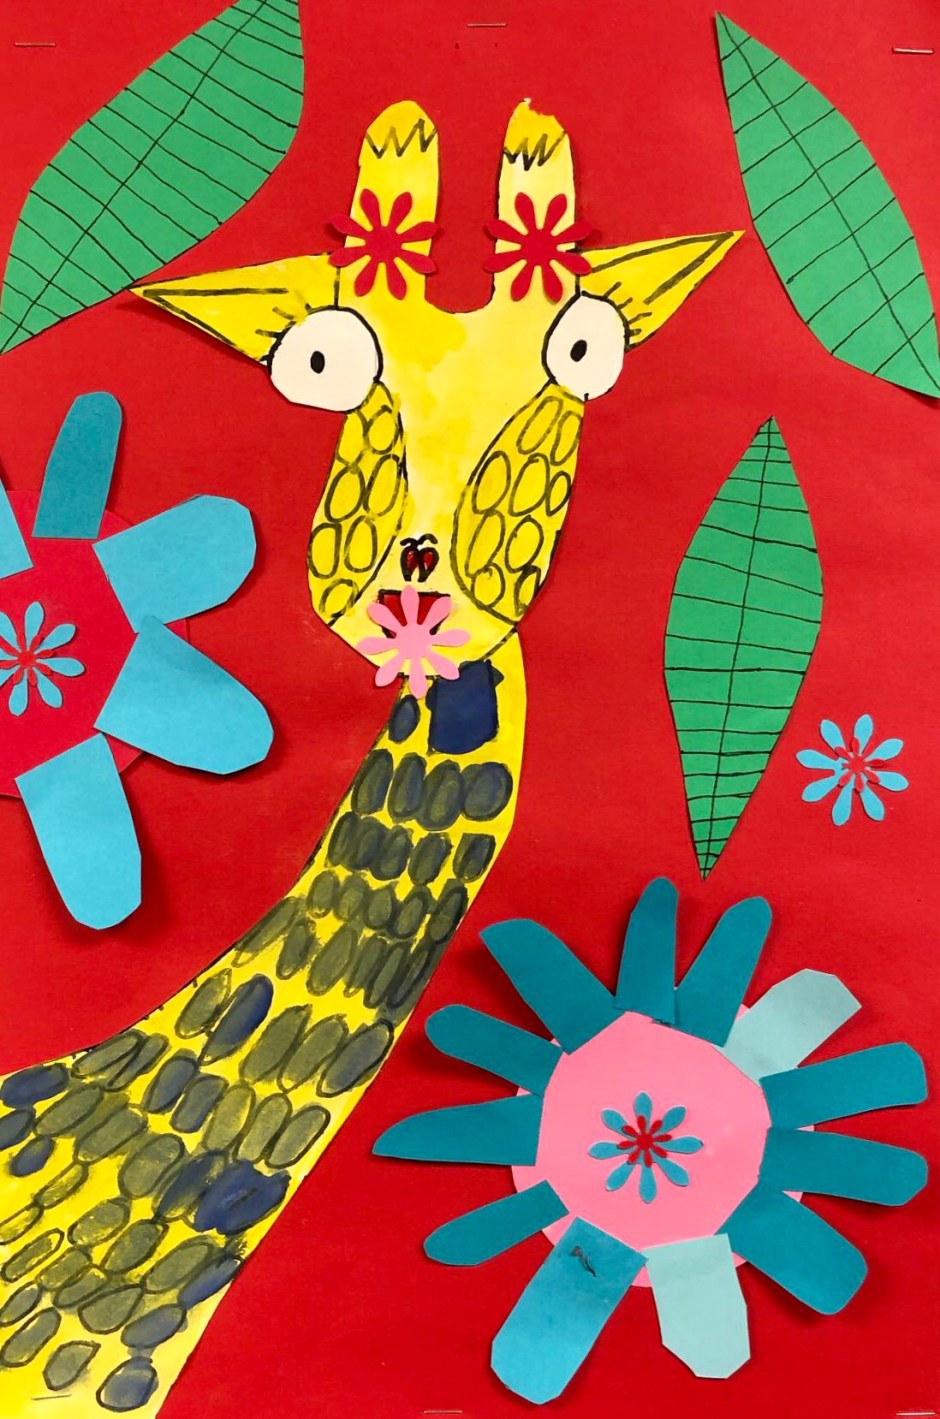
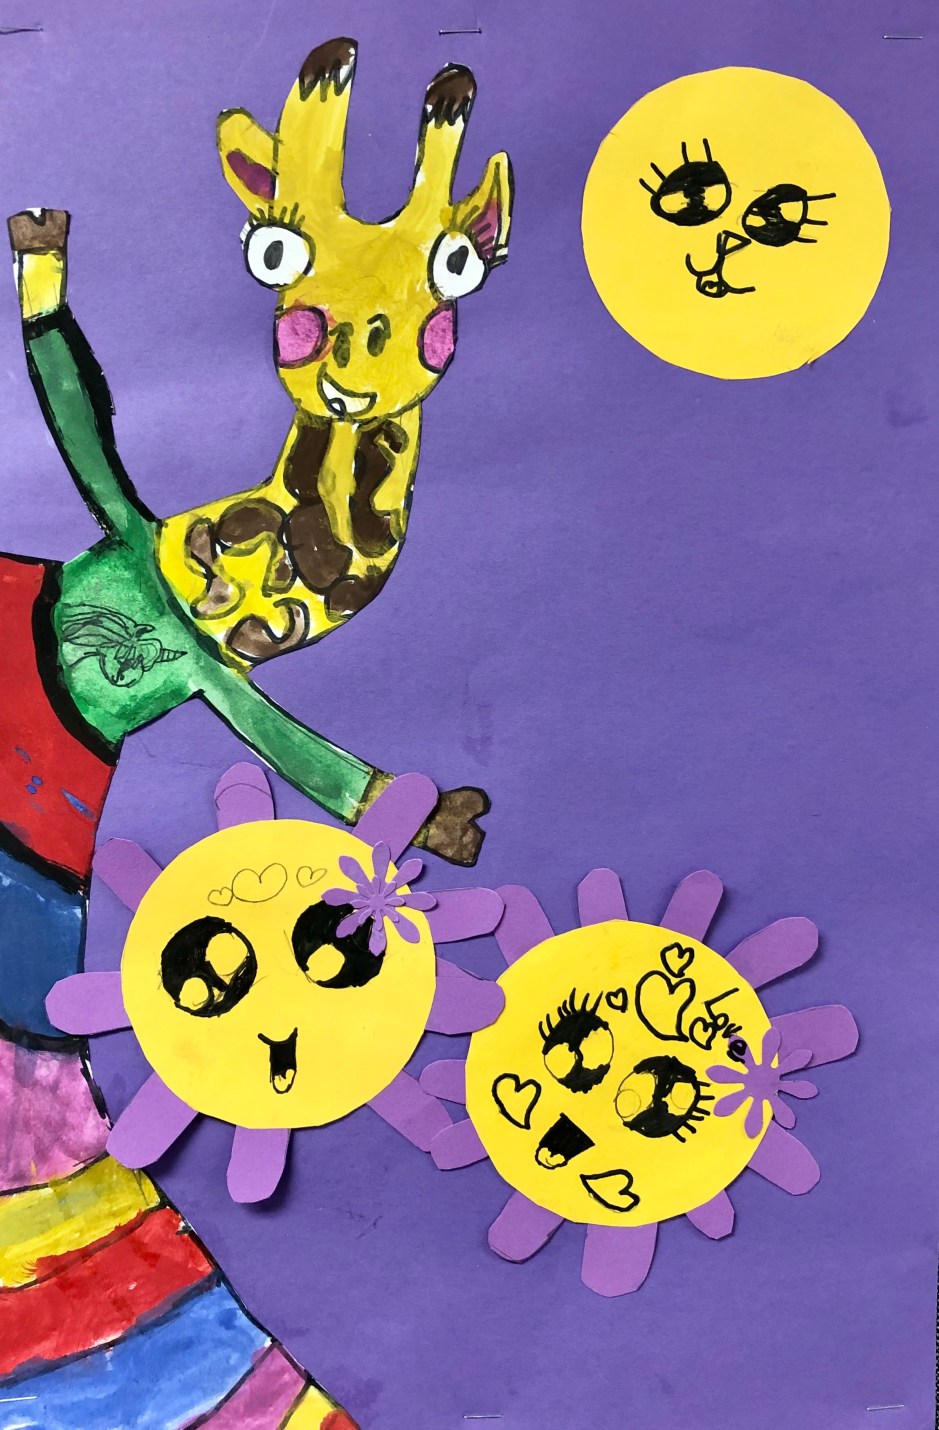
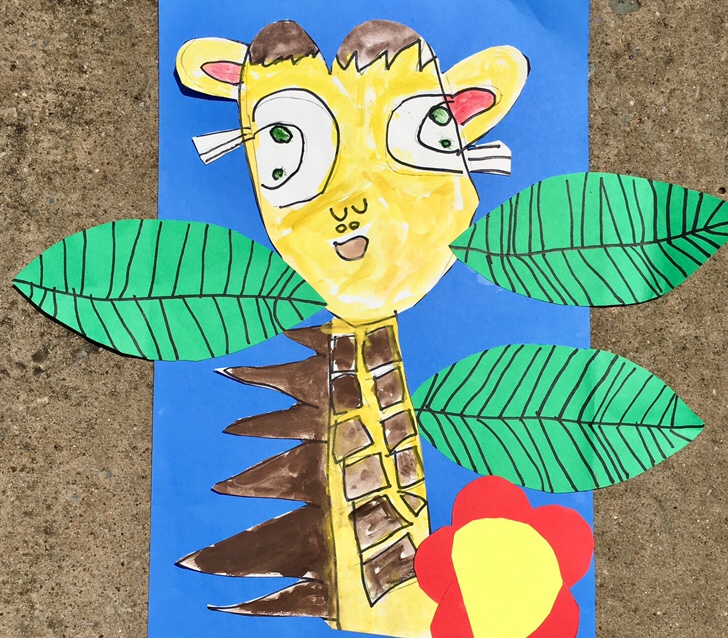
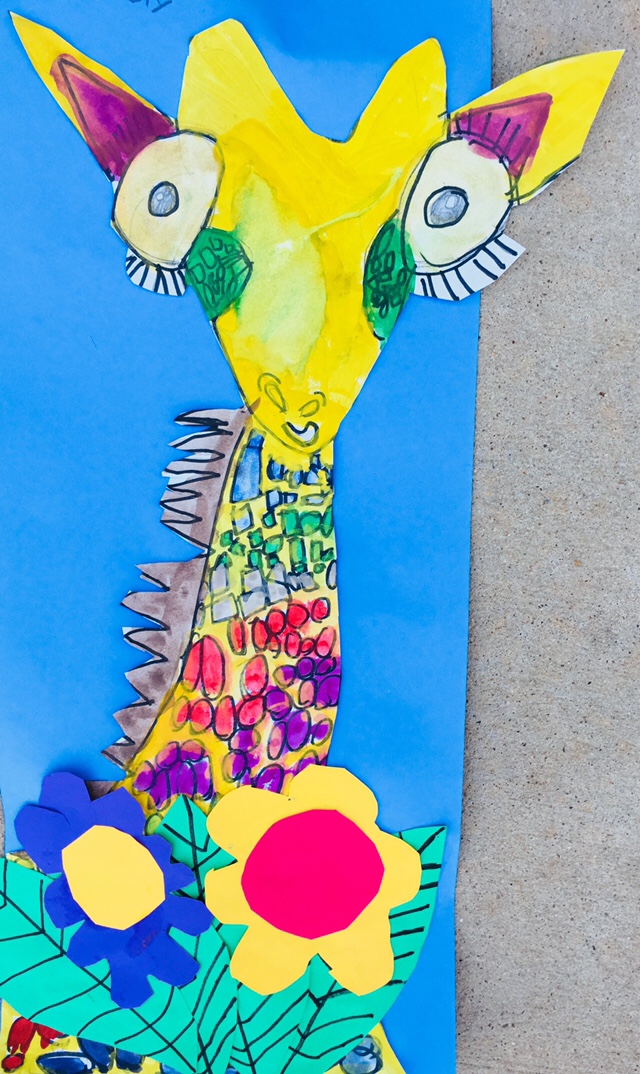
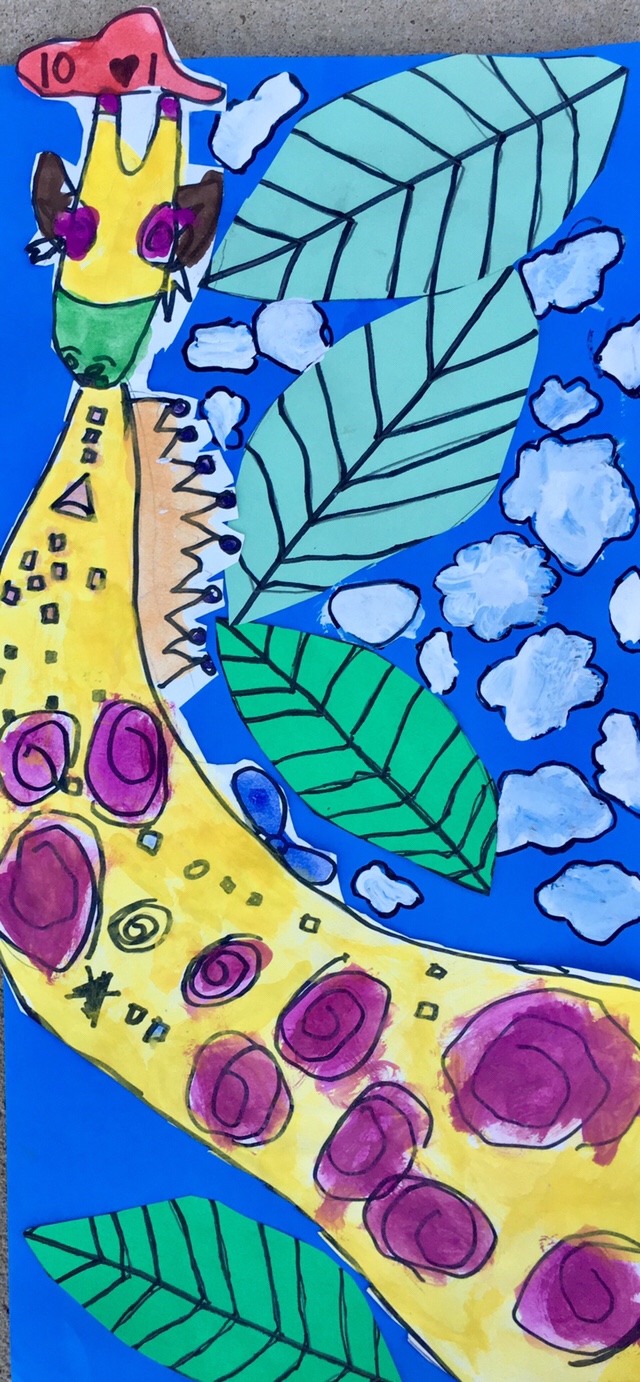
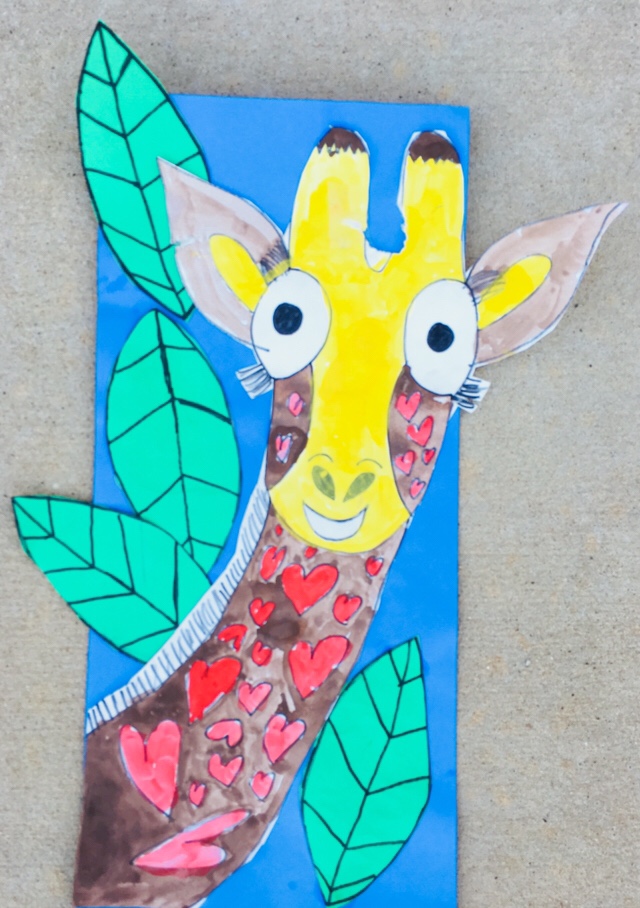
- After the basics of the guided drawing are completed together, we talk about how we can add details to make it even better. For example, each student created their own spotted giraffe pattern, chose to add personalized details (glasses, eyelashes, a mustache, a bow, details in the eyes, eating a leaf, etc.) As long as it’s school appropriate, the sky is the limit with creative additions or subtractions. This teaches the artists the beauty of creative license.
- As a teacher, I get immediate mastery feedback if I thought a concept/vocabulary was crystal clear but instead I get blank stares looking back at me (zigzag line, 3/4 of the way up the oval, etc.) You can see by the students still looking at you who needs to review it again, maybe with a slightly different approach. (And seeing their eyes look away from me right to their papers as their pencils draw shows me which students understand it immediately.)

OK. Now you’ve seen how awesome a guided drawing can be, but you still want to know how to get this one started. Here ya go:

Even before we begin the drawing section of this lesson, we do some YouTube research together to learn more about how giraffes live their lives, where they live, and what they look like. Then we read and talk about a really cute book starring Gerald the Giraffe called Giraffes Can’t Dance. We talk about and identify various lines and shapes in the room and on the anchor charts before we start so vocabulary isn’t brand new as we’re drawing together. Then we start our drawings.

I tape up a sheet of paper that’s the same size as theirs so different proportions aren’t confusing.
See it, say it, do it.
I start by asking them to join me by drawing a wavy line together in the air. We draw 2 wavy lines in the air as we repeat the key vocabulary together (wavy line, for example.) Then I tell them to watch only (not draw yet) as I’m drawing 2 wavy lines on the paper. Then, when I’m done, they draw it on their papers. Once we finish the first step, we move onto the 2nd step. We continue until we all have the beginnings of a giraffe. All the details – eyes, spot patterns, etc. – they create on their own.

After completing our giraffe drawings in pencil, we then go over everything we drew in pencil with a Sharpie. After that, we erase any stray pencil marks that didn’t get covered by the Sharpie outlines. Then we paint with tempera paint, cut out our giraffe paintings, and glue onto a construction paper background. Our last step is to go over how to draw a leaf shape and how to draw the veins on construction paper leaves. They draw their own leaves, add vein details, cut them out, and glue them to the paper. Early finishers can add a flower or another collaged detail.
The highest parent compliment I’ve gotten came from this project. A mom asked me what day I was going to pass these back to the students because she wanted to frame it. The highest student compliment was seeing them work so excitedly on it and then hearing them talk contentedly about their giraffes.

This was the first year we’ve done this project that kthru2inmalibu inspired, but it’s going into the 1st grade art project rotation now. Enjoy your giraffes!


My teacher example