We studied painted scrolls in museums, discussed them, then watched and discussed what we noticed when we watched the very specific way a museum worker carefully unrolled a scroll from the museum collection.
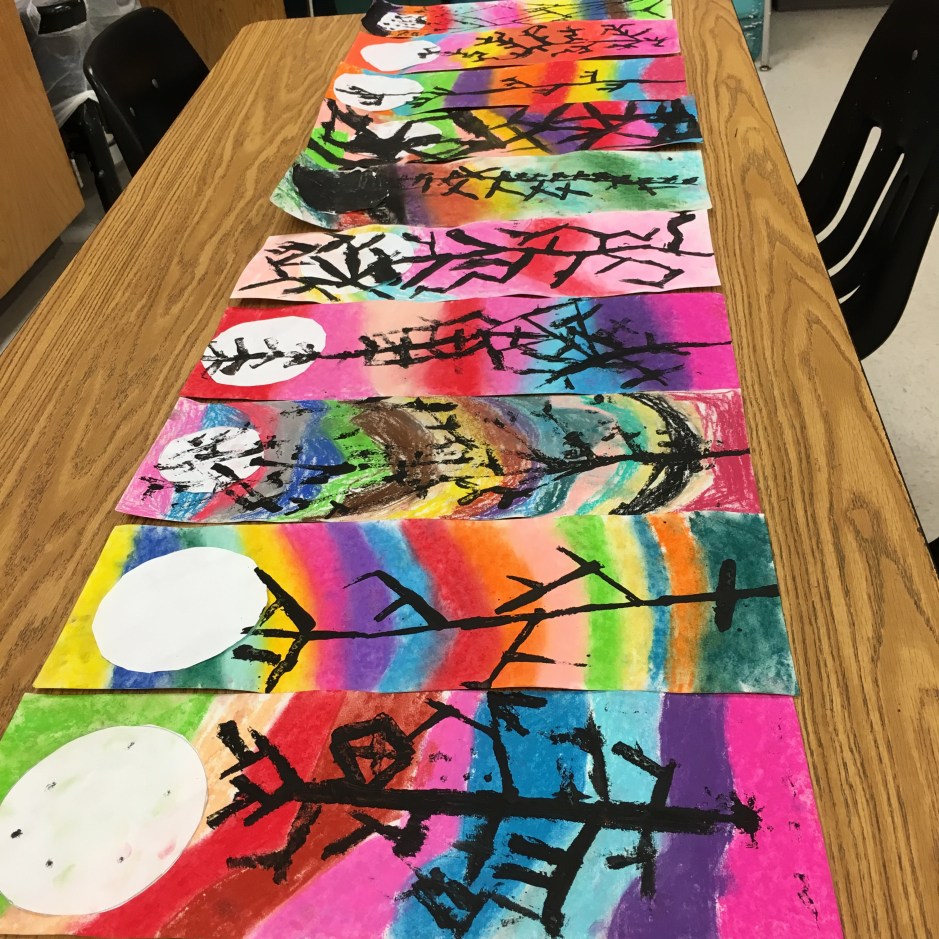
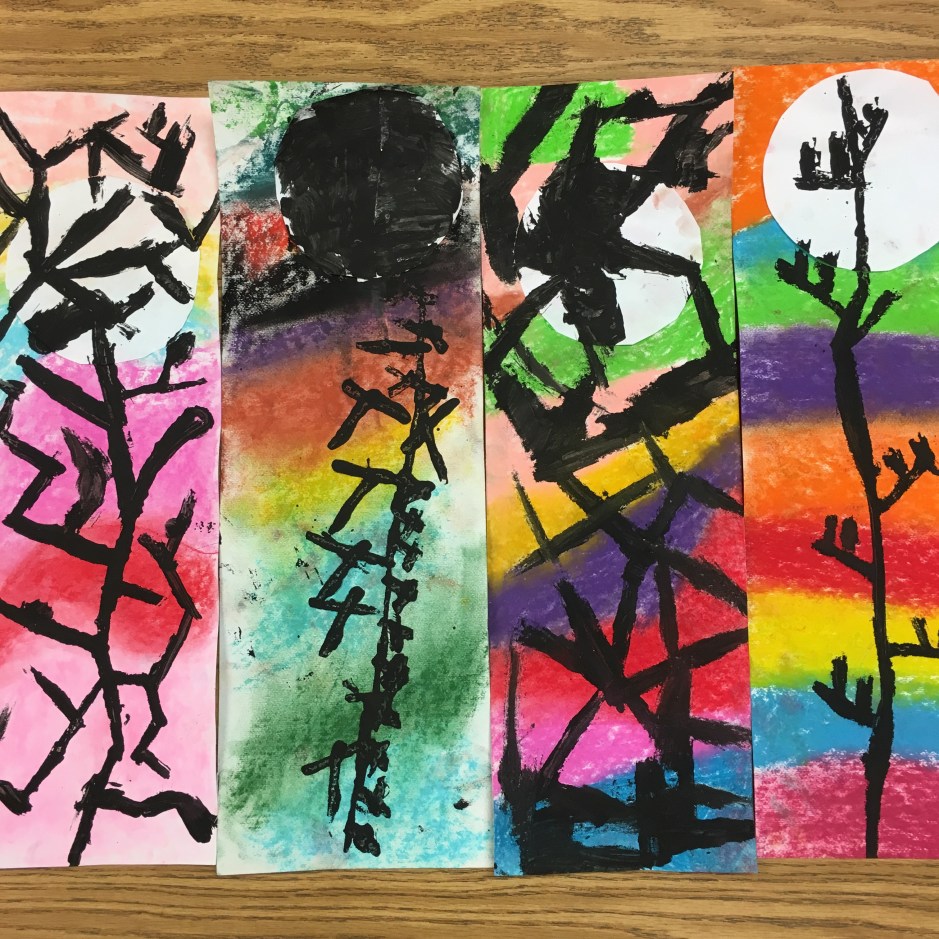
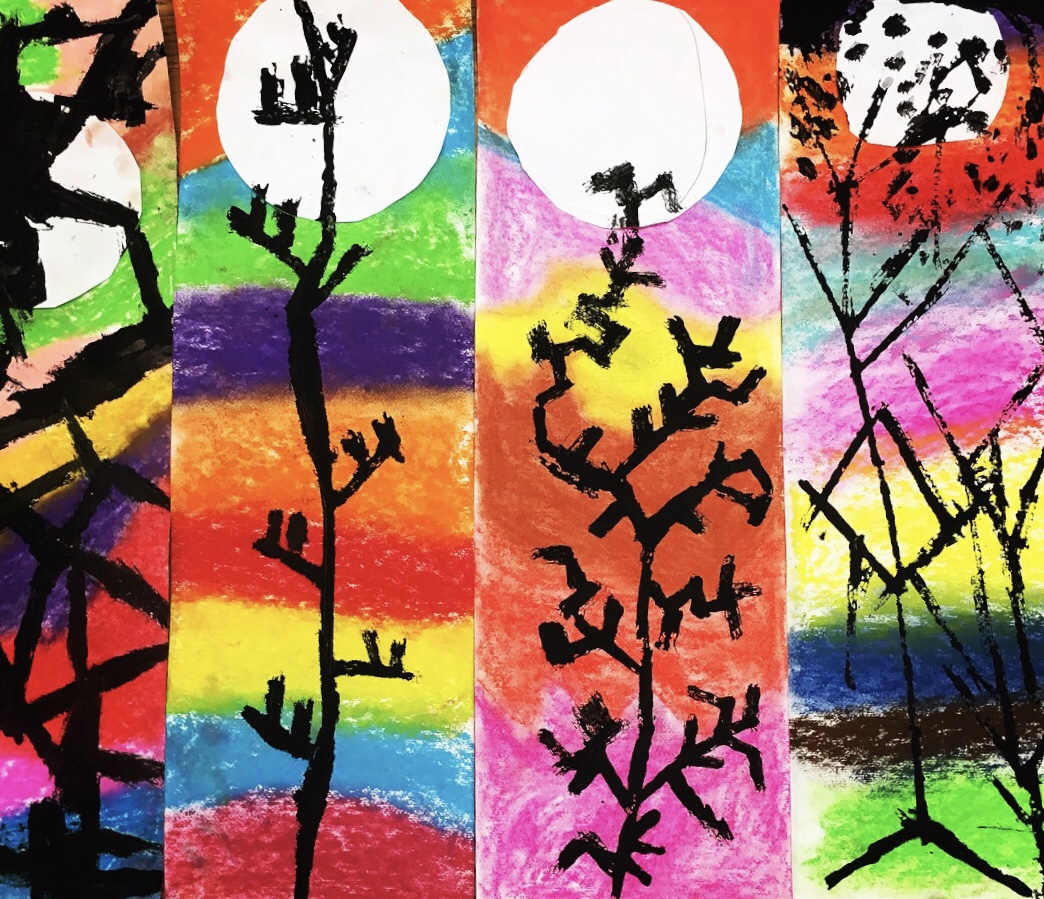
This is most of the firsties’ 1st time to use chalk pastel, so I do a demo showing them how to blend the edges only so they don’t get dull chalk mud.

I show then how to keep a clean paper towel handy for cleaning fingers that blend, again to avoid the dreaded pastel mud.

One reminder before they begin is to blend the chalk after they’ve added a layer of color so the white paper doesn’t show through.

Last reminder – make sure your color goes all the way across from the left and right sides.

It is a joy to see how excited they get as they experience the chalk pastel magic on their own!

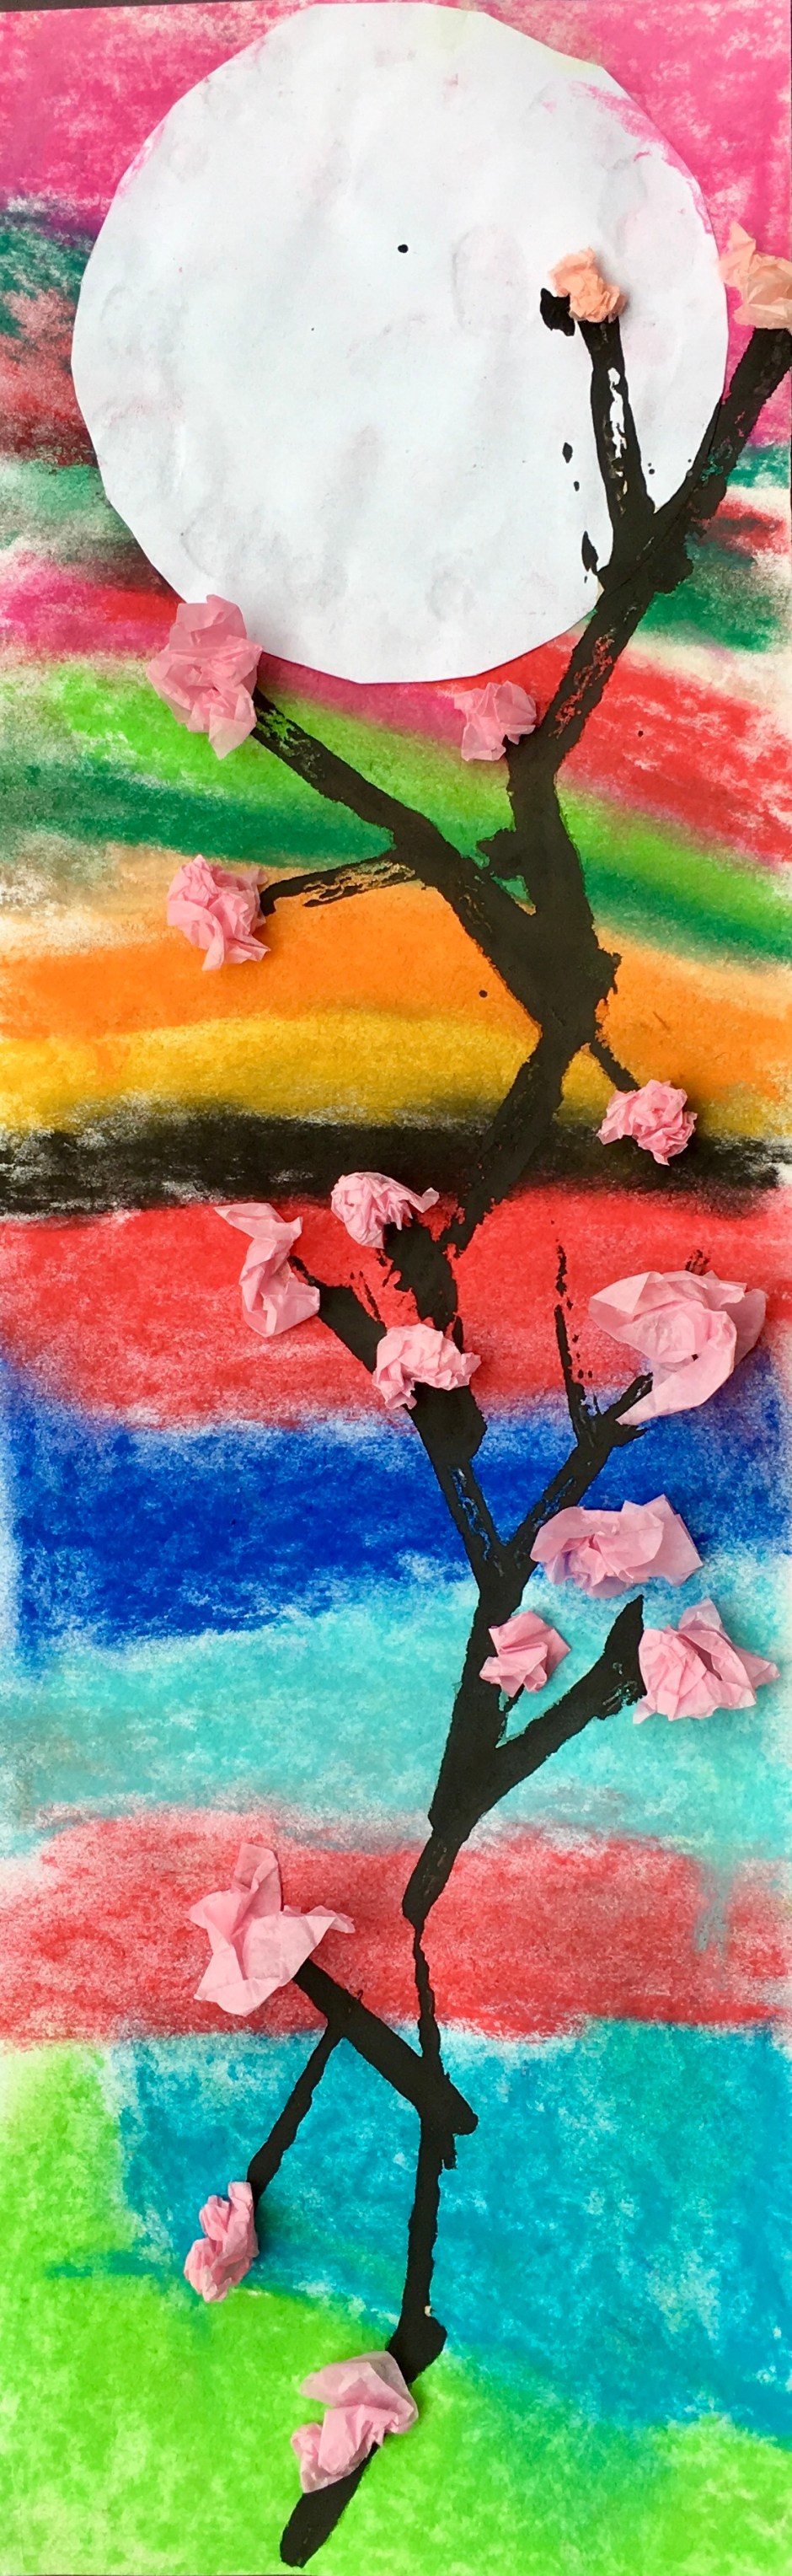
Once they fill their tall thin vertical paper with layer of vertical layer of gorgeous blended chalk pastel, they trace a bowl on a white piece of paper. Then they cut their moon out, glue it on and boom…there’s a moon shining high in a colorful sky.
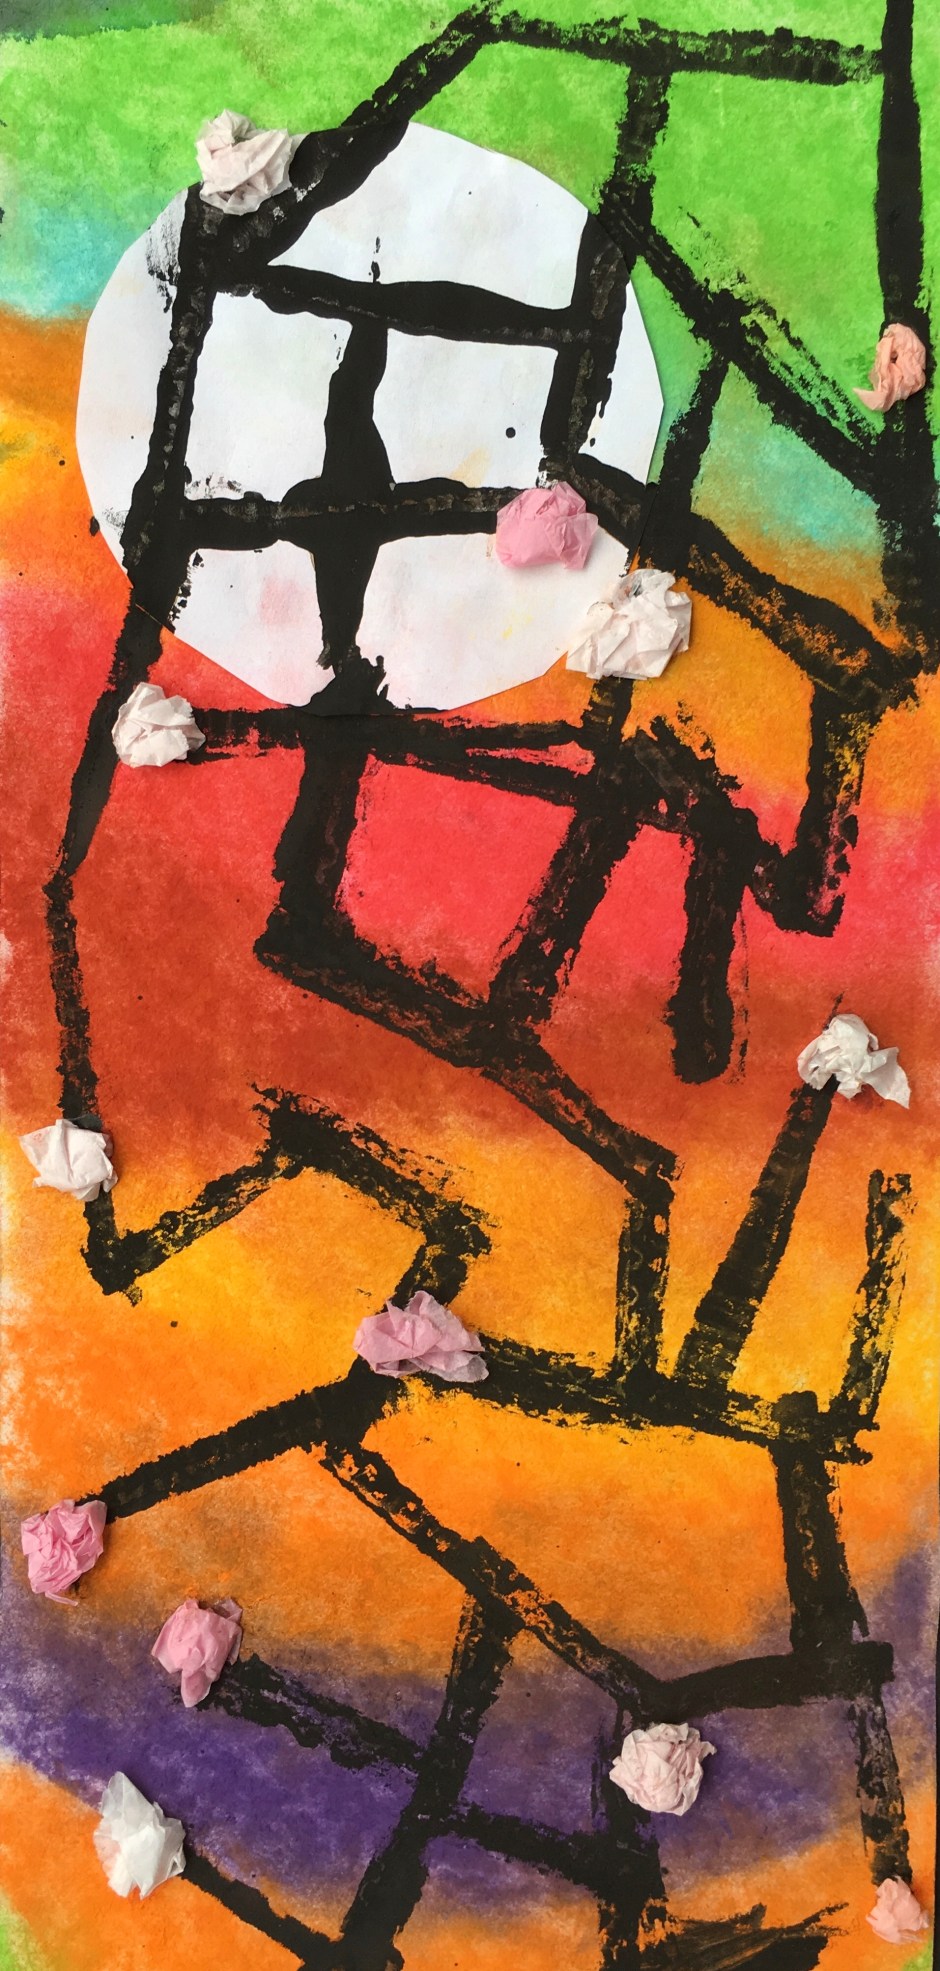
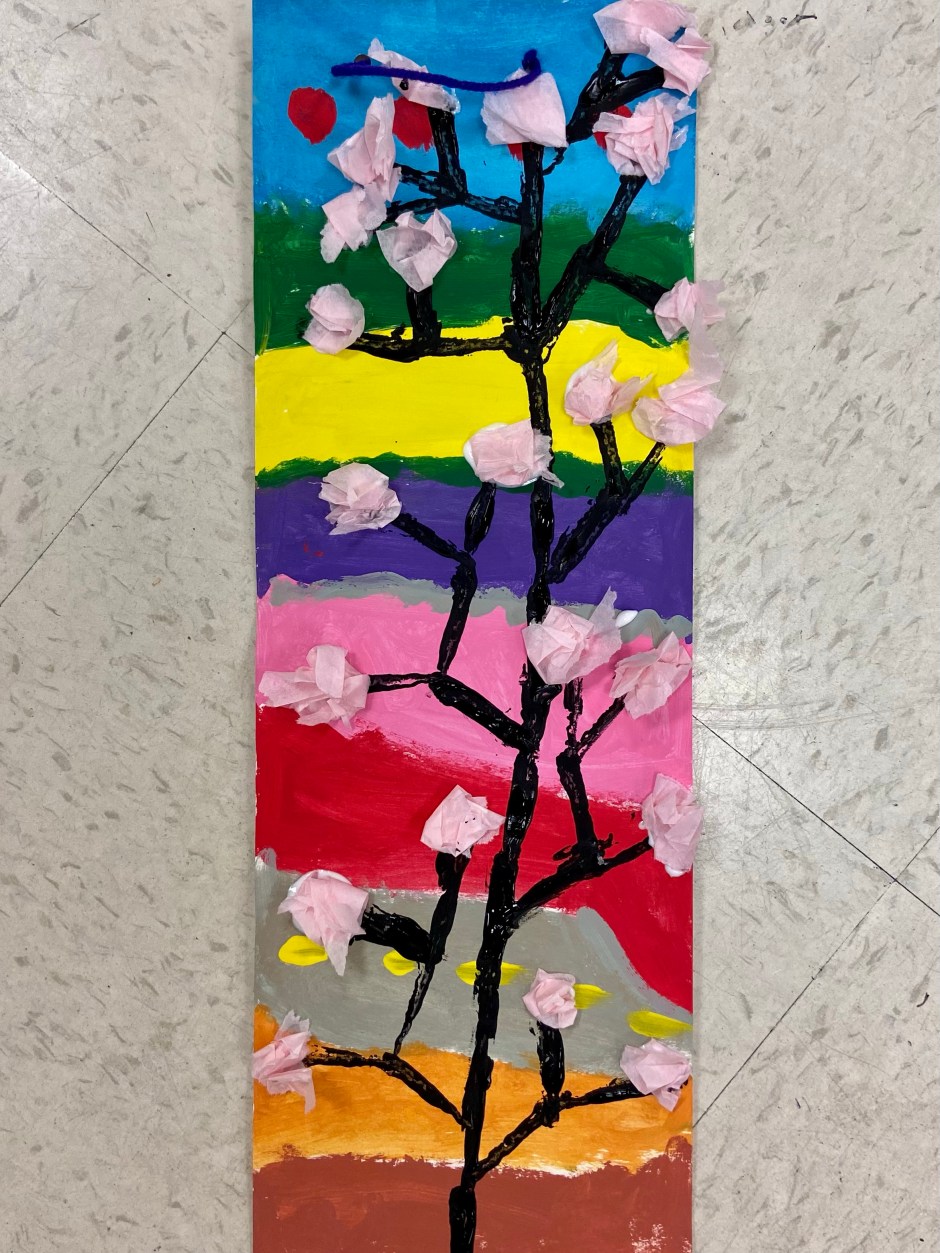
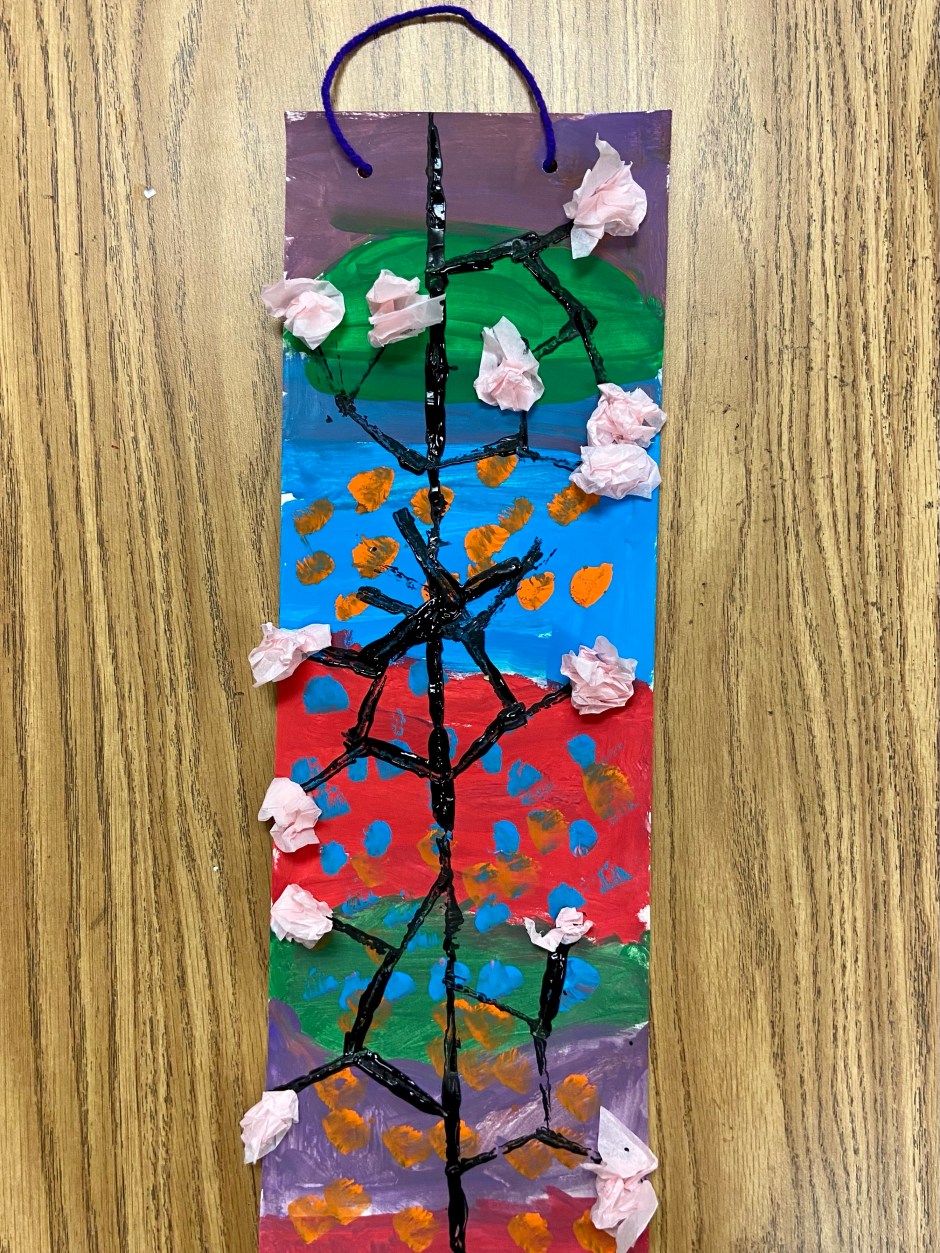
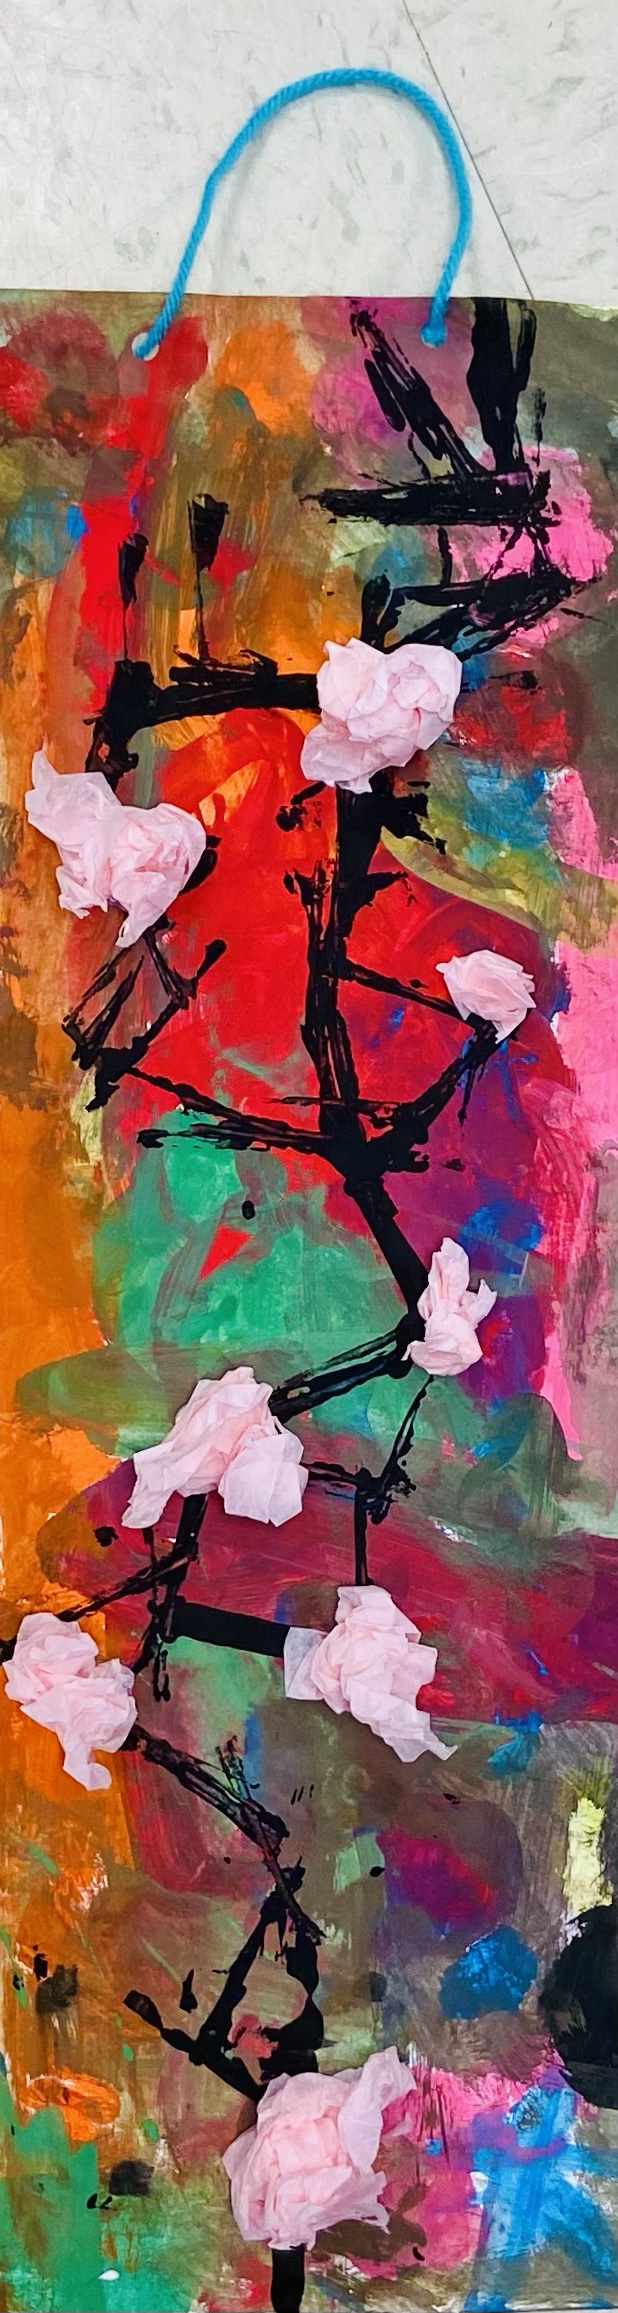
After that, I demo how to stamp the black branches on their papers. We use small squares of cardboard cut from a box, They place their cardboard in a shallow bowl of black tempera paint and stamp out their winding, curving branch and the branches growing out of their main branch.

For the cherry blossoms, I cut out small sections of pink tissue paper. I show them how to gently roll them up and glue them onto the branches. Then we’re done! Love how they come out, and the artists have fun throughout the process.