Cross-curricular math and art project? Ruler as an art tool? Got ya covered with this one!

This is a popular op art (p-op-ular?) drawing. Some students might surprise you by not knowing how to use a ruler for this project. Using the metric side of it throws everybody off, so I teach it as if no one knows how to use a ruler.

I pass out the rulers, then show them the standard (non-metric) side. We locate it together on their rulers. I didn’t know each ruler has it’s own personality until I taught this for the 1st time. Some rulers start at the edge, and some have some “dead space” at the edge and then start after the dead space.

I showed them about 4 different rulers and how to navigate with any of the hodge podge class set I have. (One particularly awesome ruler features all the American presidents with their pics – it’s the most coveted one in the room.)

I demo’ed on our 6×6″ pre-cut paper how to measure then mark a pencil dot at the 1 CM point, starting at the left edge moving towards the right. Then we flip our papers 1 turn, measure and mark the 1 CM, and continue until you have all 4 sides measured and marked.

Now comes the trickiest part – connecting the dots. You find the dot on the right side (any way you turn it) and the dot above that dot (bonus using geometry terms – on the plane that’s perpendicular to the first plane – woohoo!). Then you connect the right side dot with the dot at the top. Then you turn it one side around and continue until you’ve connected all 4 dots.
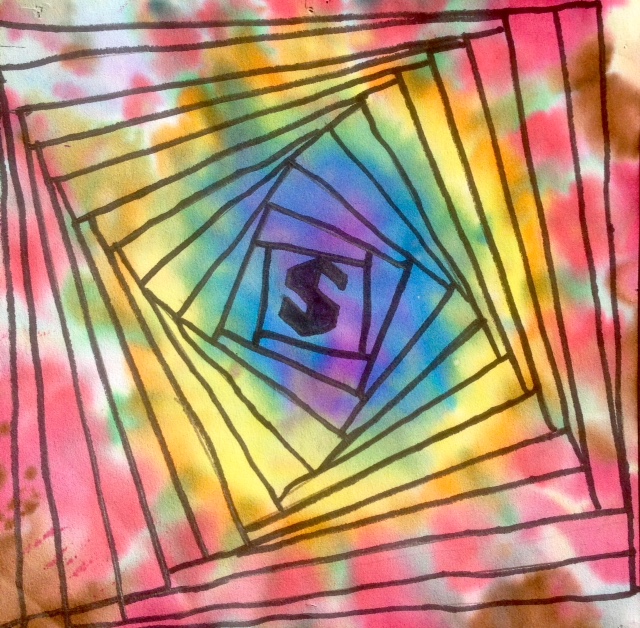
Then you continue until you get almost to the very center. Then the students drew something meaningful to them – a favorite sport, sports team logo, a music note, a microscope, anything (school apropes, of course).

After that, you draw your lines over again with a thick Sharpie. (We learned that the thin Sharpie lines almost disappear after all our hard work – boo!)
For the color, we set aside our parabolic drawings and drew on coffee filters with regular Crayola (not permanent Sharpie) markers. The rules? You had to have at least 10 different colors on your coffee filter, and your drawing needs to take up at least 2/3 of the class period. (No lazy bones sloppy quick drawings.) Sad about the no copyright rule in art class? Draw away! Because there’s that final step…
I set out a super-long piece of paper towels that stretched the whole class. I asked them to bring their parabolic drawings and their completed coffee filter art. They lined up on one side of the long paper towel, put their coffee filter art OVER their parabolic drawings, and I showed them how to spray their coffee filter art. The non-waterproof markers’ colors spread like tie dye. Minds blown! And they loved spraying their own. Teacher success when the 5th graders in the spring all call out “whoa!” “beast!” in excitement to see the sprayed art in action. 🙂 And they look cool tiled together to make it look like a long spiral (op art)


Pingback: 5th grade Op Art Circle Patterns | Wow Art Project