This was my 2nd attempt with making clay cupcakes. I was wowed with the online postings of other art teachers’ clay cupcakes, but our first results were a little underwhelming.
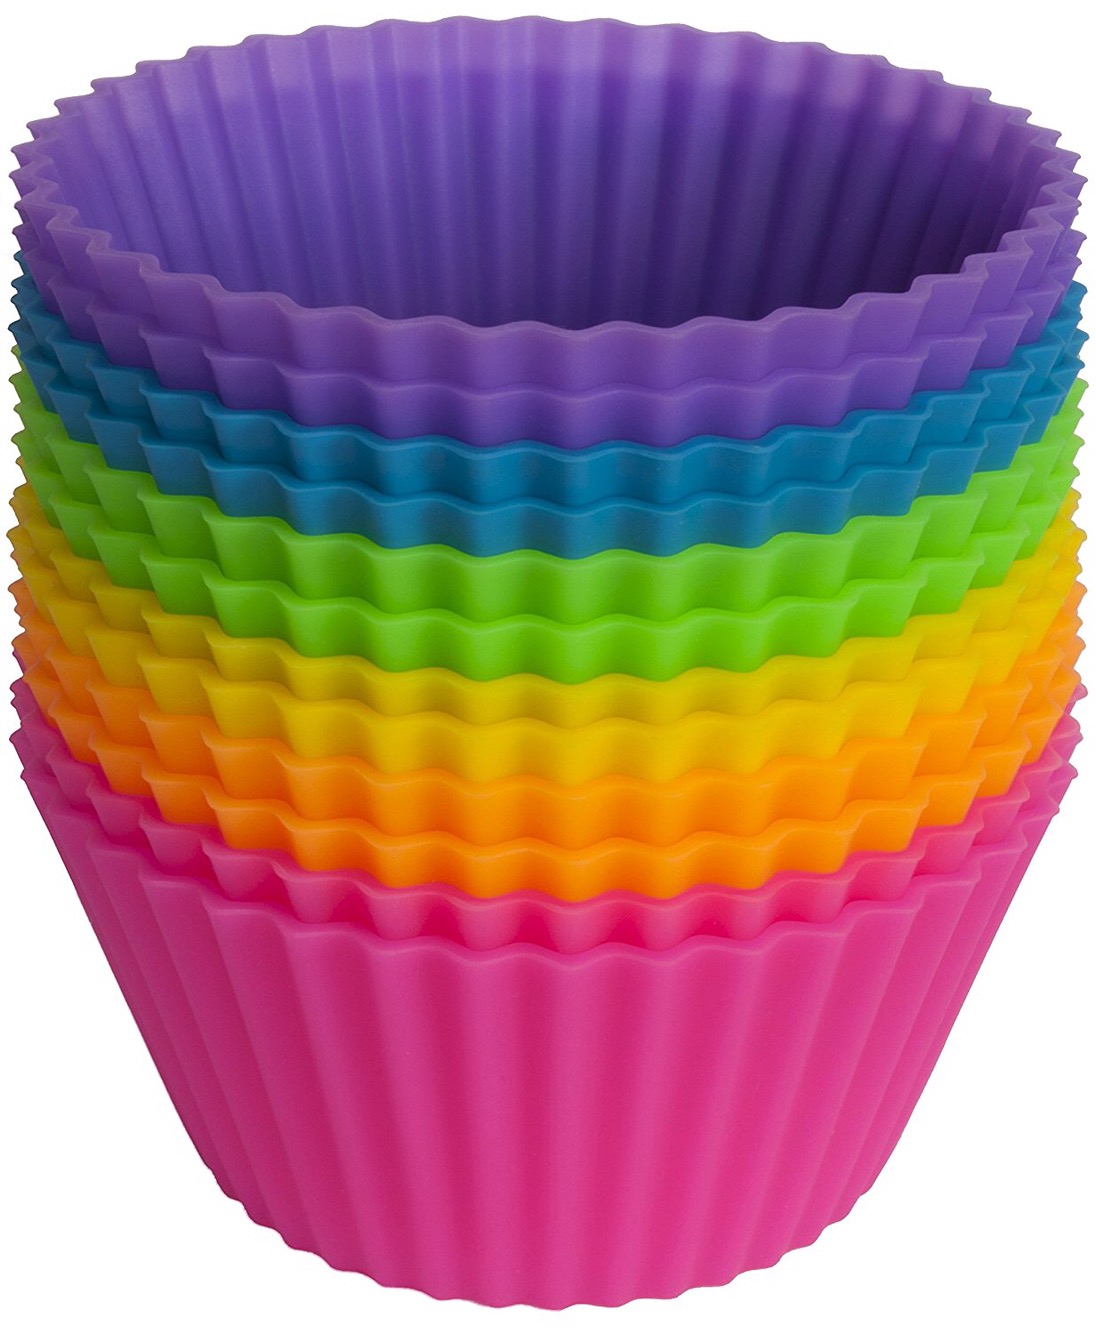
The first time I tried it, we made a pinch pot top and a pinch pot base. For the base, we pressed the pinch pots into silicone cupcake baking molds for the nice ridged look. Unfortunately, several cupcakes had lots of space where the cupcake tops didn’t meet the cupcake bases.
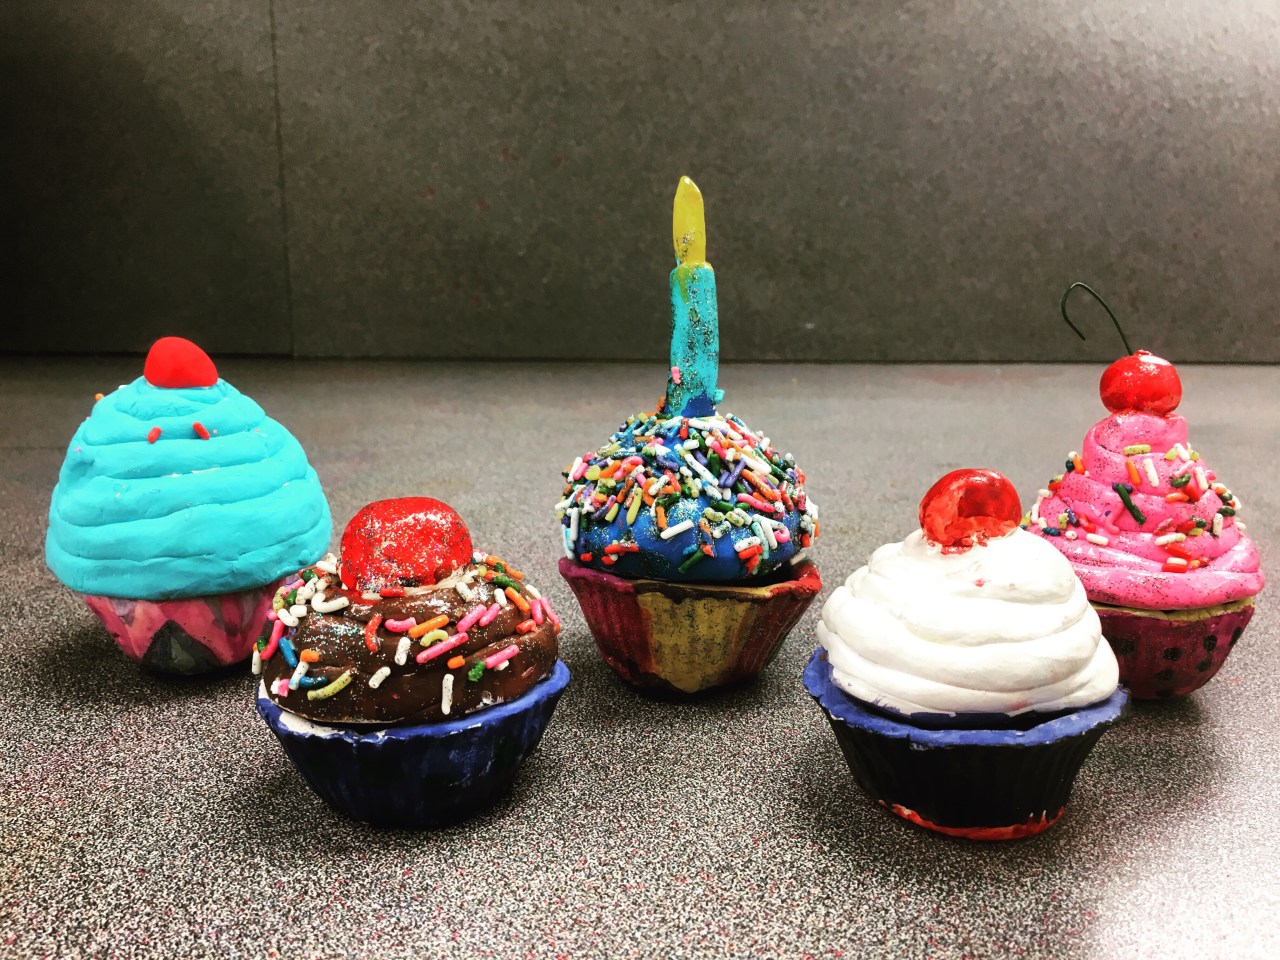
This year I tried it again but changed a few things. I saw online where another teacher’s classes created their class clay cupcakes by coiling the clay for the cupcake top. I loved how this gave the class two clay creation exposures (pinch pot and coiled clay creation) AND how the coiled clay resembled the way real cupcake bakers coil up their frosting. If you added a cherry on top, you get a third clay creation exposure – scratch and attach. Woohoo!
I demo’ed the right way to make a pinch pot, and also demo’ed what not to do (pinch it too thin.) I passed out the clay cloths, and then I cut and handed out the clay.
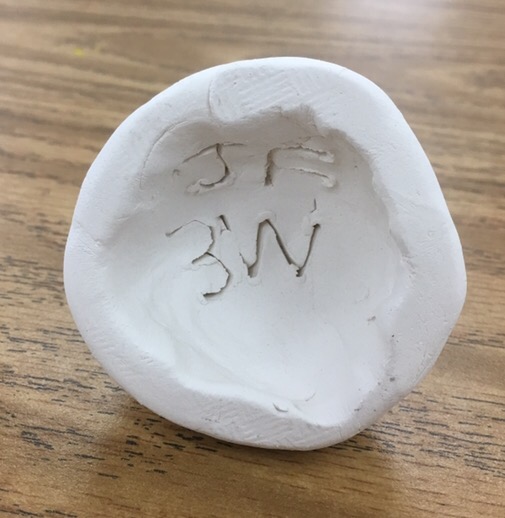
We all made our pinch pots in a circle on the ground so I could very closely monitor and help when needed. We then pressed our pinch pots into the silicone baking molds. We inscribed our names and art addresses with the pointed wooden shish kebab (skewer) tool. Writing in clay is always challenging for them!
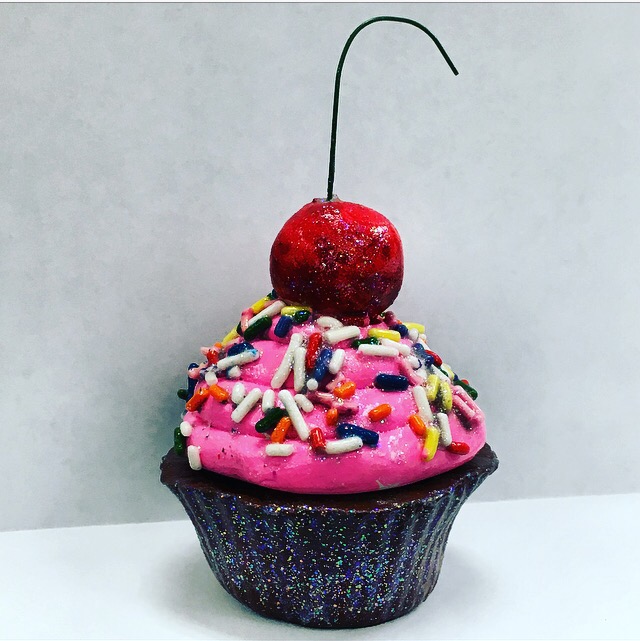
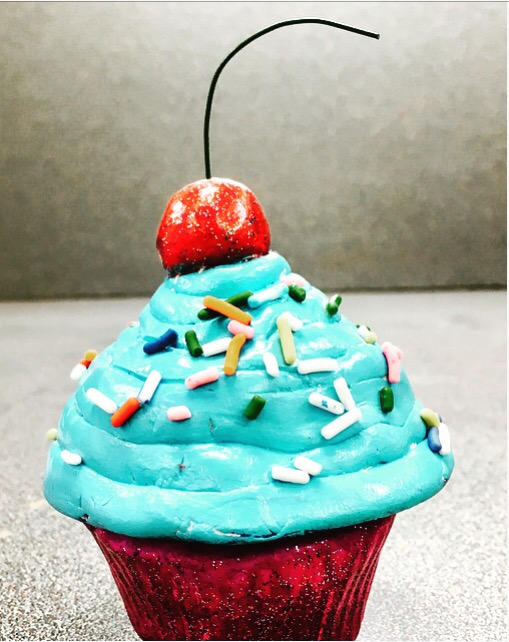
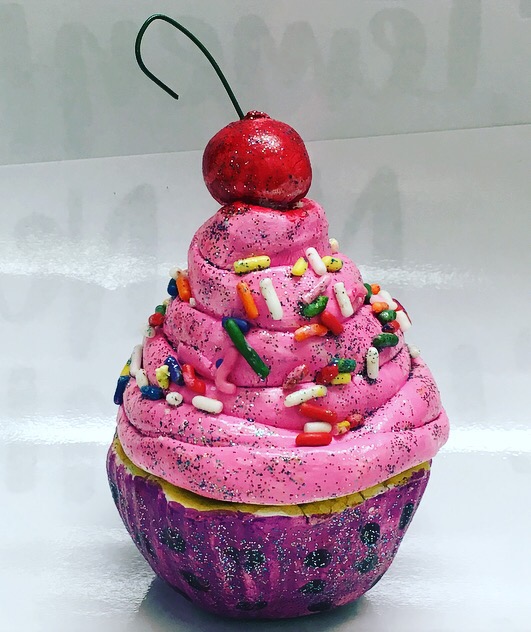
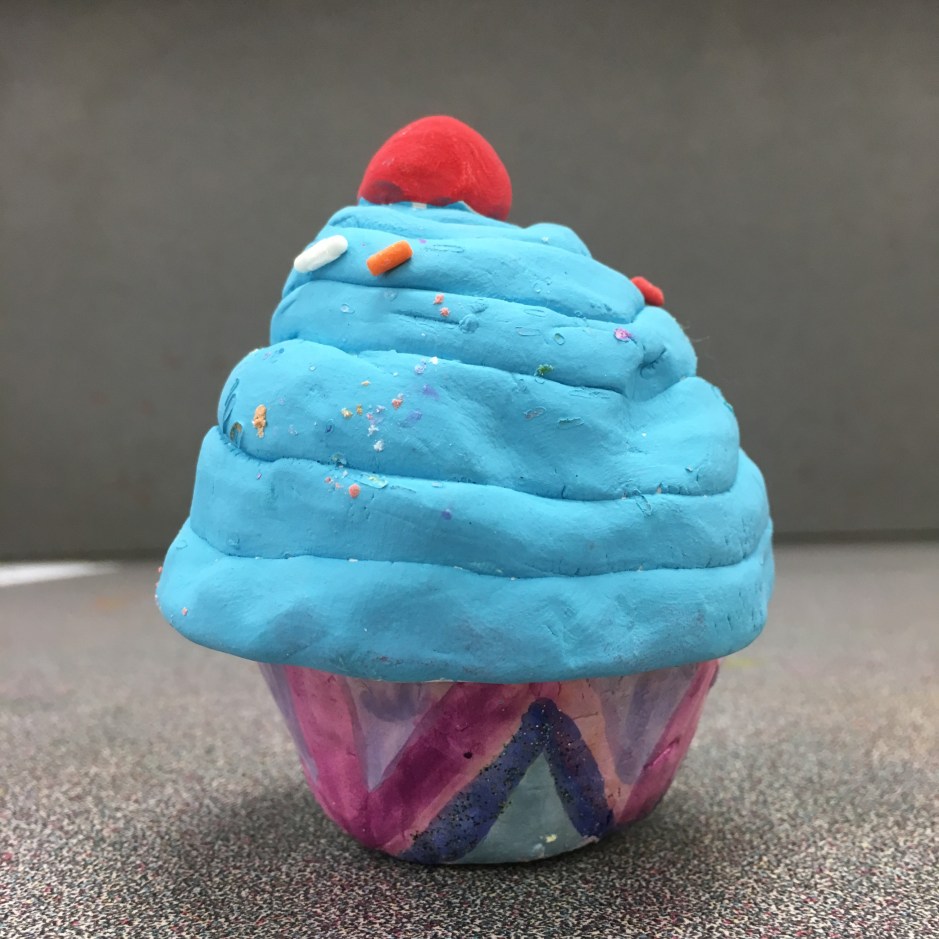
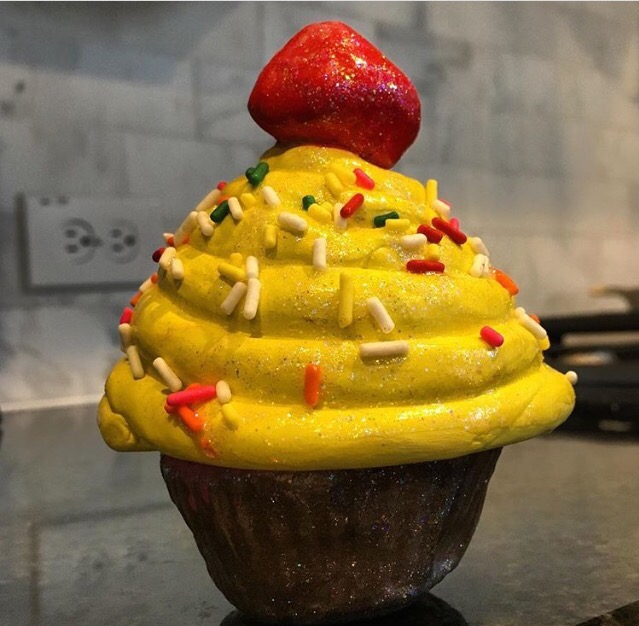
The next week, we made the cupcake tops by rolling out a long cylinder. Once rolled out, I showed them how to curl the clay cylinder up into a circle that gets smaller with each revolution until it connects to itself at the top. Adding a small rolled clay cherry and scratching and attaching it was artist’s choice, as was poking a hole for a metal cherry stem or not.

About a quarter of each class had a hard time with coiling up the cylinder cupcake top. They got their cupcake tops started but coiled the cylinder on top of itself without indenting the cylinder after each rotation. This creates a tall cylinder shape with no top (and frustrated artists.) I would show them how they were almost there but needed to un-coil and recoil with it getting smaller with each rotation.
Most of the students wanted a cherry on top. They scratched and attached their cherries and poked a hole in the top of the cherry if they wanted to add a stem as the last step.
Once we all had cupcake tops created, I showed them how to cradle it upside down in their hands and smooth together the inner coils for added strength.
Then I fired them in the kiln and the real fun began.
Instead of glazing them and refiring them like we did the first year, I researched how to attach sprinkles. I kept seeing sprinkles on lots of clay cupcakes online but I didn’t see how the art teachers attached them.
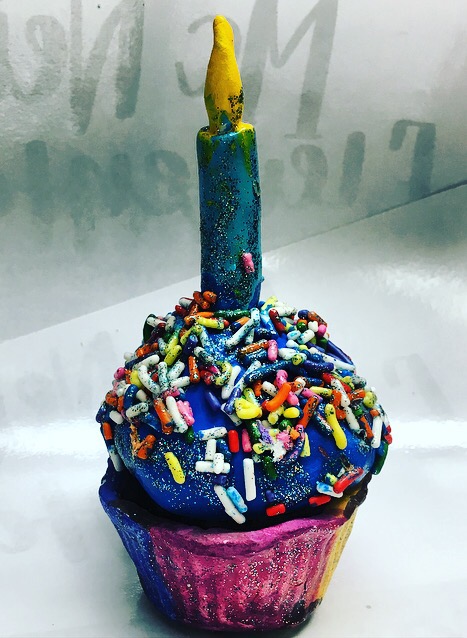
With experimentation, I came up with my own technique. I showed the class how to paint a vertical stripe of acrylic paint on the cupcake top then quickly dust on the sprinkles in that stripe of wet paint. This worked fine but lots of sprinkles came off a few months later. In the meantime, I learned how to attach sprinkles with clear polyurethane on our paper mache donuts. It’s the same concept as what we used to add the sprinkles on our cupcakes but with polyurethane on the acrylic. There was still a little sprinkle shedding with the polyurethane, but not nearly as much as when we attached the sprinkles to the acrylic paint by itself.
This is my latest and most successful sprinkle application technique. We painted the whole cupcake top with acrylic first, then did our “paint a vertical stripe, add sprinkles to the wet polyurethane stripe” technique until we worked our way around the whole cupcake.
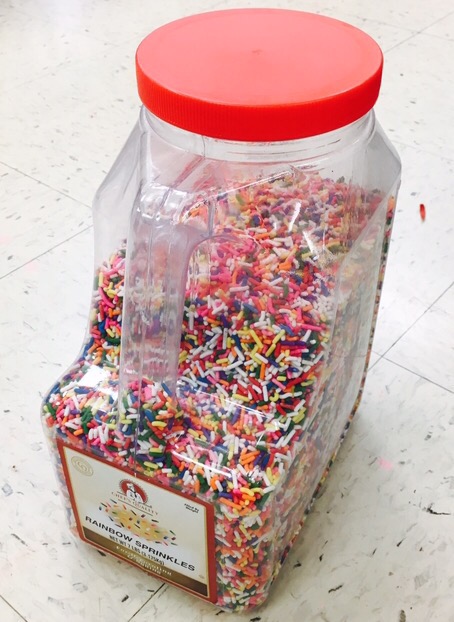
Both techniques experience sprinkle shedding after they’re finished, but the polyurethane method keeps a lot more on than the painted acrylic only method.
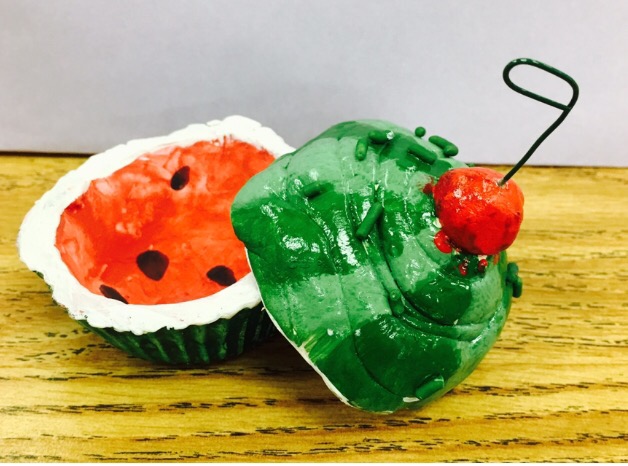
For painting the cupcake bases, we used the tempera paint in solid hockey puck shapes instead of liquid acrylic or tempera paint. The artists could make their cupcake bases look as realistic or as creative as they wanted, depending on what they had in mind for their completed cupcake.

I inherited some long green skinny metal wire from the previous art teacher at my school, but wasn’t quite sure how to use it. I decided this project would be perfect for it. I cut the metal wire into stems and letting the students glue in the metal they’ve bent into a stem shape.
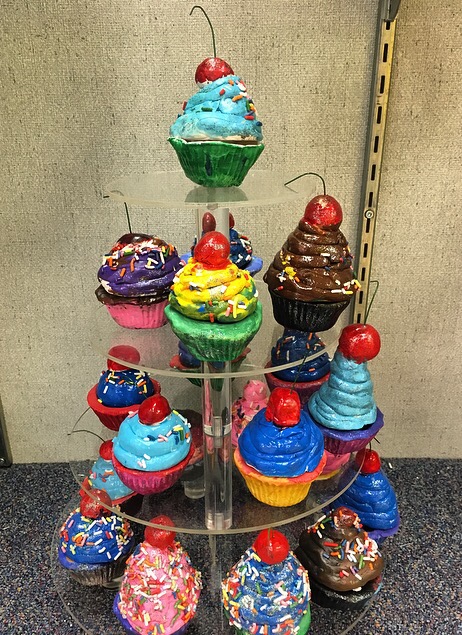
I was so happy with how they turned out! Please tag me on Twitter at @wowartproject or on Instagram at @juliaforsythart to let me know how yours turned out 🙂
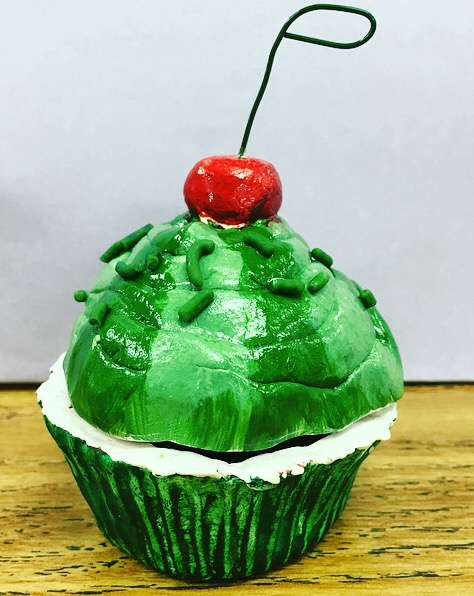
This cupcake shed most of it’s sprinkles. It started with more but several came off.


Those are amazing! I was experimenting the other day with silicone molds and couldn’t get the bottom pinch pot to let go of the silicone. Is there anything different you do to get them out?
LikeLike
Thanks! It’s a tricky move, ha. I show them how to turn it upside down and very gently drop it a few times to create a shelf. Then, while it’s still upside down, peel the silicone mold off from the bottom to the top. It helps to press down on the top of the upside down cupcake with one hand as you’re peeling with the other hand. Good luck!
LikeLike
I used corn starch on the silicon mold and it releases the clay much easier.
LikeLiked by 1 person