
The grass is always greener on the other side…
There’s always a little bit of “Why aren’t we making that?” when the different grade levels see each other’s art. We made clay cupcakes last year in 3rd grade. The kids enjoyed making them, and a few turned out pretty good. But overall, most completed cupcakes didn’t match perception of how I hoped they would turn out.
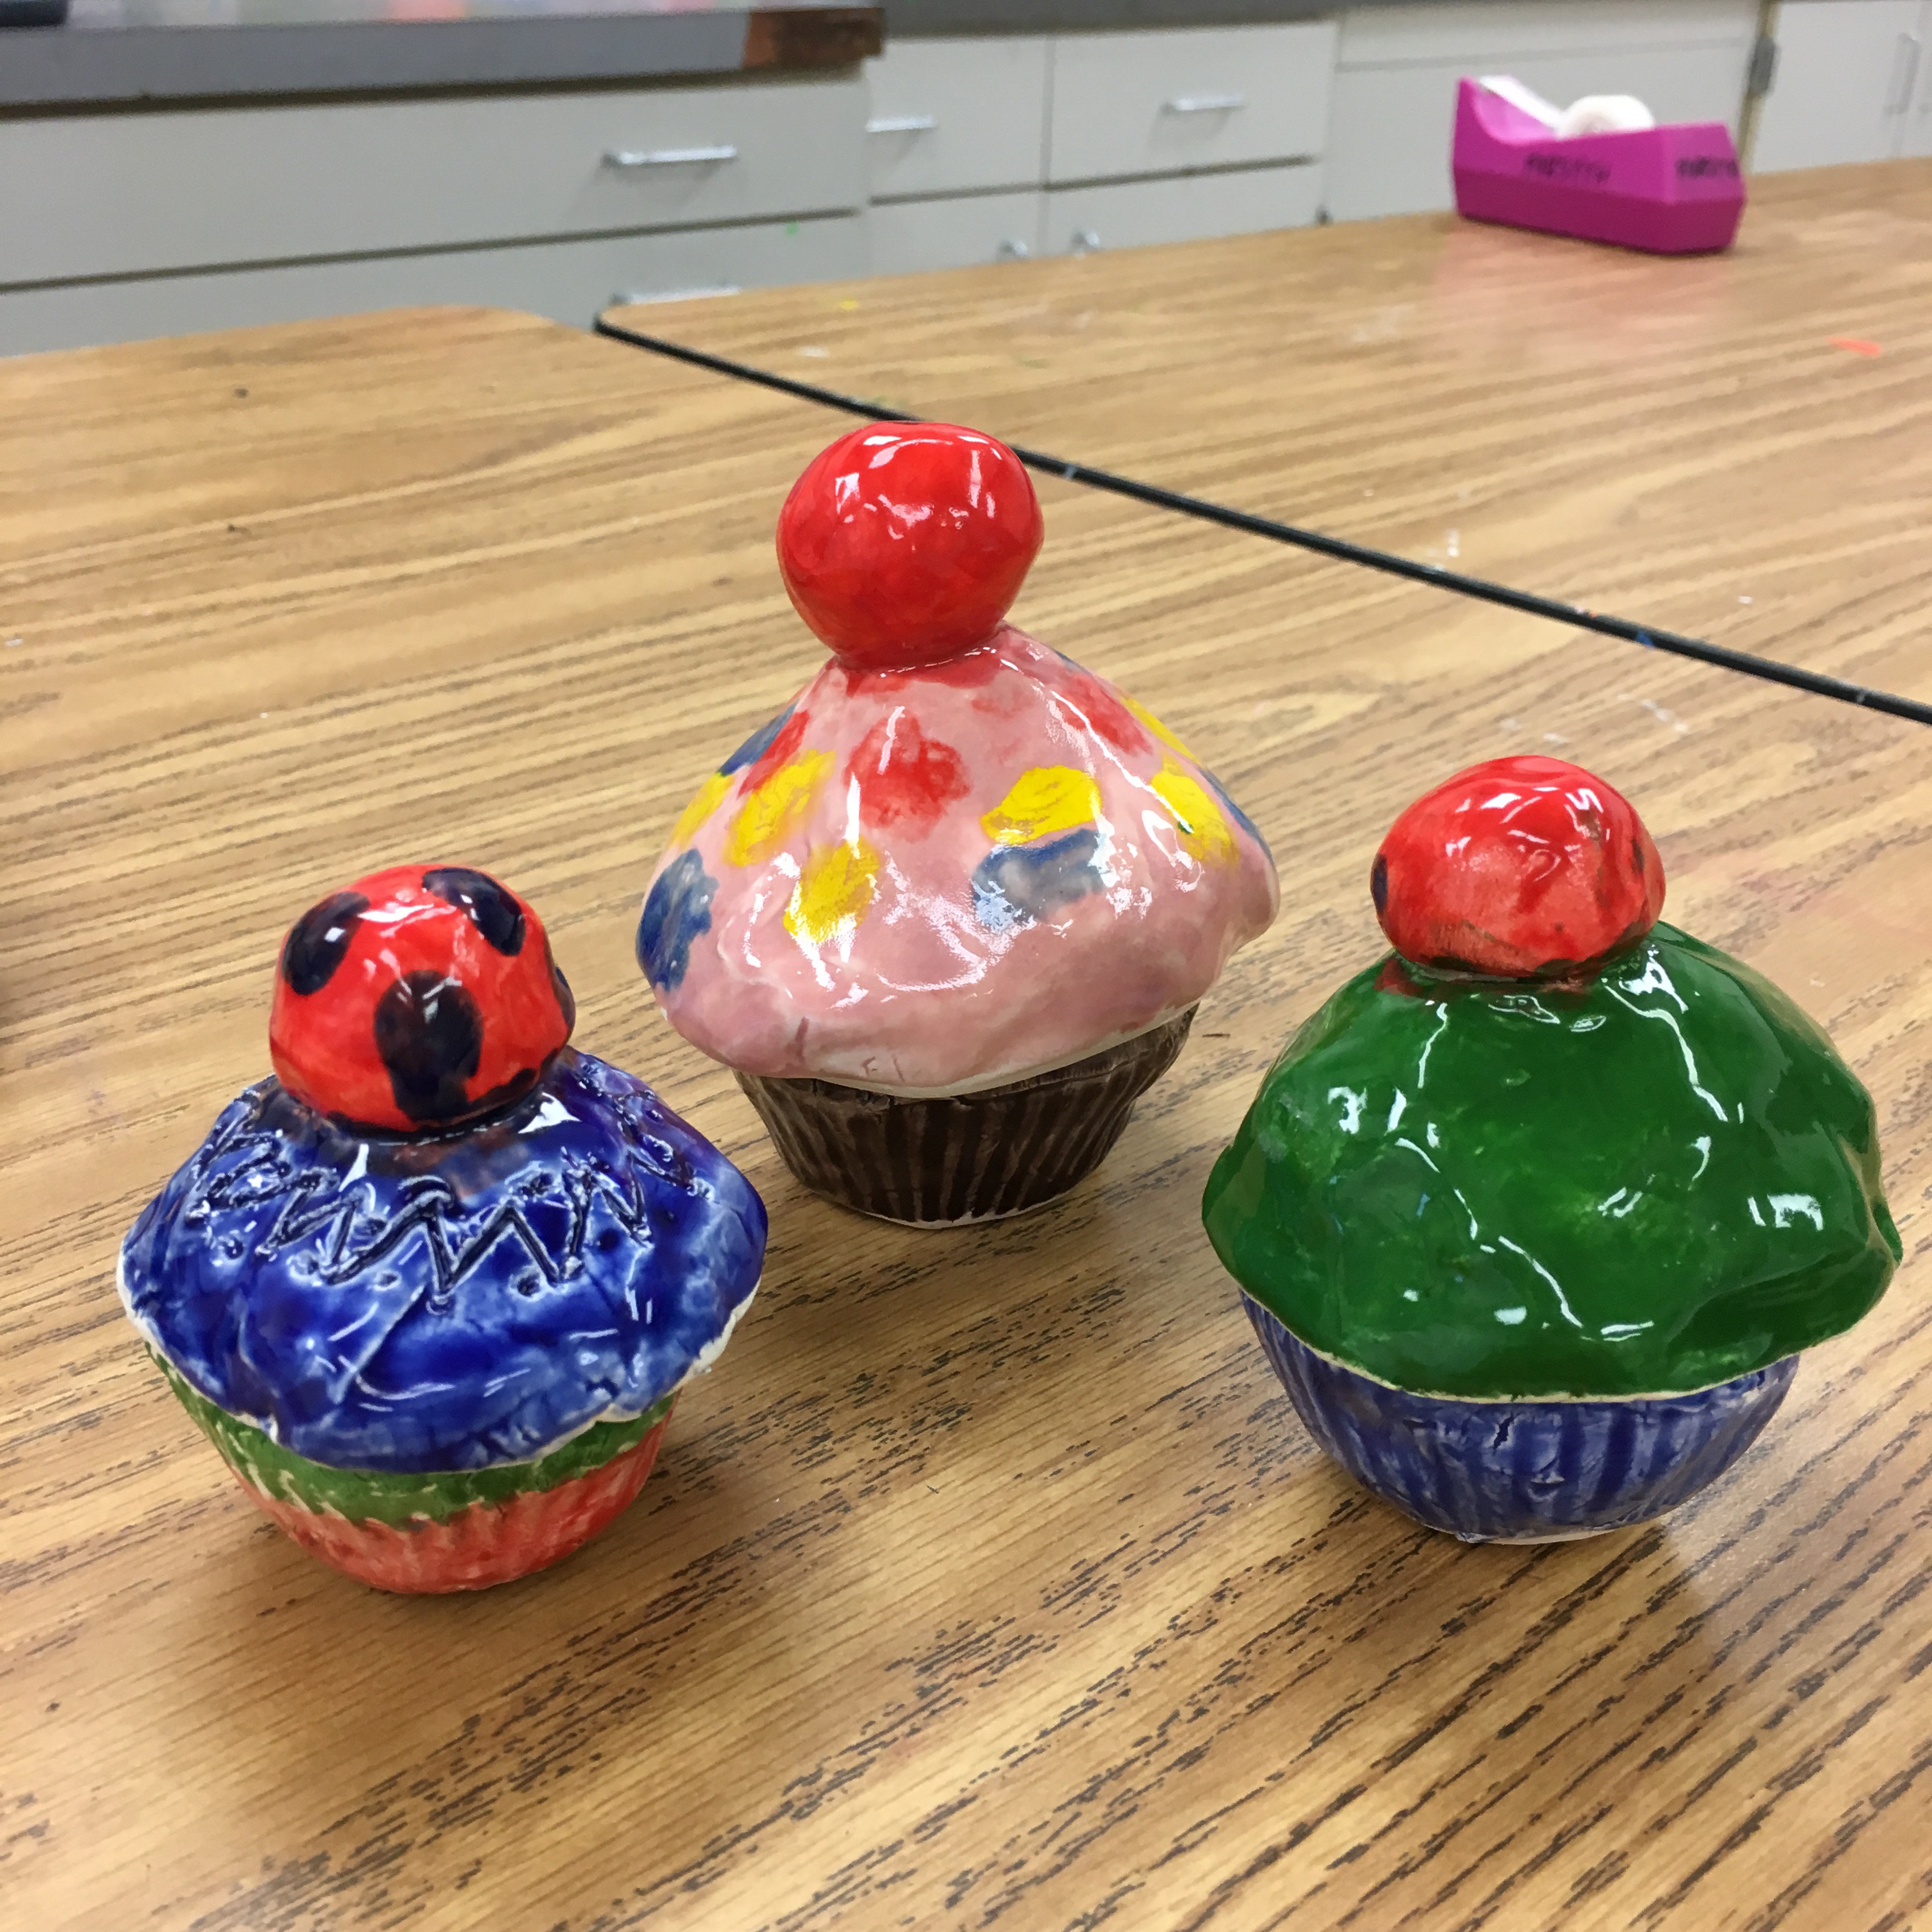 Our very 1st clay cupcakes without sprinkles
From last year to this year, I taught myself how to attach real sprinkles to clay cupcakes, and the first generation of cupcake makers (last year’s) asked why they didn’t get to add sprinkles to their clay cupcakes.
The repeated questions (“Why didn’t we get to use sprinkles?”) and longing looks directed at the new and improved clay cupcakes vs. the memories of last year’s cupcakes stuck in my mind. Since this year’s 4th graders made their clay Alamos as their very 1st project of the year, they were ready to try something else 3D after Spring Break. And they collectively seemed to crave the “sprinkle experience” that they missed out on, so why not inaugurate paper maché donuts with them?
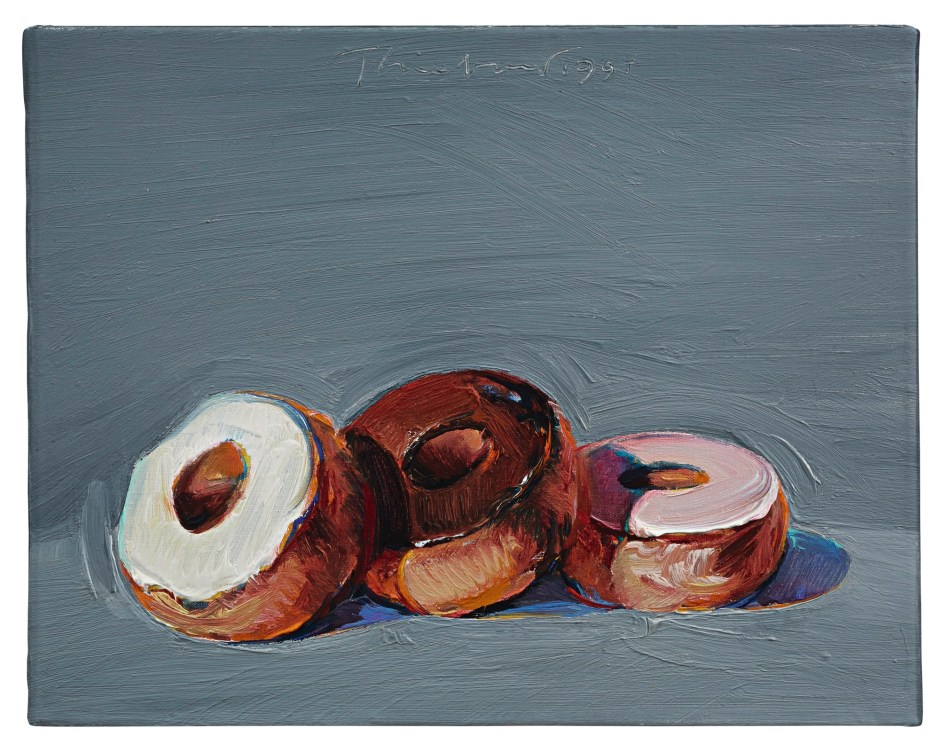
But why make paper mache donuts in art? In semi-recent and very recent art history, donuts have made it into the cannon. (Too bad it’s not a real donut cannon – that would be amazing.) The original donut artist I introduced my students to was Wayne Thiebaud. (Photo copyright of Sotheby’s)
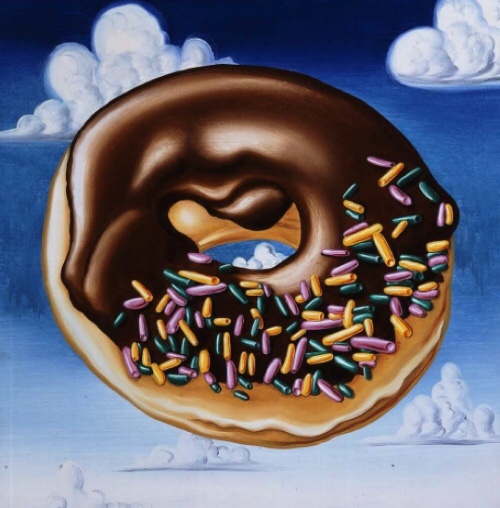
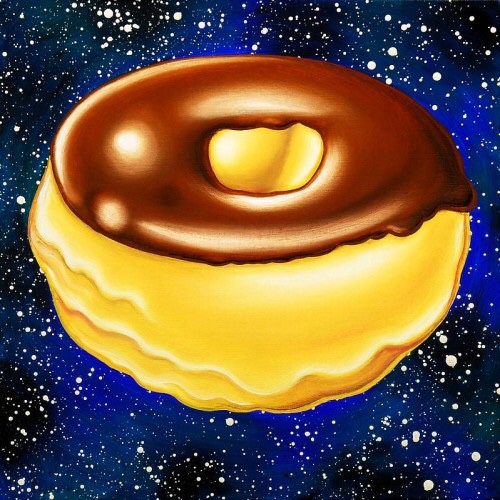
Later, I learned about Kenny Scharf and his cosmic donut paintings. (pictures copyright of Kenny Scharf)
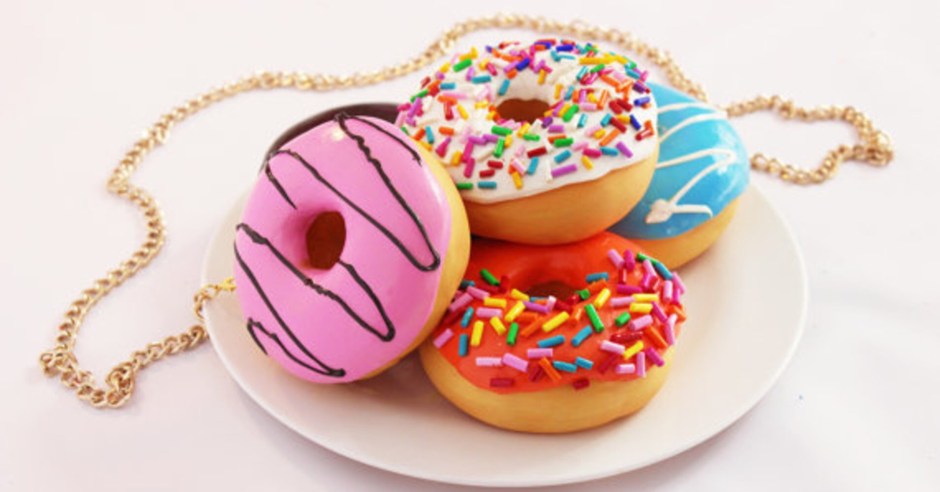
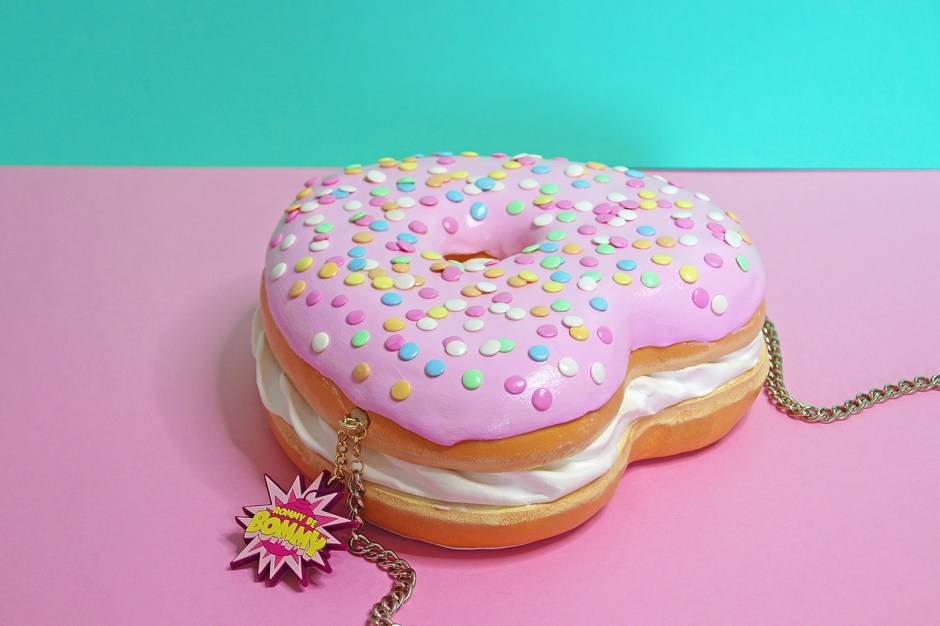
After that, I discovered an artist after my own heart, Rommy de Bommy and her donut purses along with all sorts of her fun food-inspired purses. (Photos copyright Rommy de Bommy)

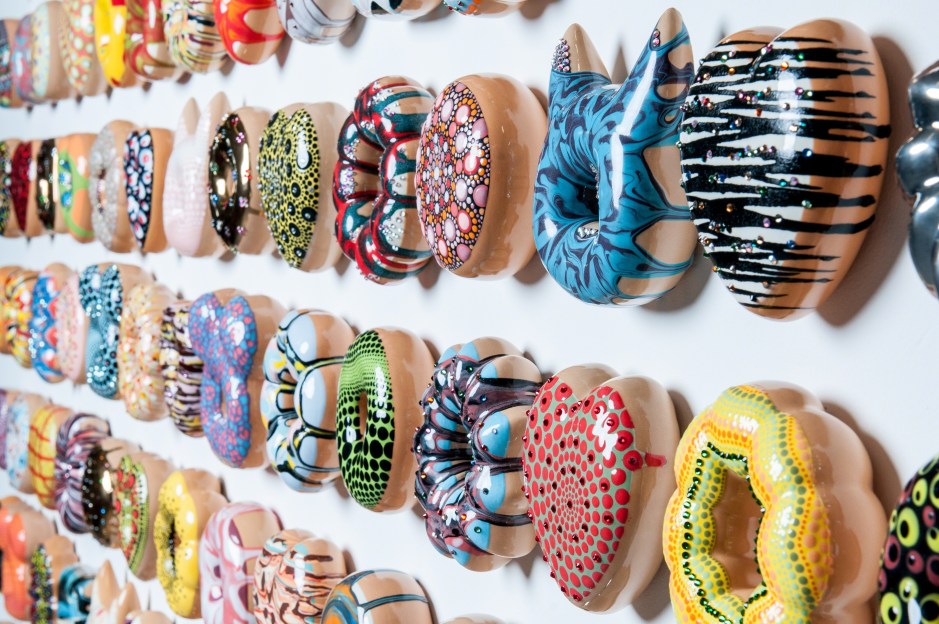
My most recent donut artist discovery was the very talented clay South Korean artist Jae Yong Kim. (Photos copyright of thisiscolossal.com and mymodernmet.com)
I’ve never taught paper maché before. Hello steep learning curve! My brilliant idea was to make my own test paper maché donuts at home to master a step at a time right before I taught them. I was anxious like I always am before teaching a new art process, but I really wanted to figure it out.
Class period 1: We rolled 2 full sheets of newspaper together into a long skinny cylinder. Then we twisted up the cylinder from the middle to both outside edges.
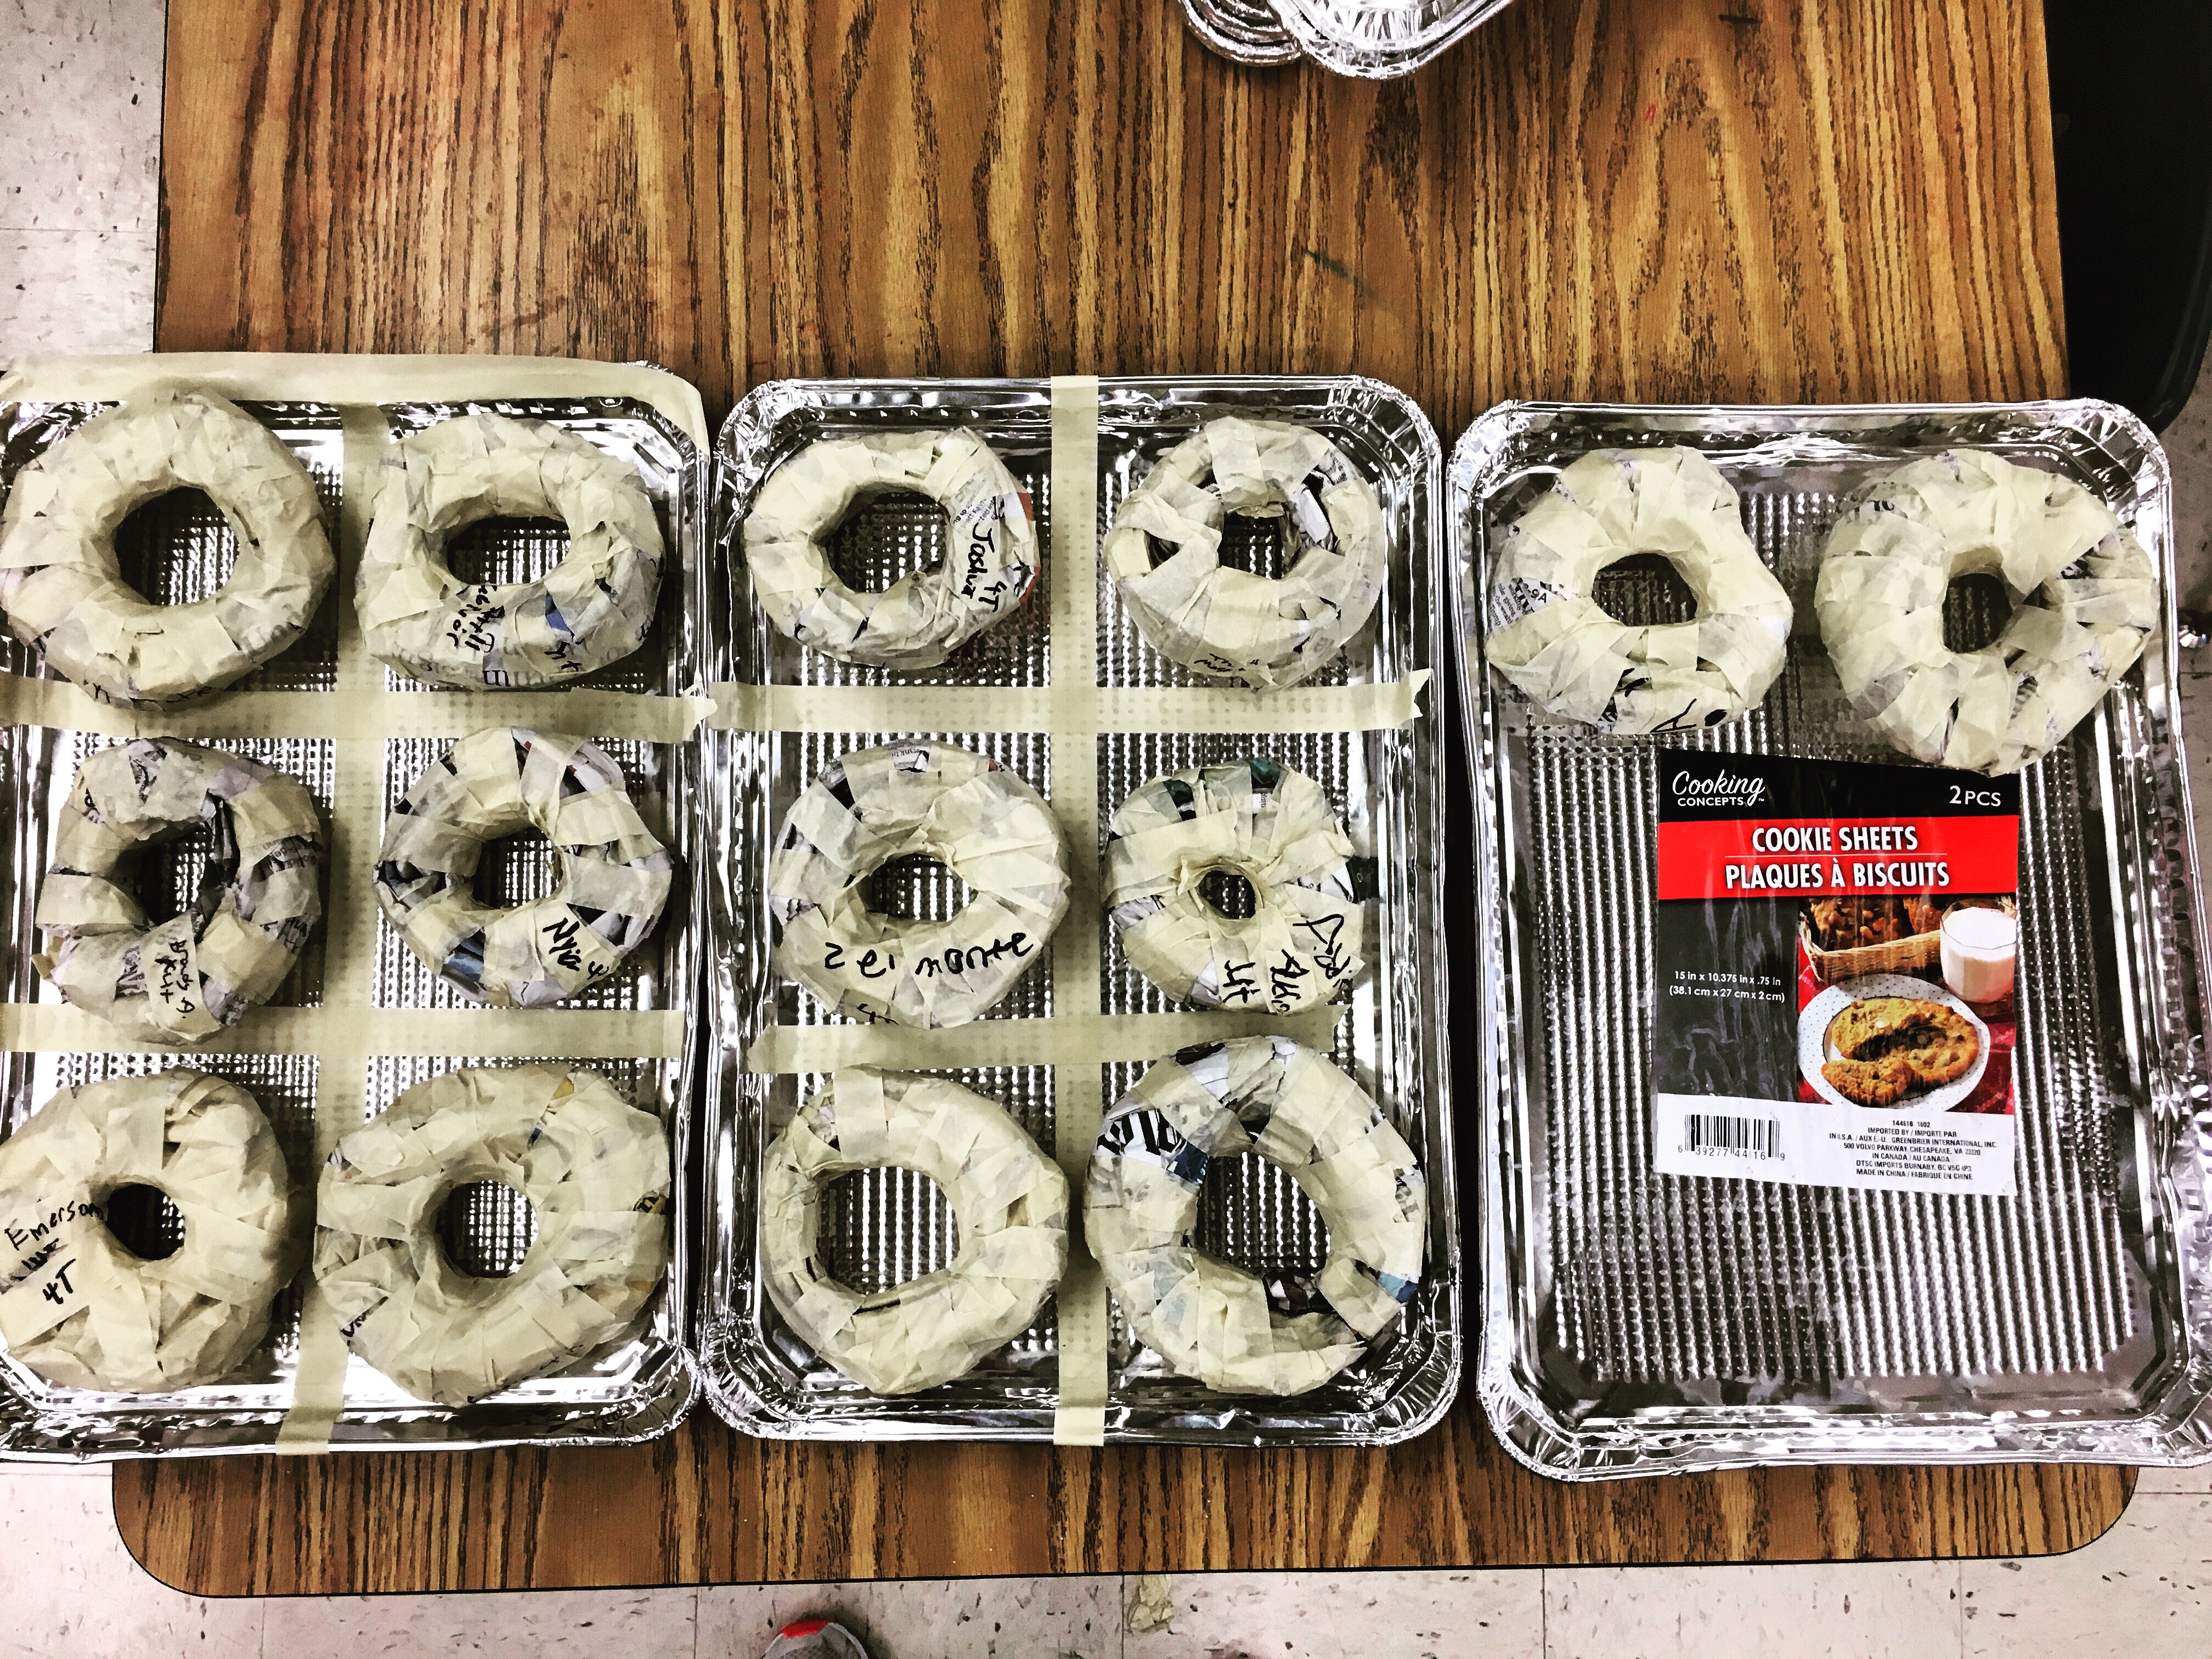 The newspaper part of paper maché donuts before they’re completely covered with masking tape
Then we taped our entire rolled, twisted cylinders into a donut shape with a couple of layers of masking tape.
 Masking tape step
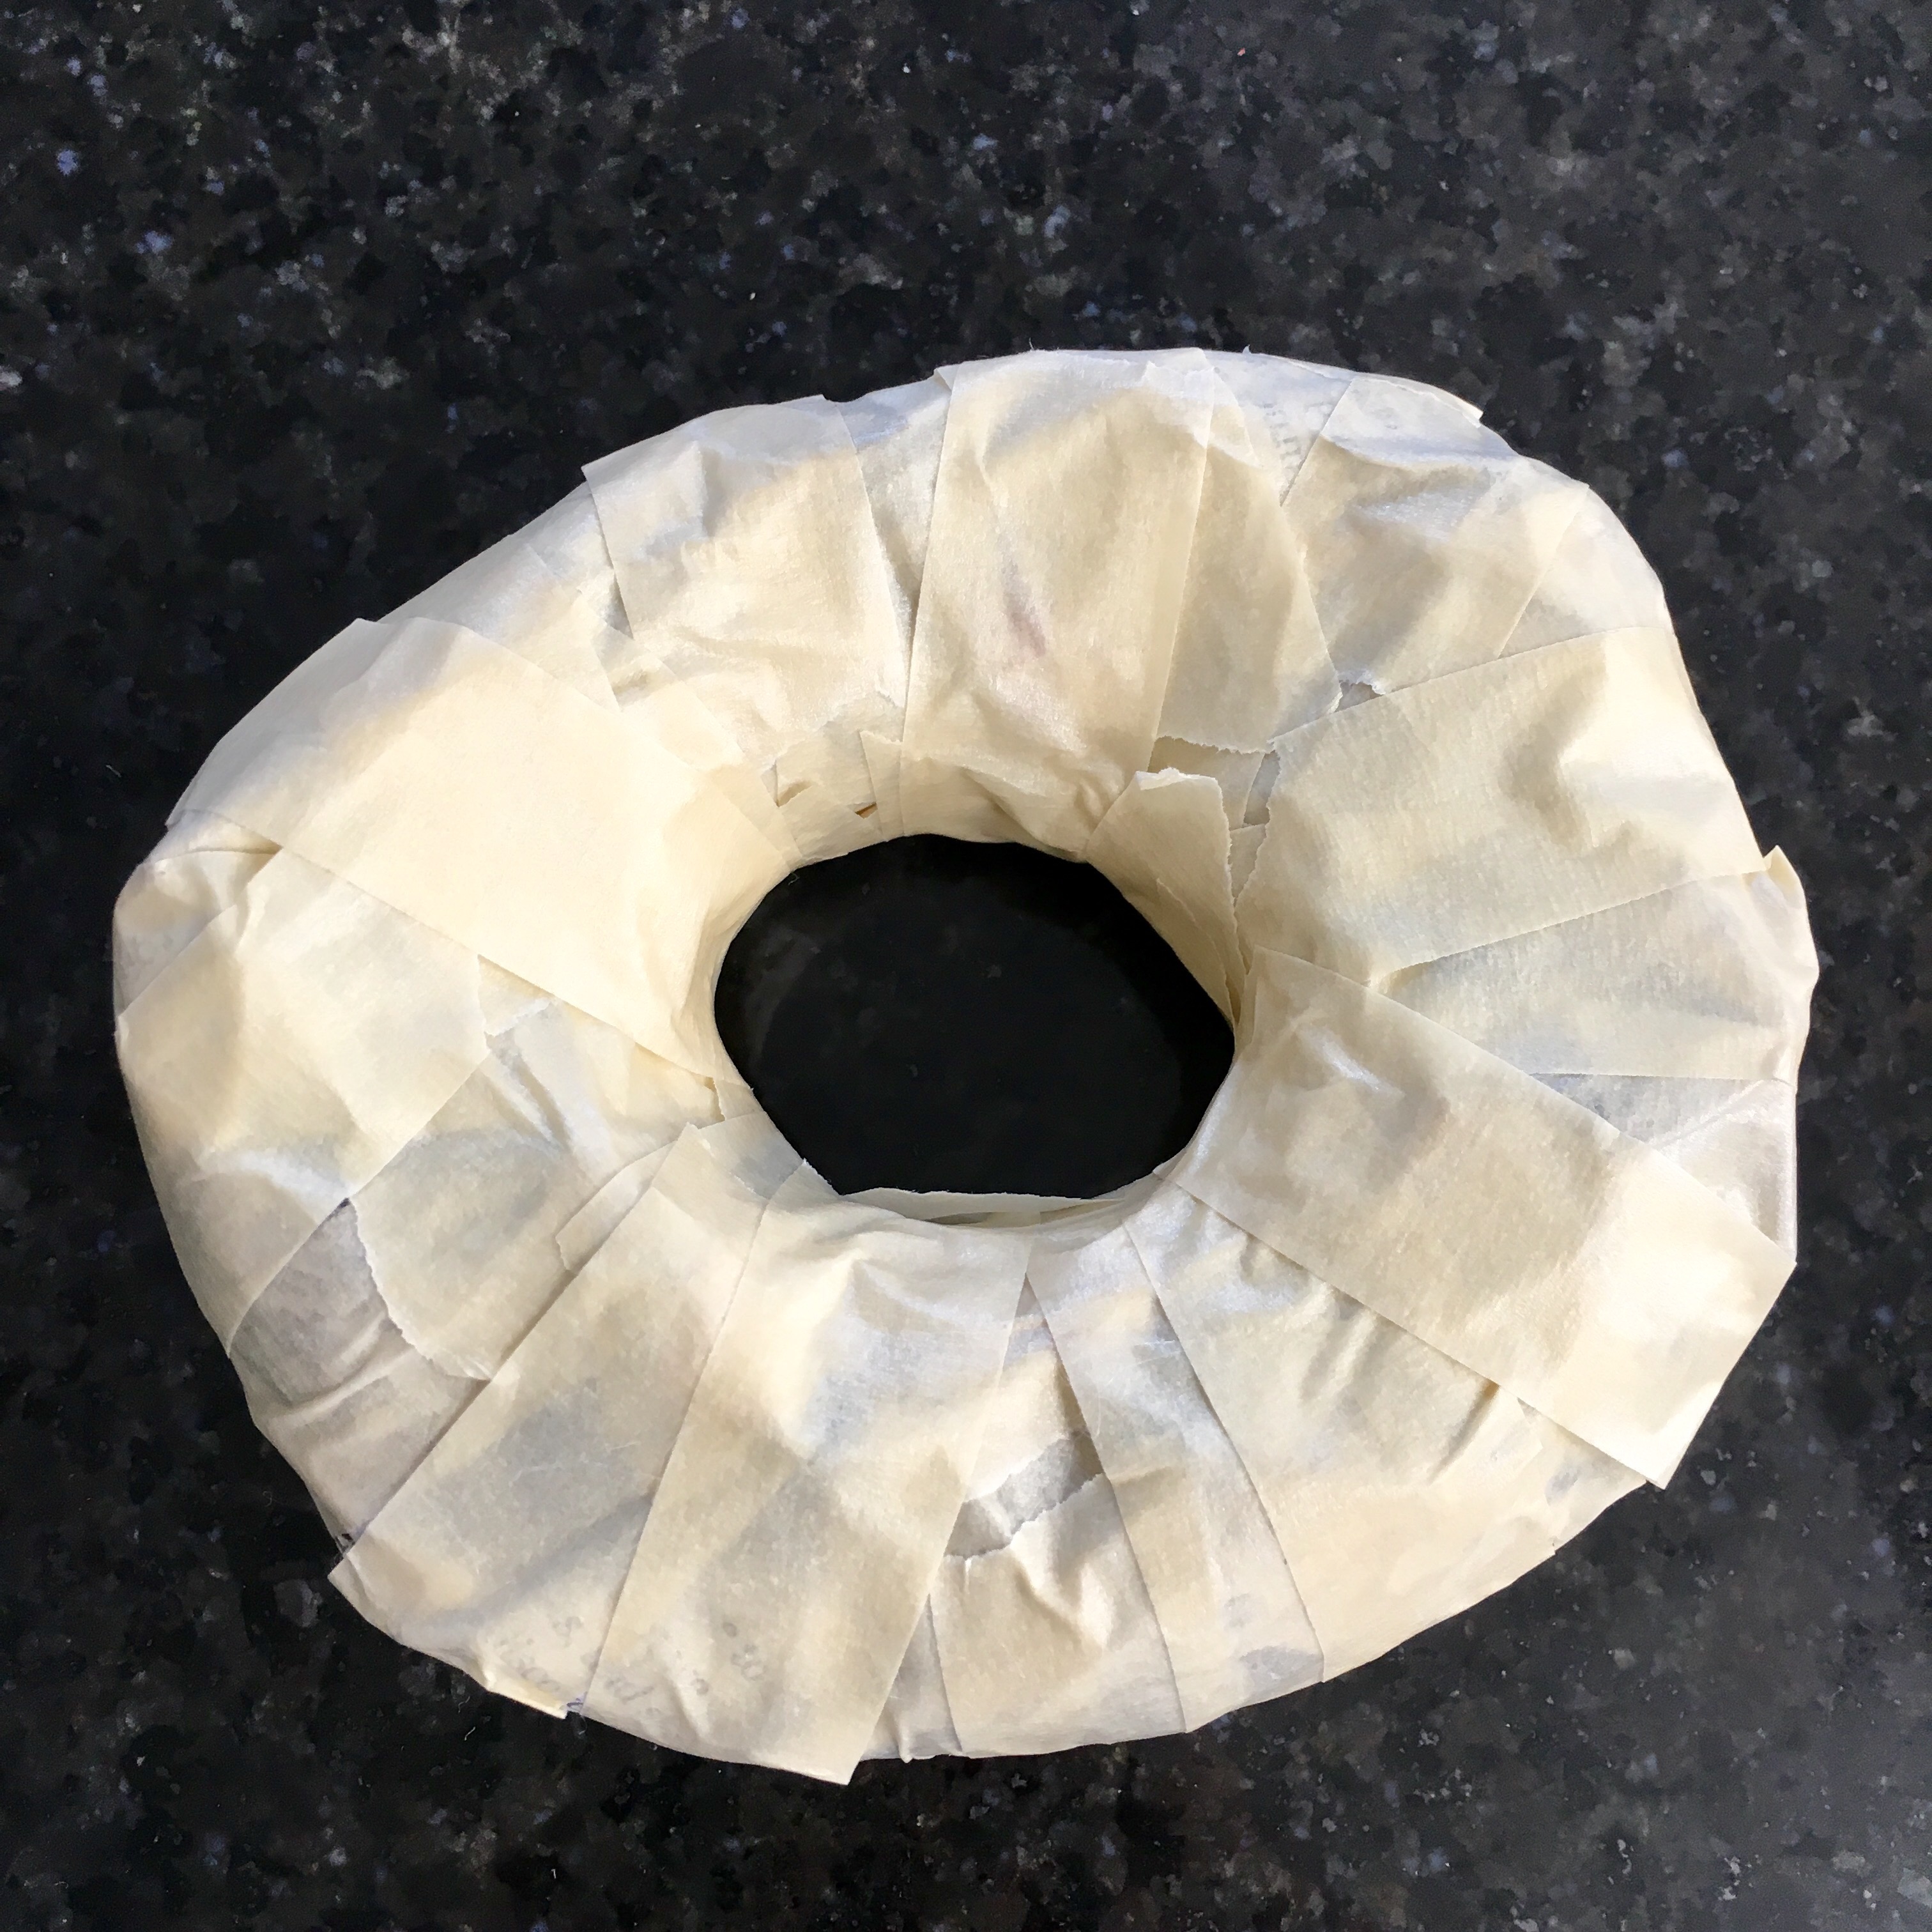
Class period 2: We tore or cut copy paper into strips, and then dipped them into pre-mixed Elmer’s paper maché paste. We aimed for 2-3 layers of pasted strips that covered up the newspaper text/pics.
 Copy paper paper machéd step
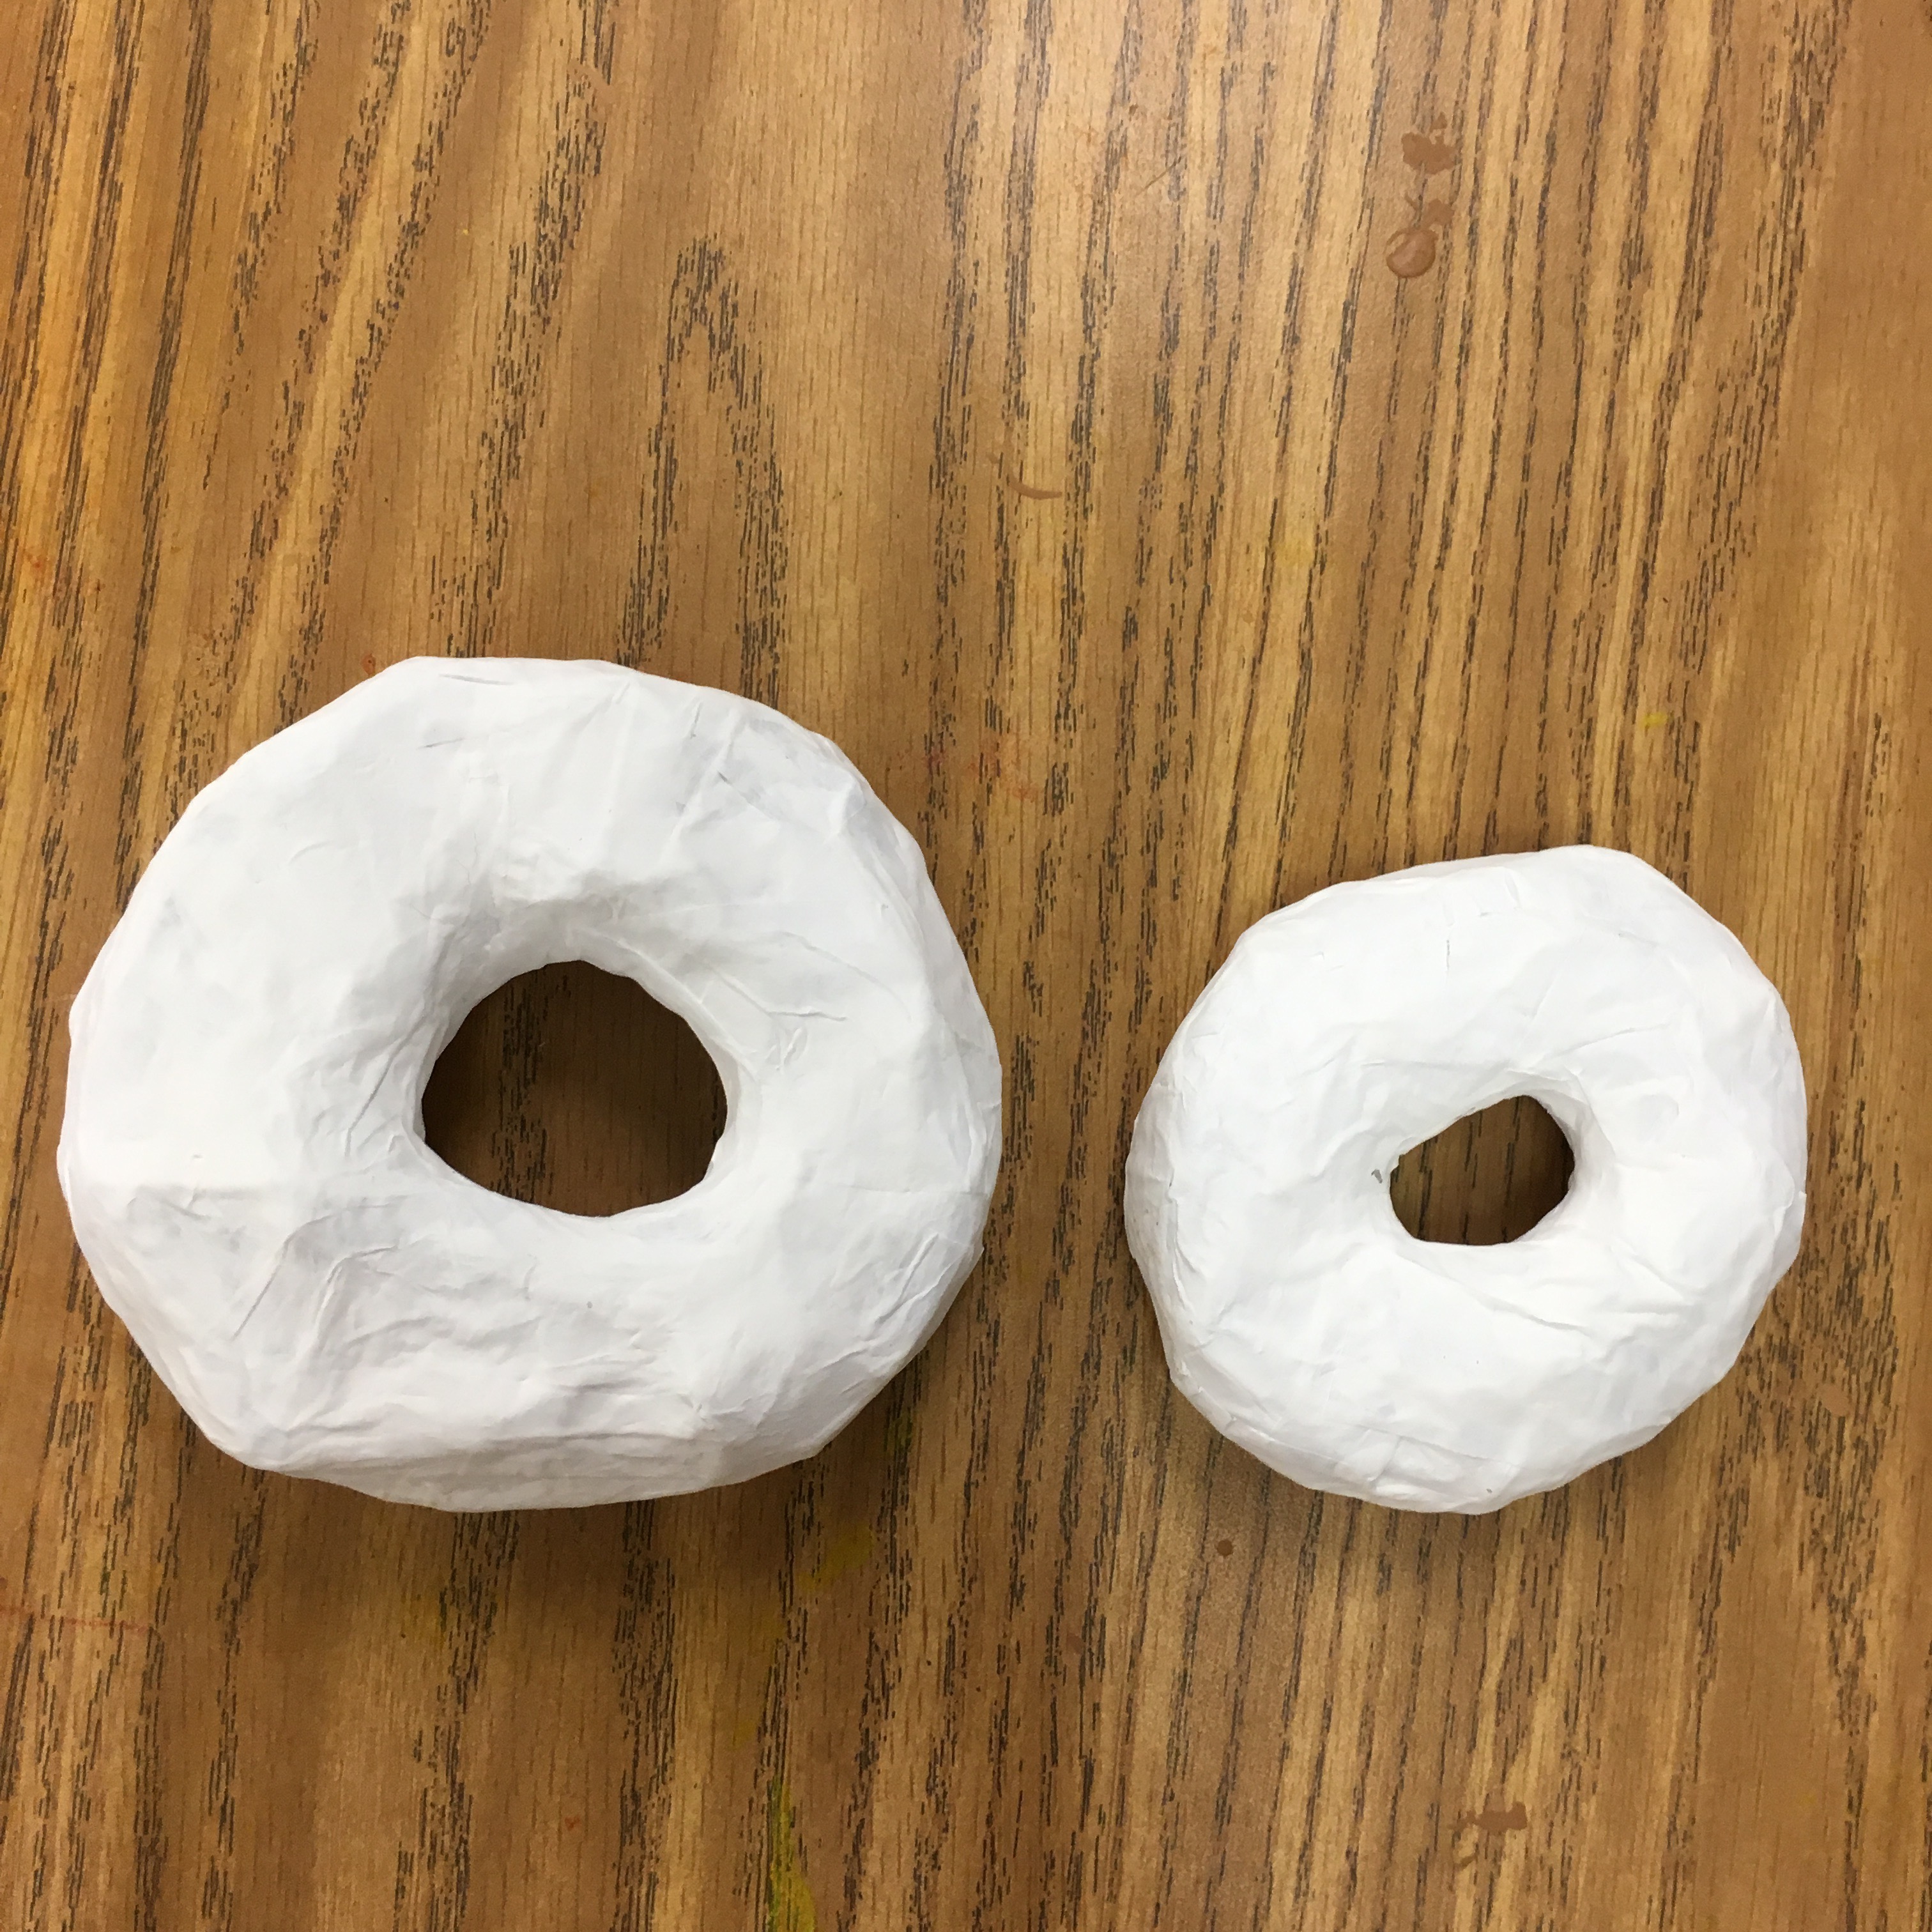
Class period 3: We acrylic painted the bases of our donuts the classic “donut golden brown.”
 Before puffy paint
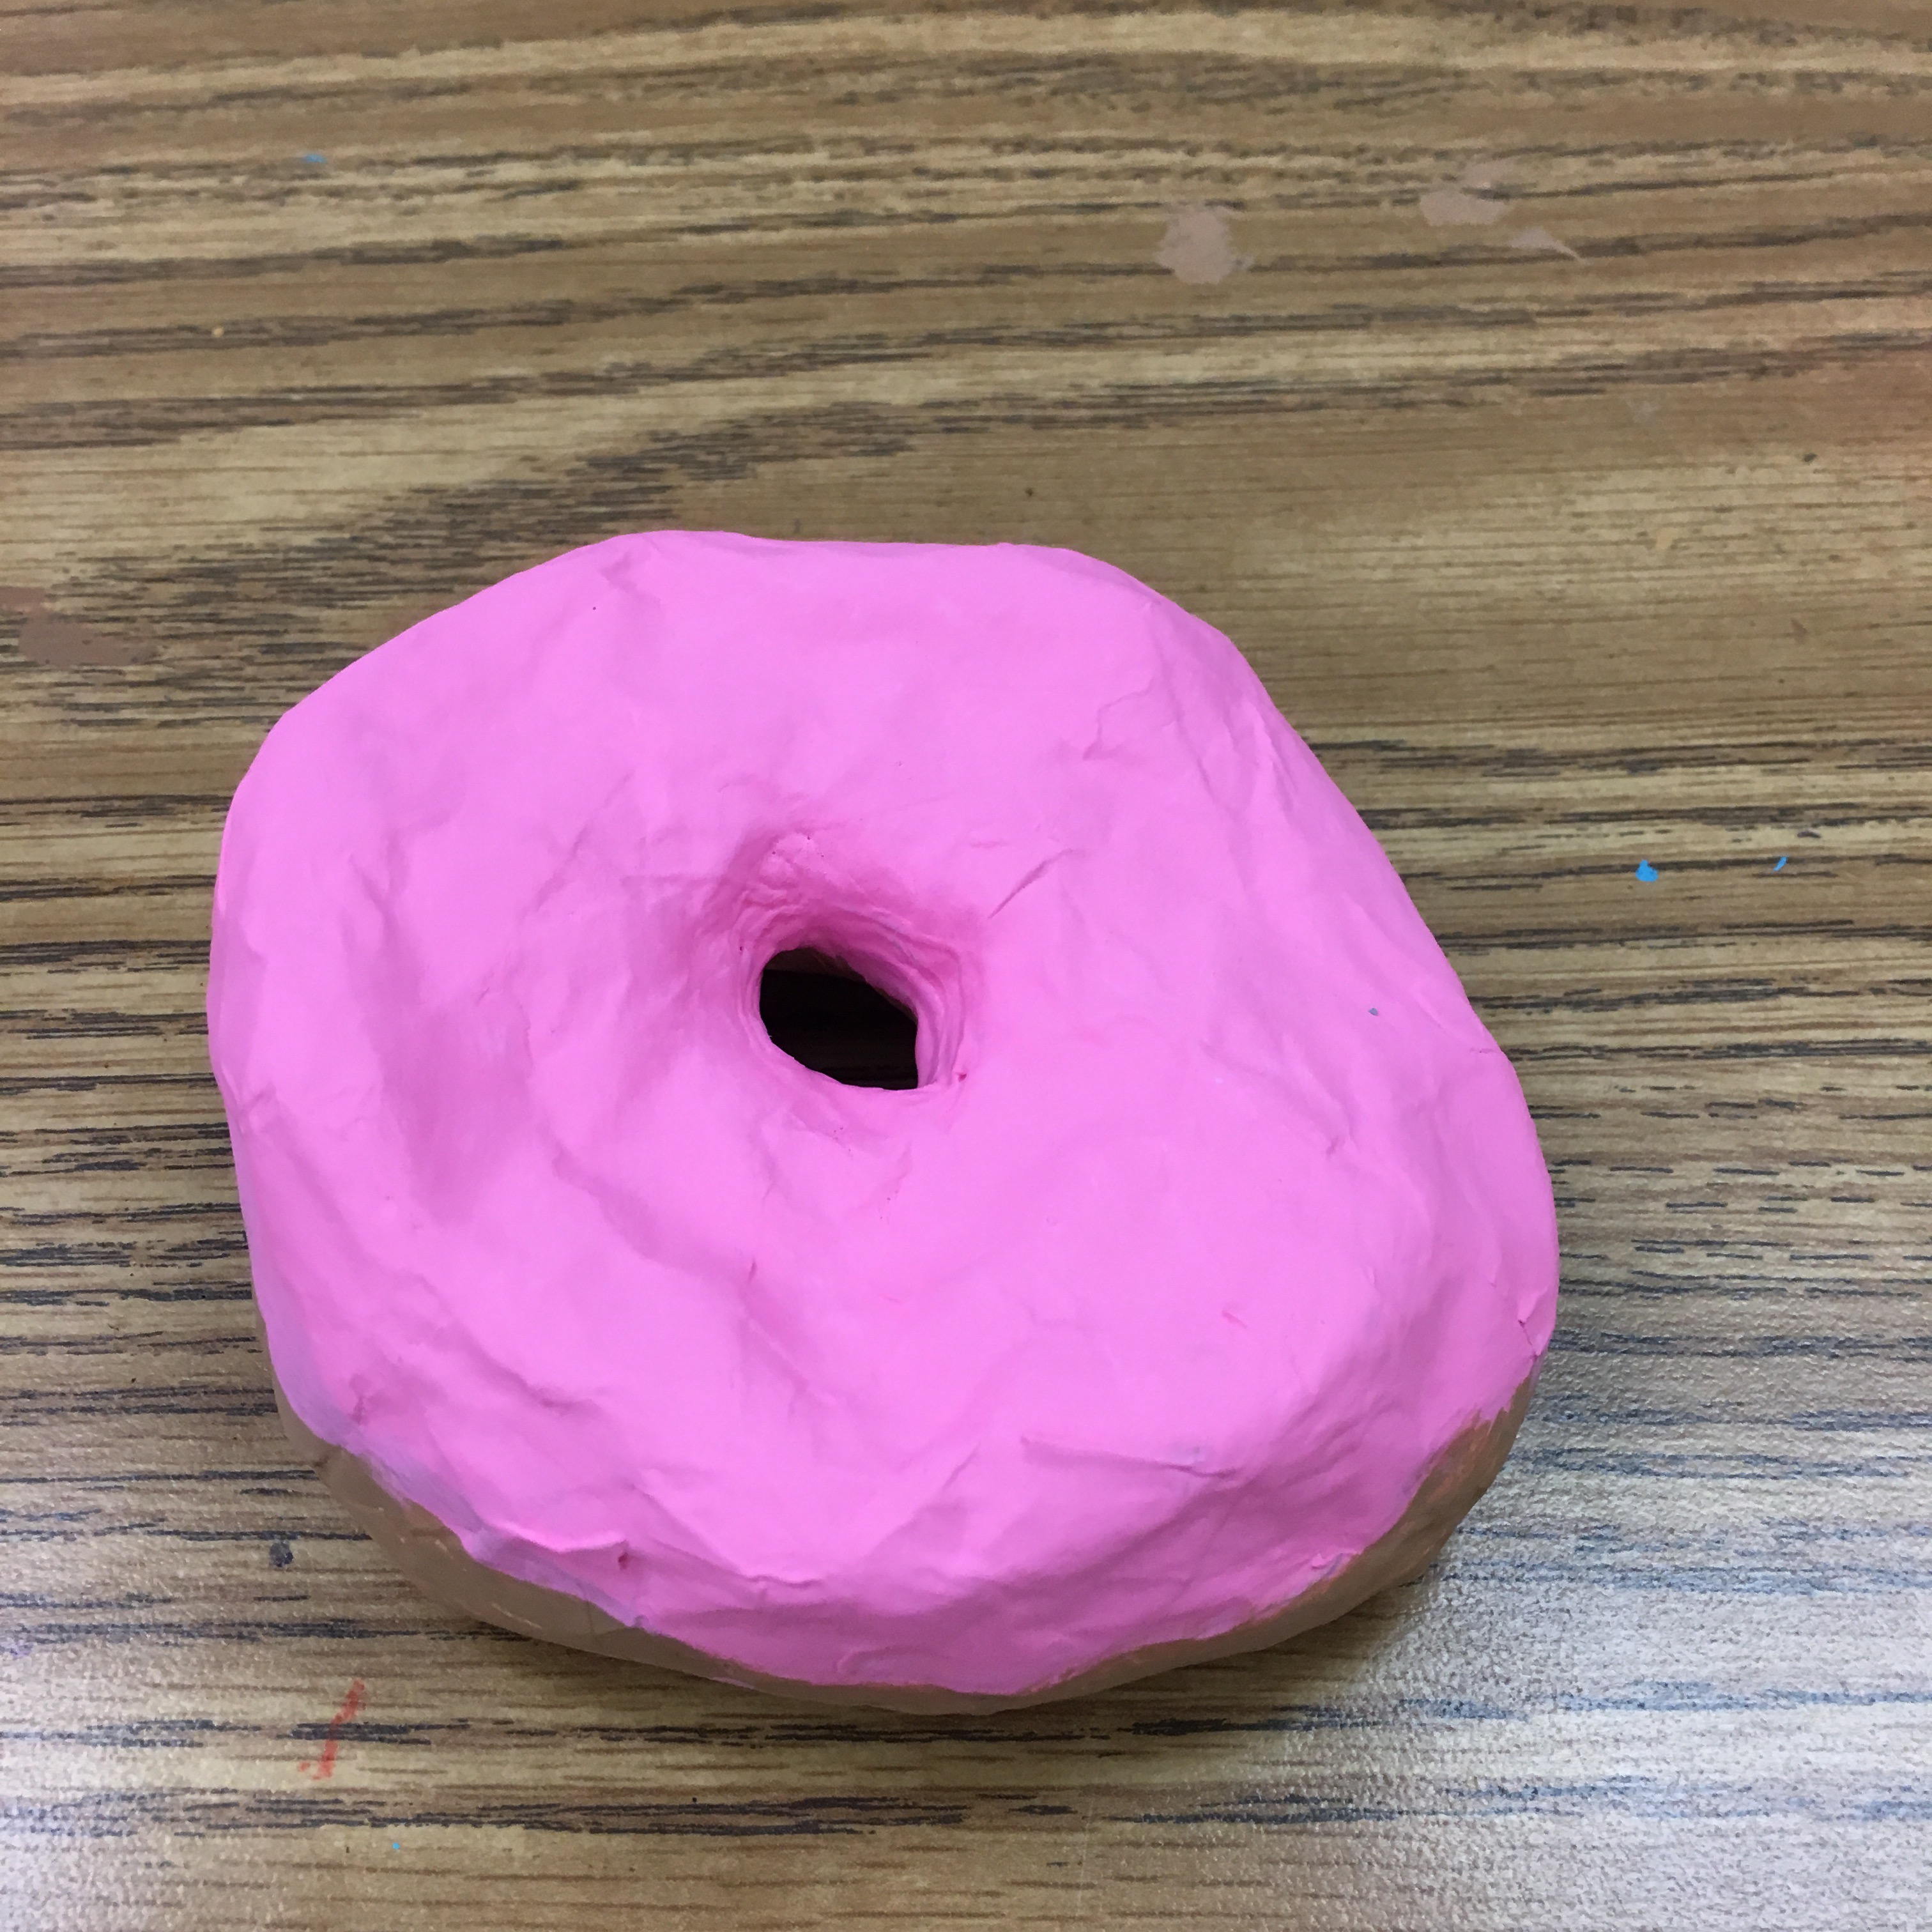 Before puffy paint
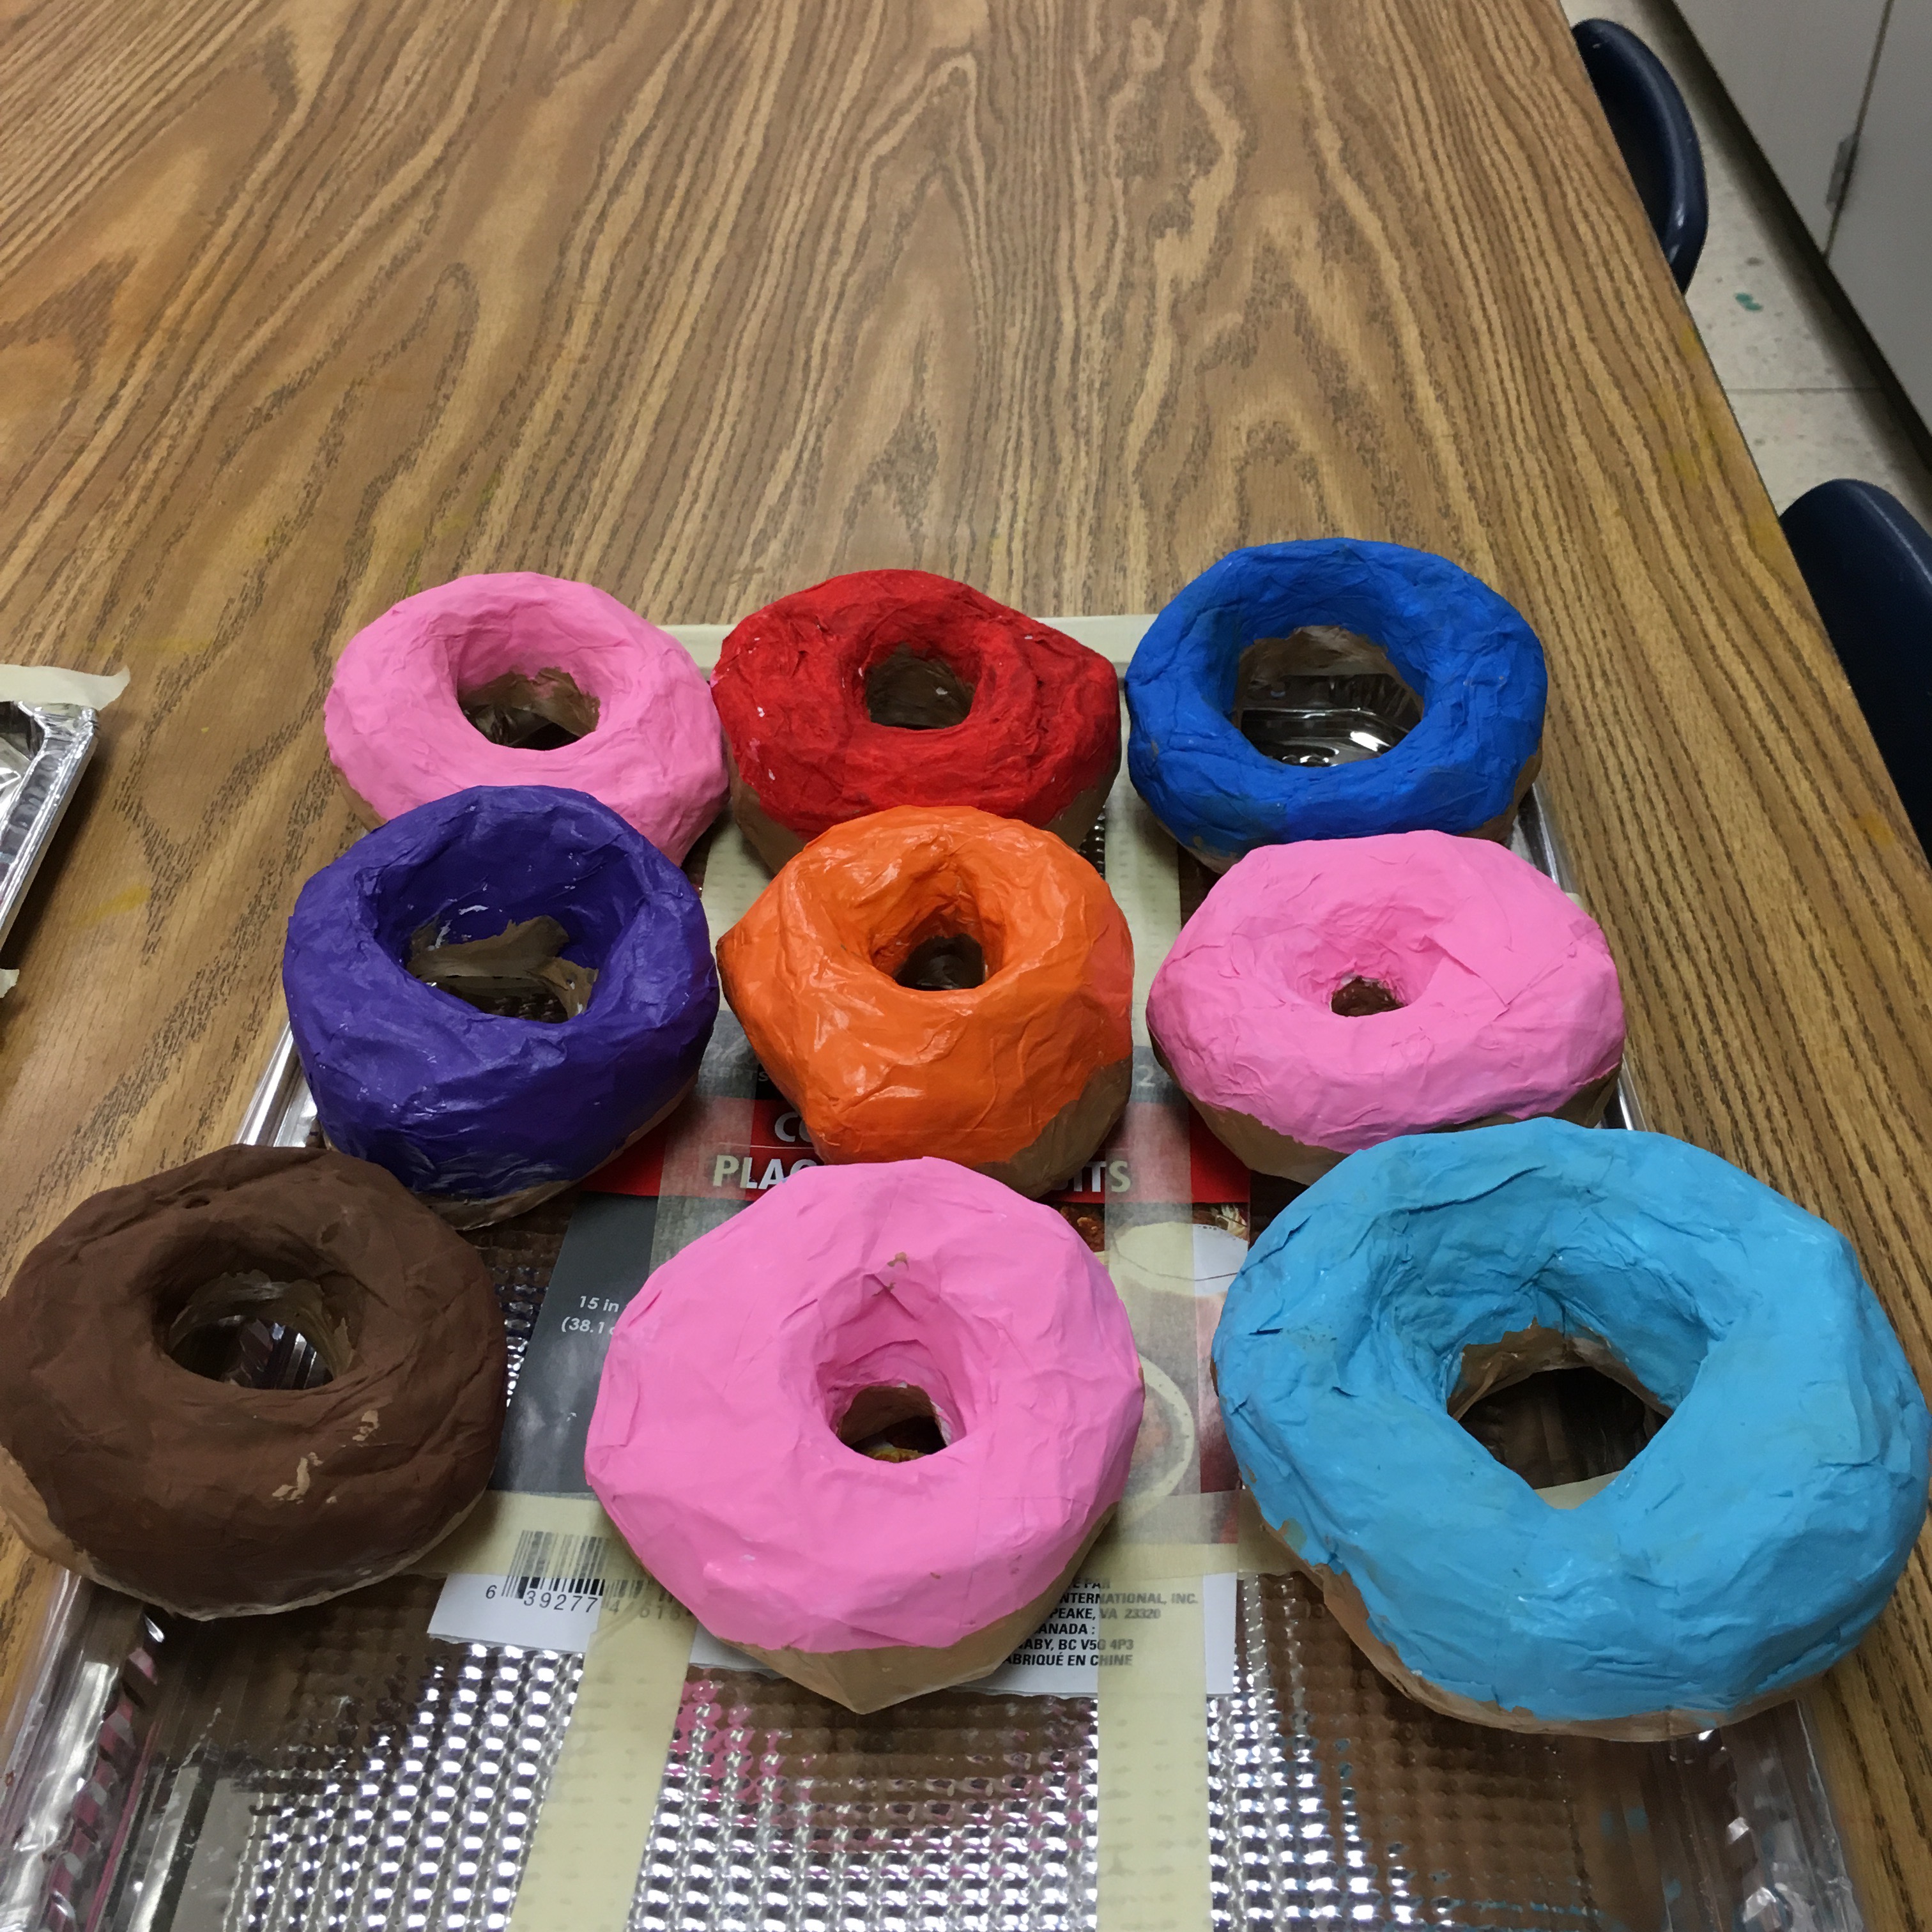
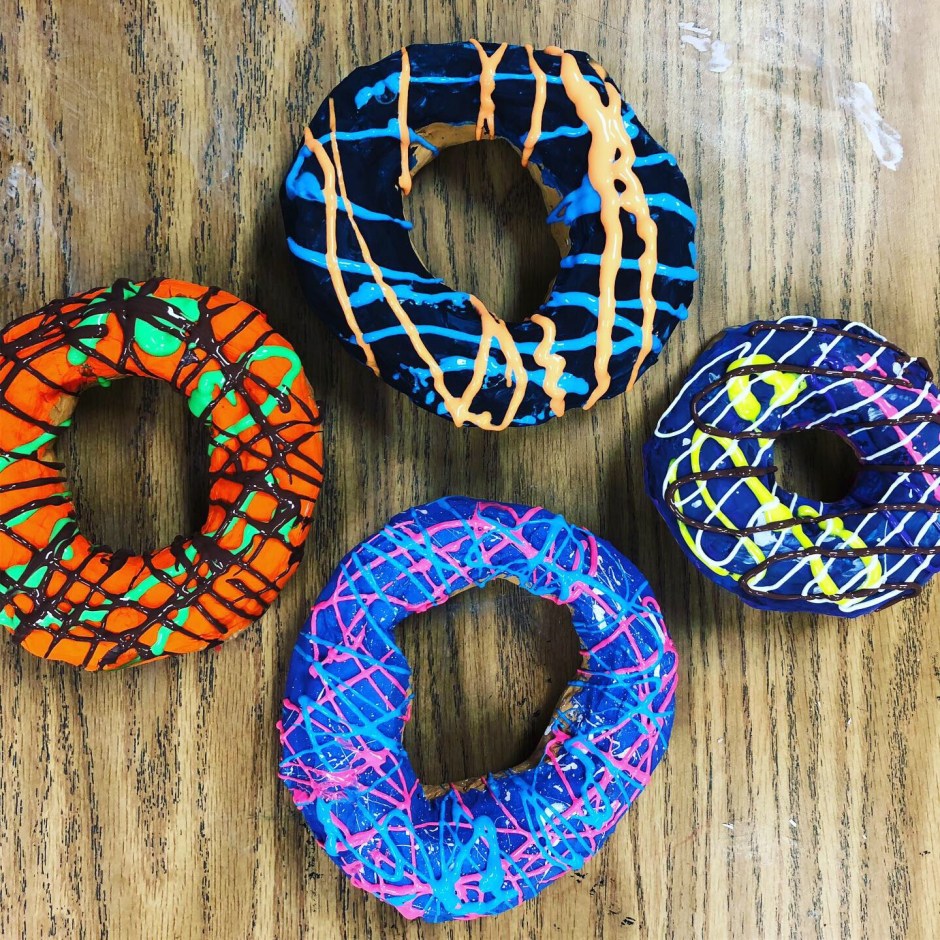
Class period 4: We acrylic painted the tops of our donuts in any jewel tone or neutral color each artist thought looked the best.
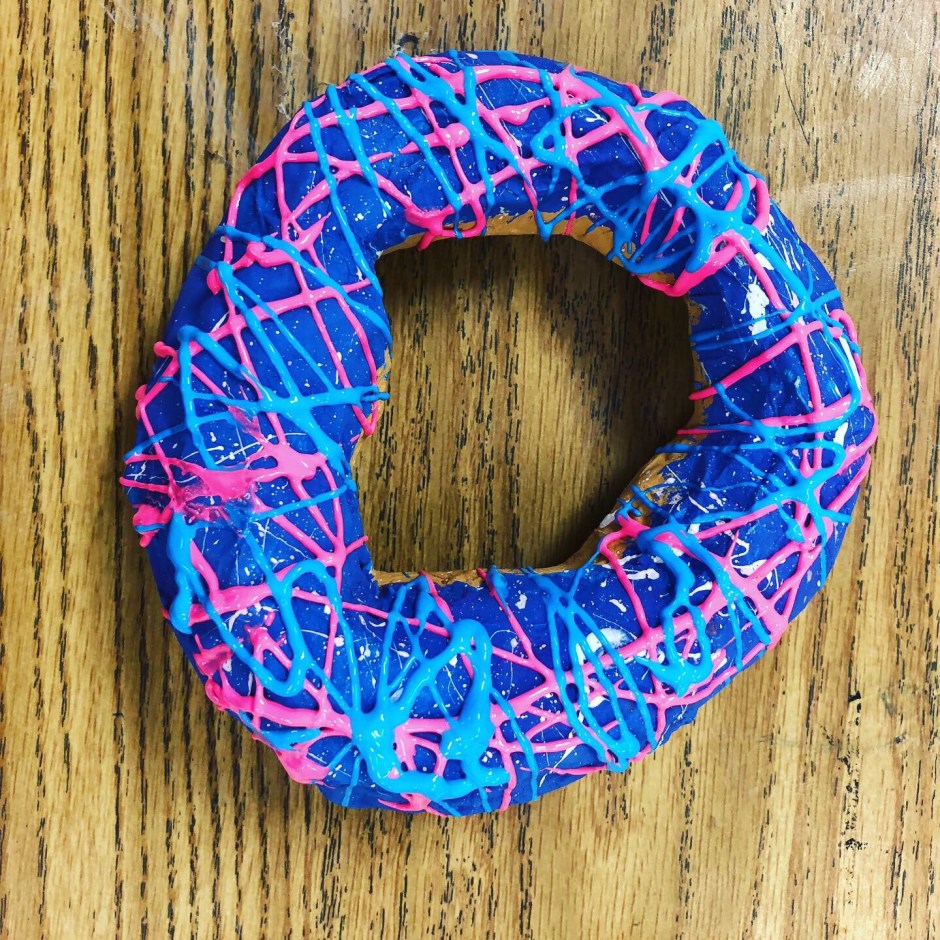
Class period 5: I demo’ed how to apply the puffy paint drizzle in a smooth narrow wavy line across the entire top surface of the painted donuts.
 Before clear polyurethane and sprinkles
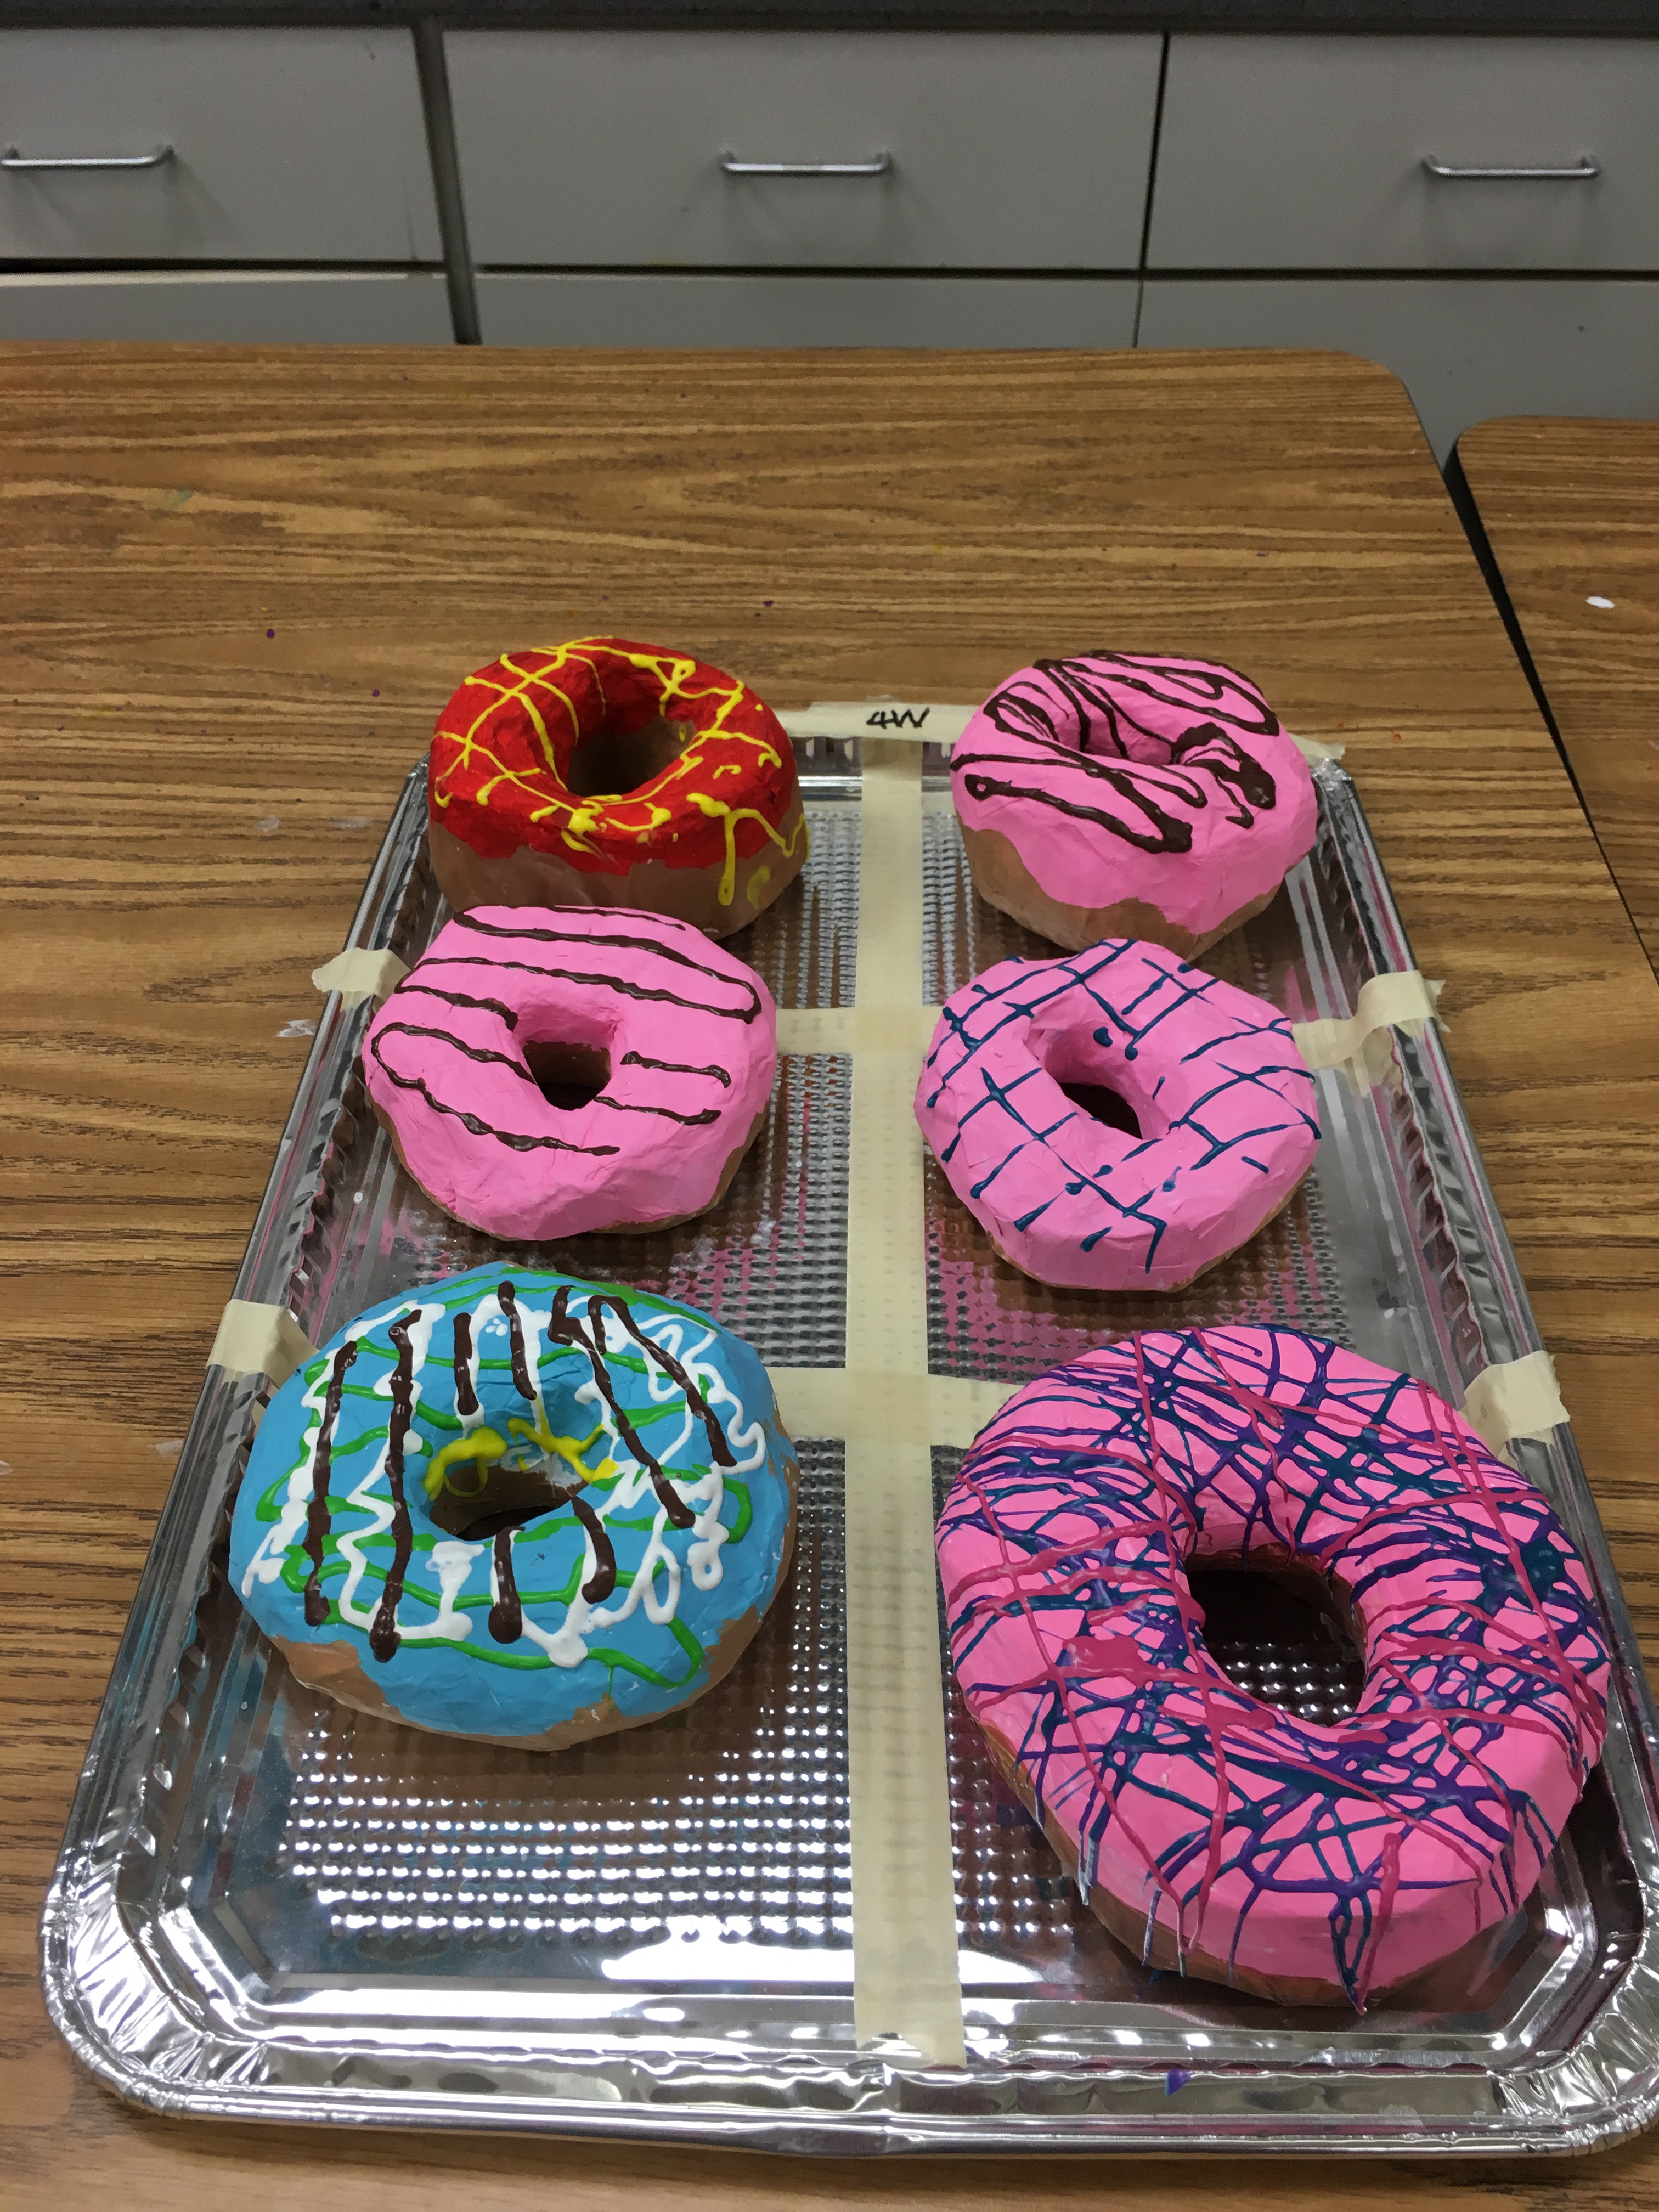 Before clear polyurethane and sprinkles

The donut painting only took at most half of our class period, so we created ads for our donuts during the 2nd half of both painting days and the puffy paint day. Our artists thought about and discussed how to advertise their donuts in print. We discussed font sizes and colors that a graphic designer would use most successfully. We brainstormed establishing donut prices like an independent pastry chef. We talked about sharing with potential customers on our ads why our donuts were worth the prices we asked. Then each “small business owner” created his or her own ads while the paint dried both days.
Another year, we created digital iPad donut drawing with the Drawing Carl app.
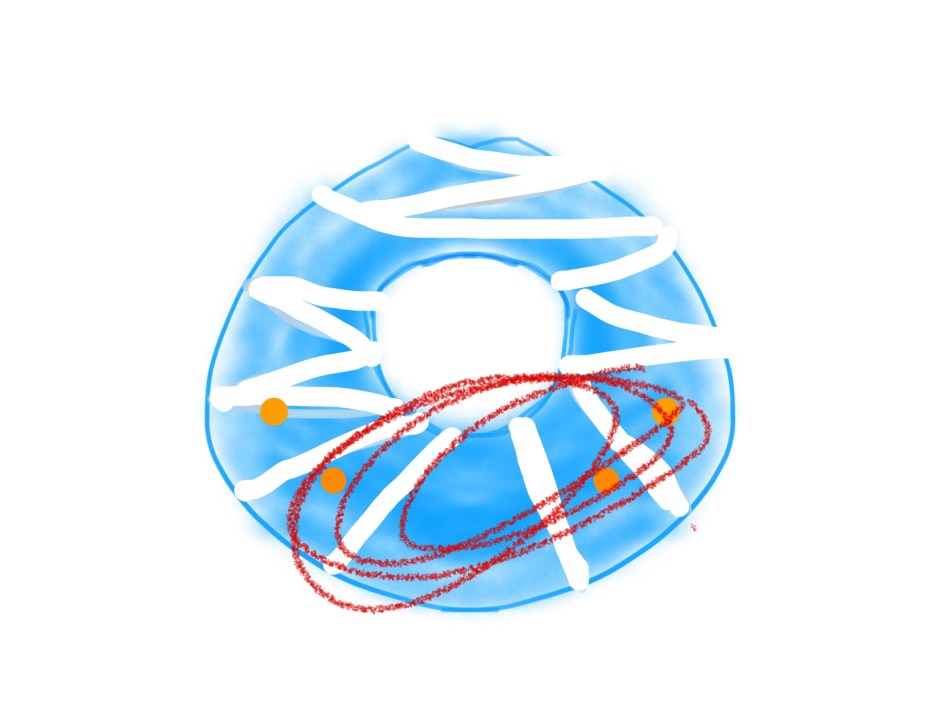
Pardon the scribble scrabble on the donut drawing
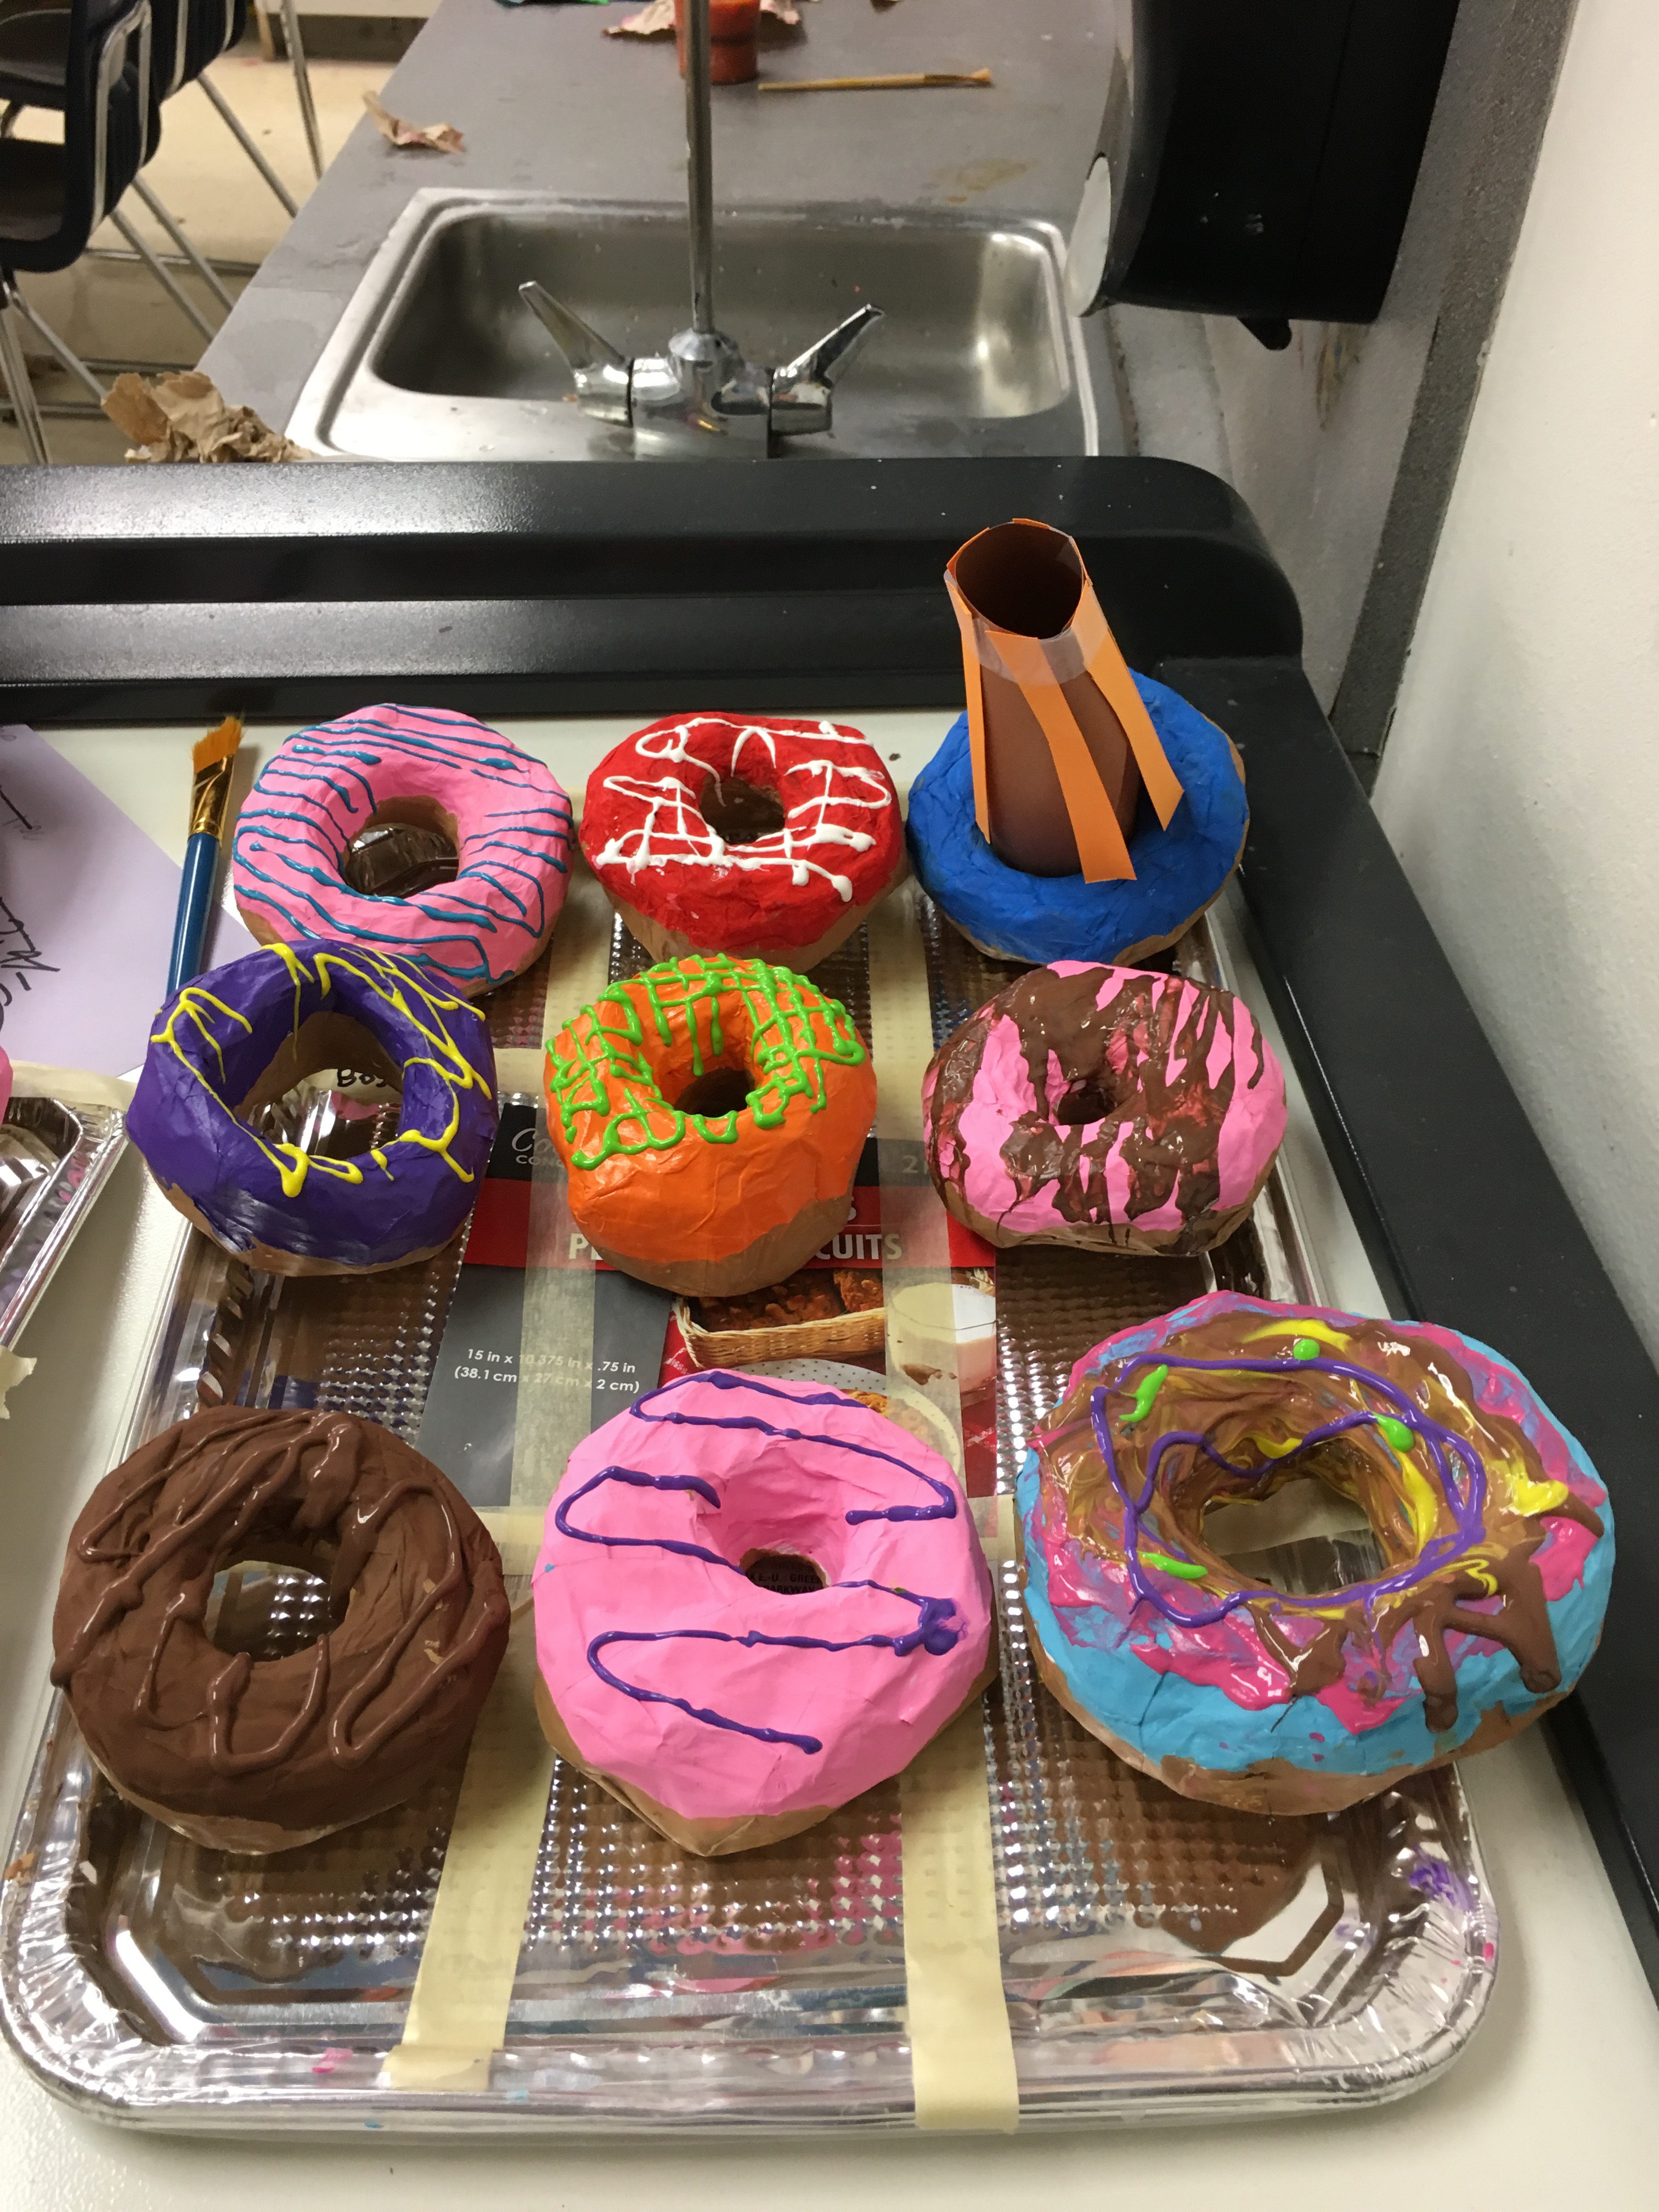
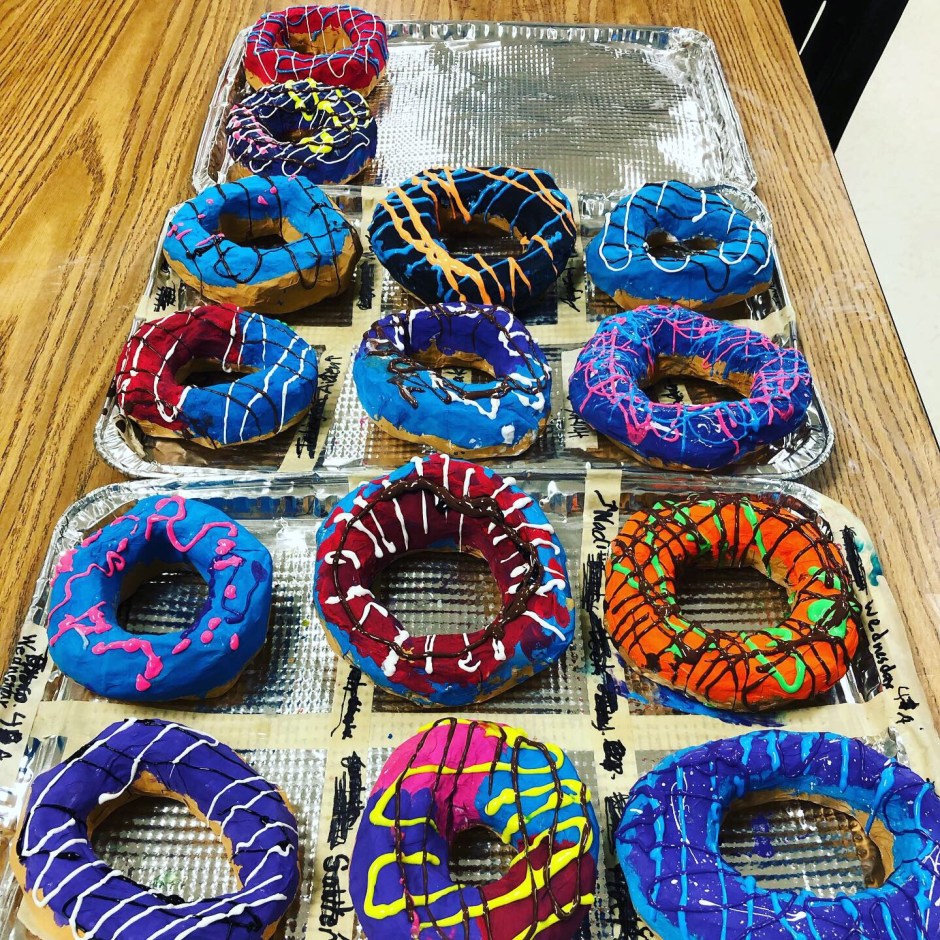
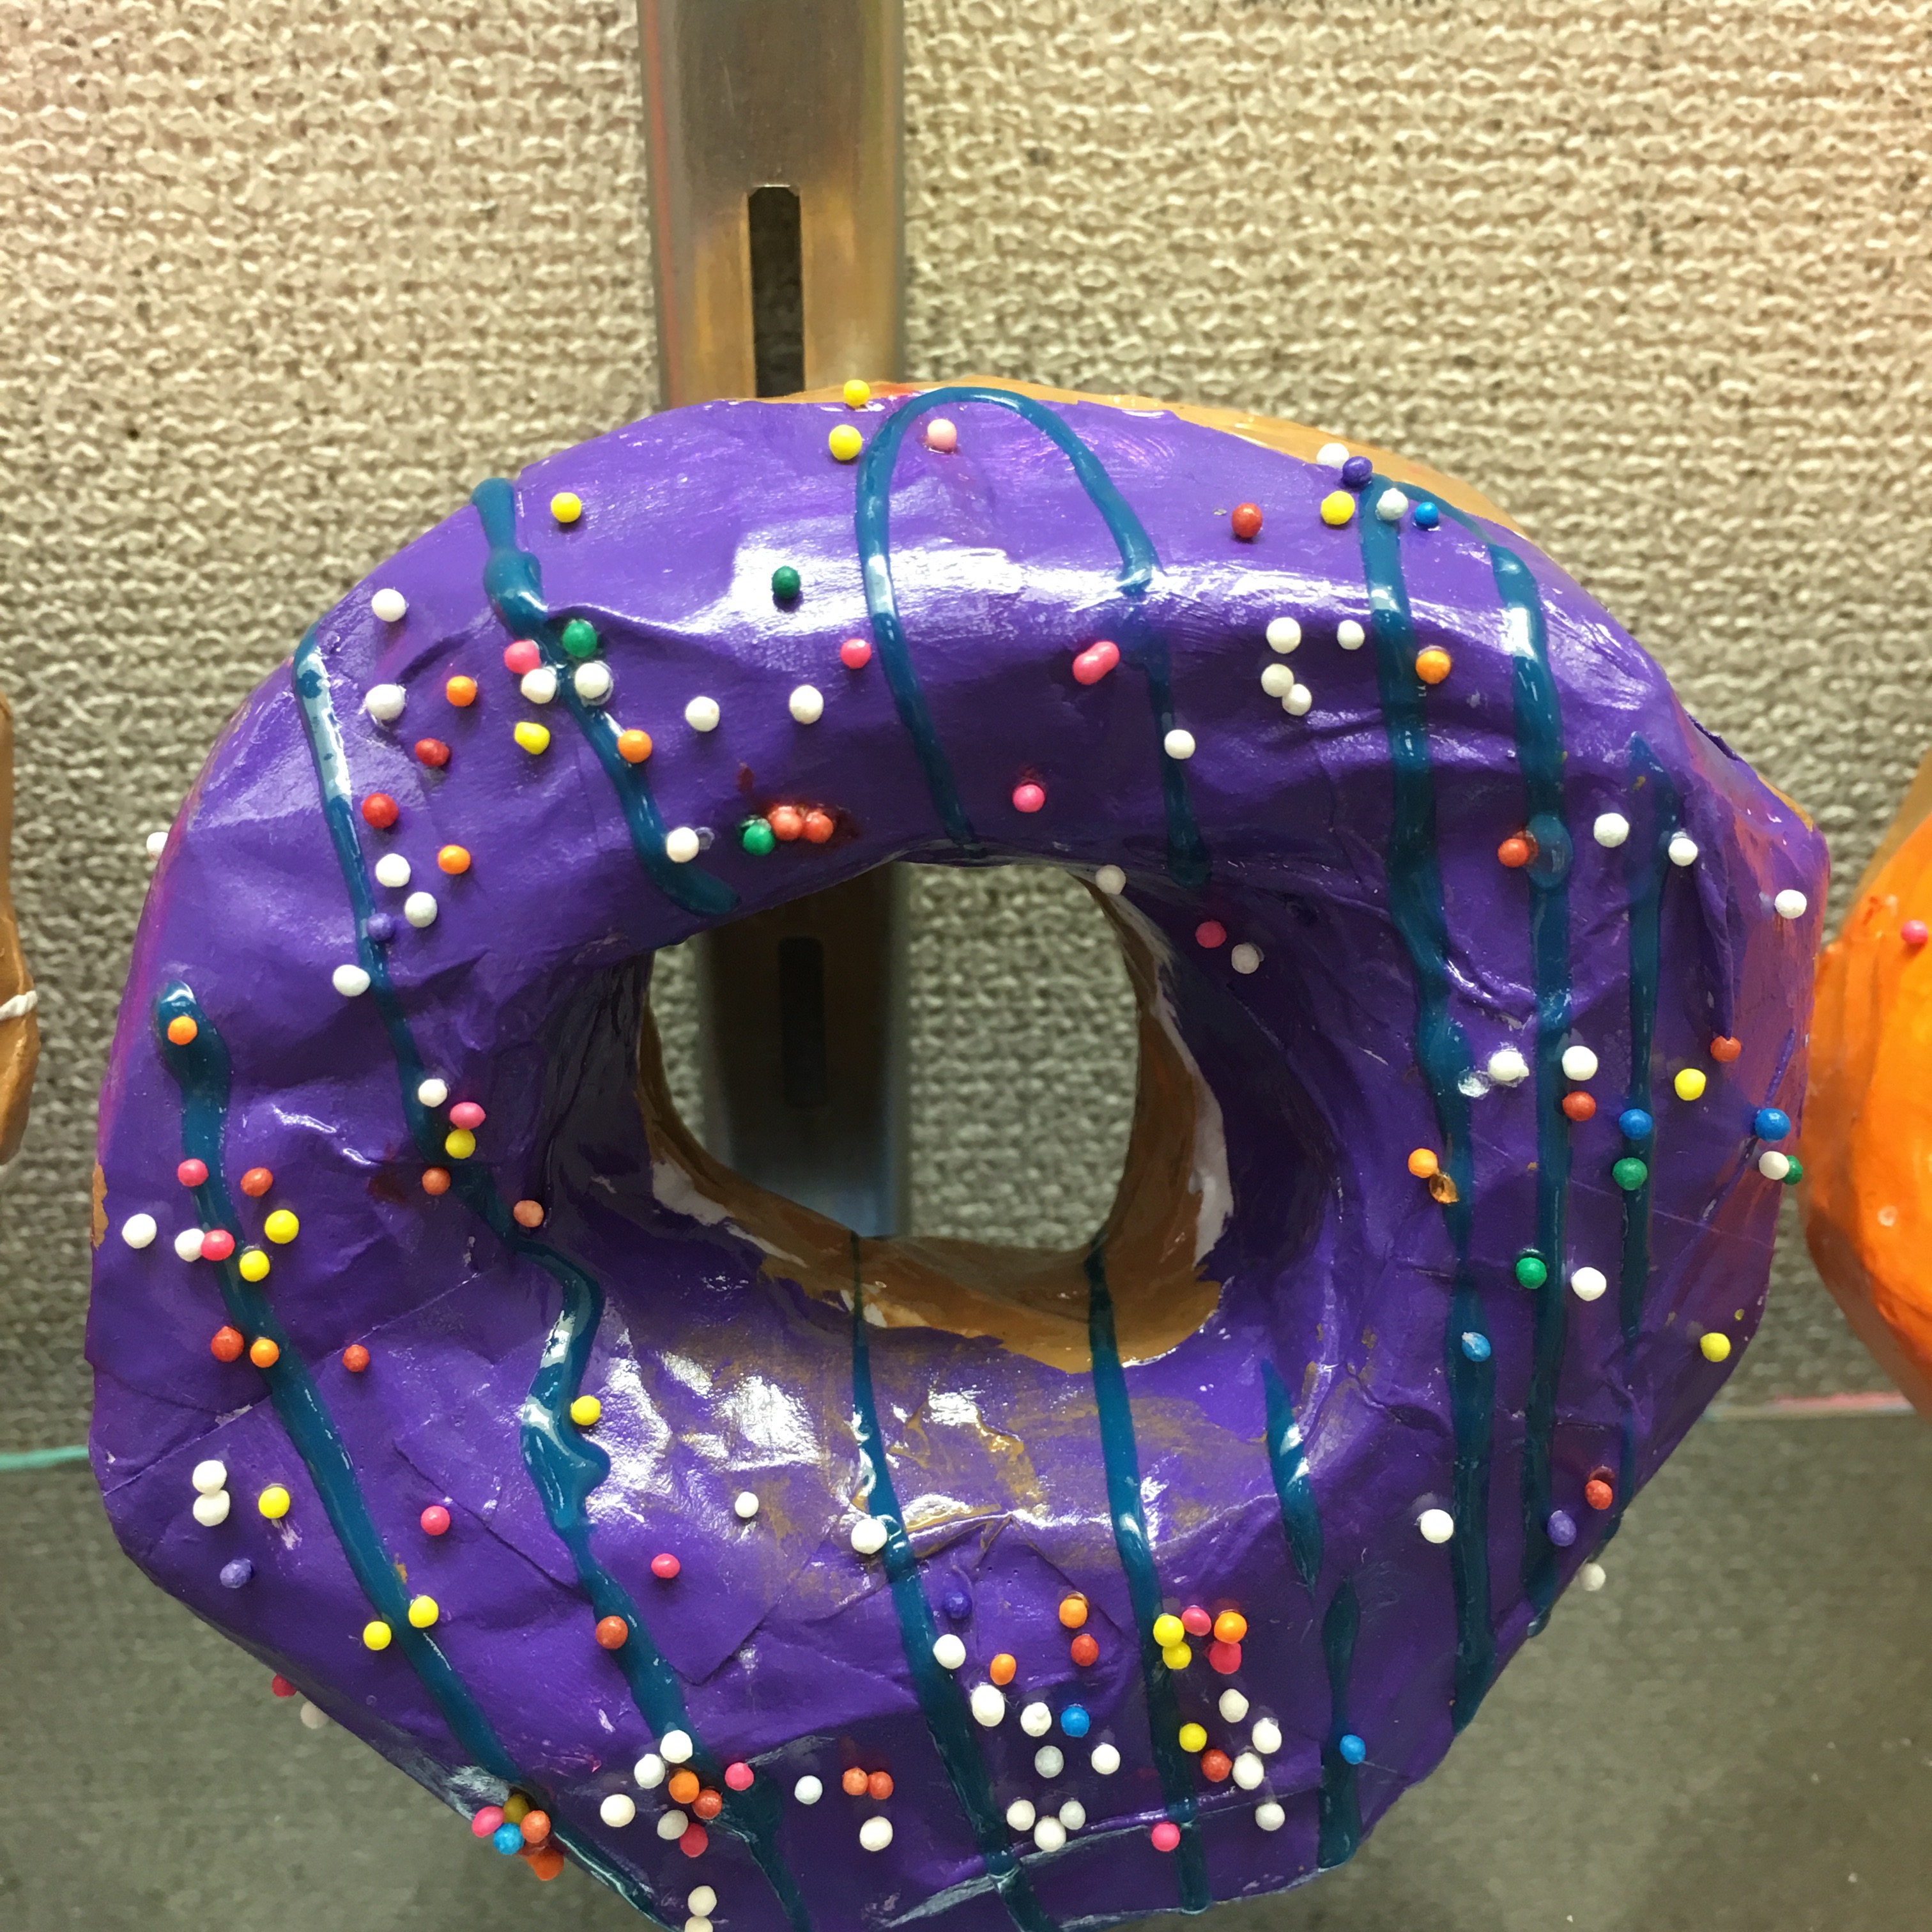
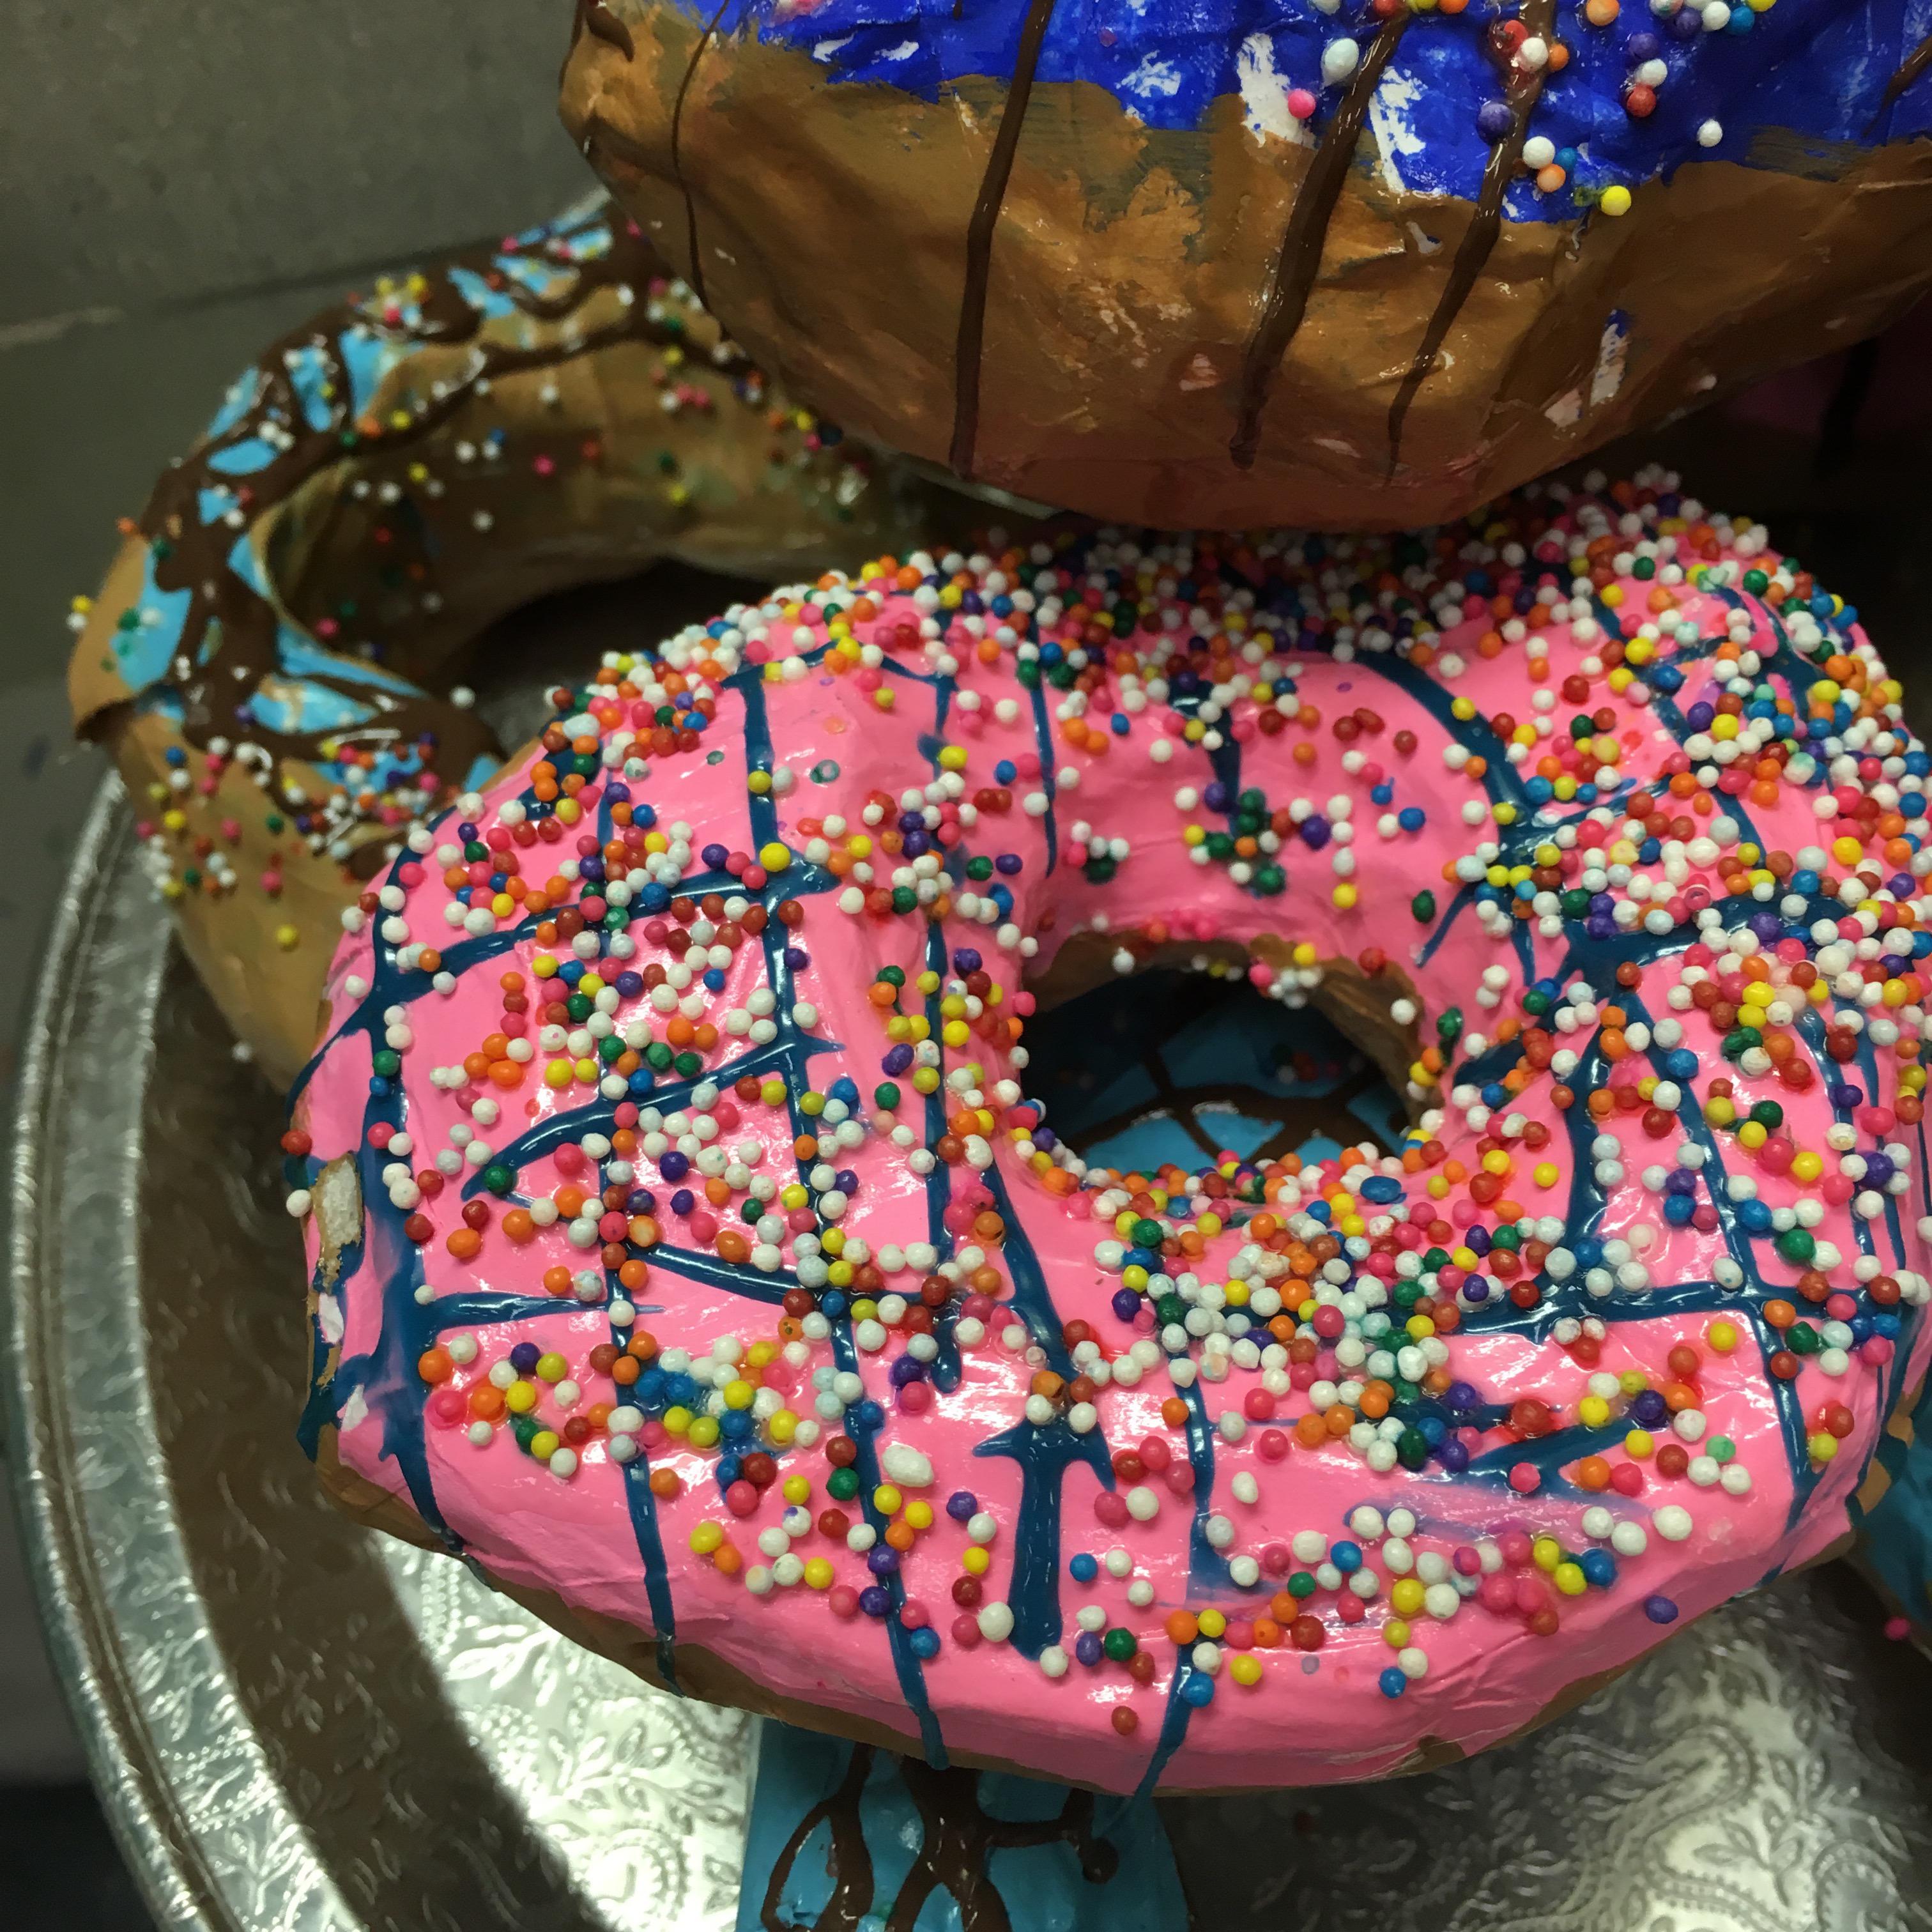
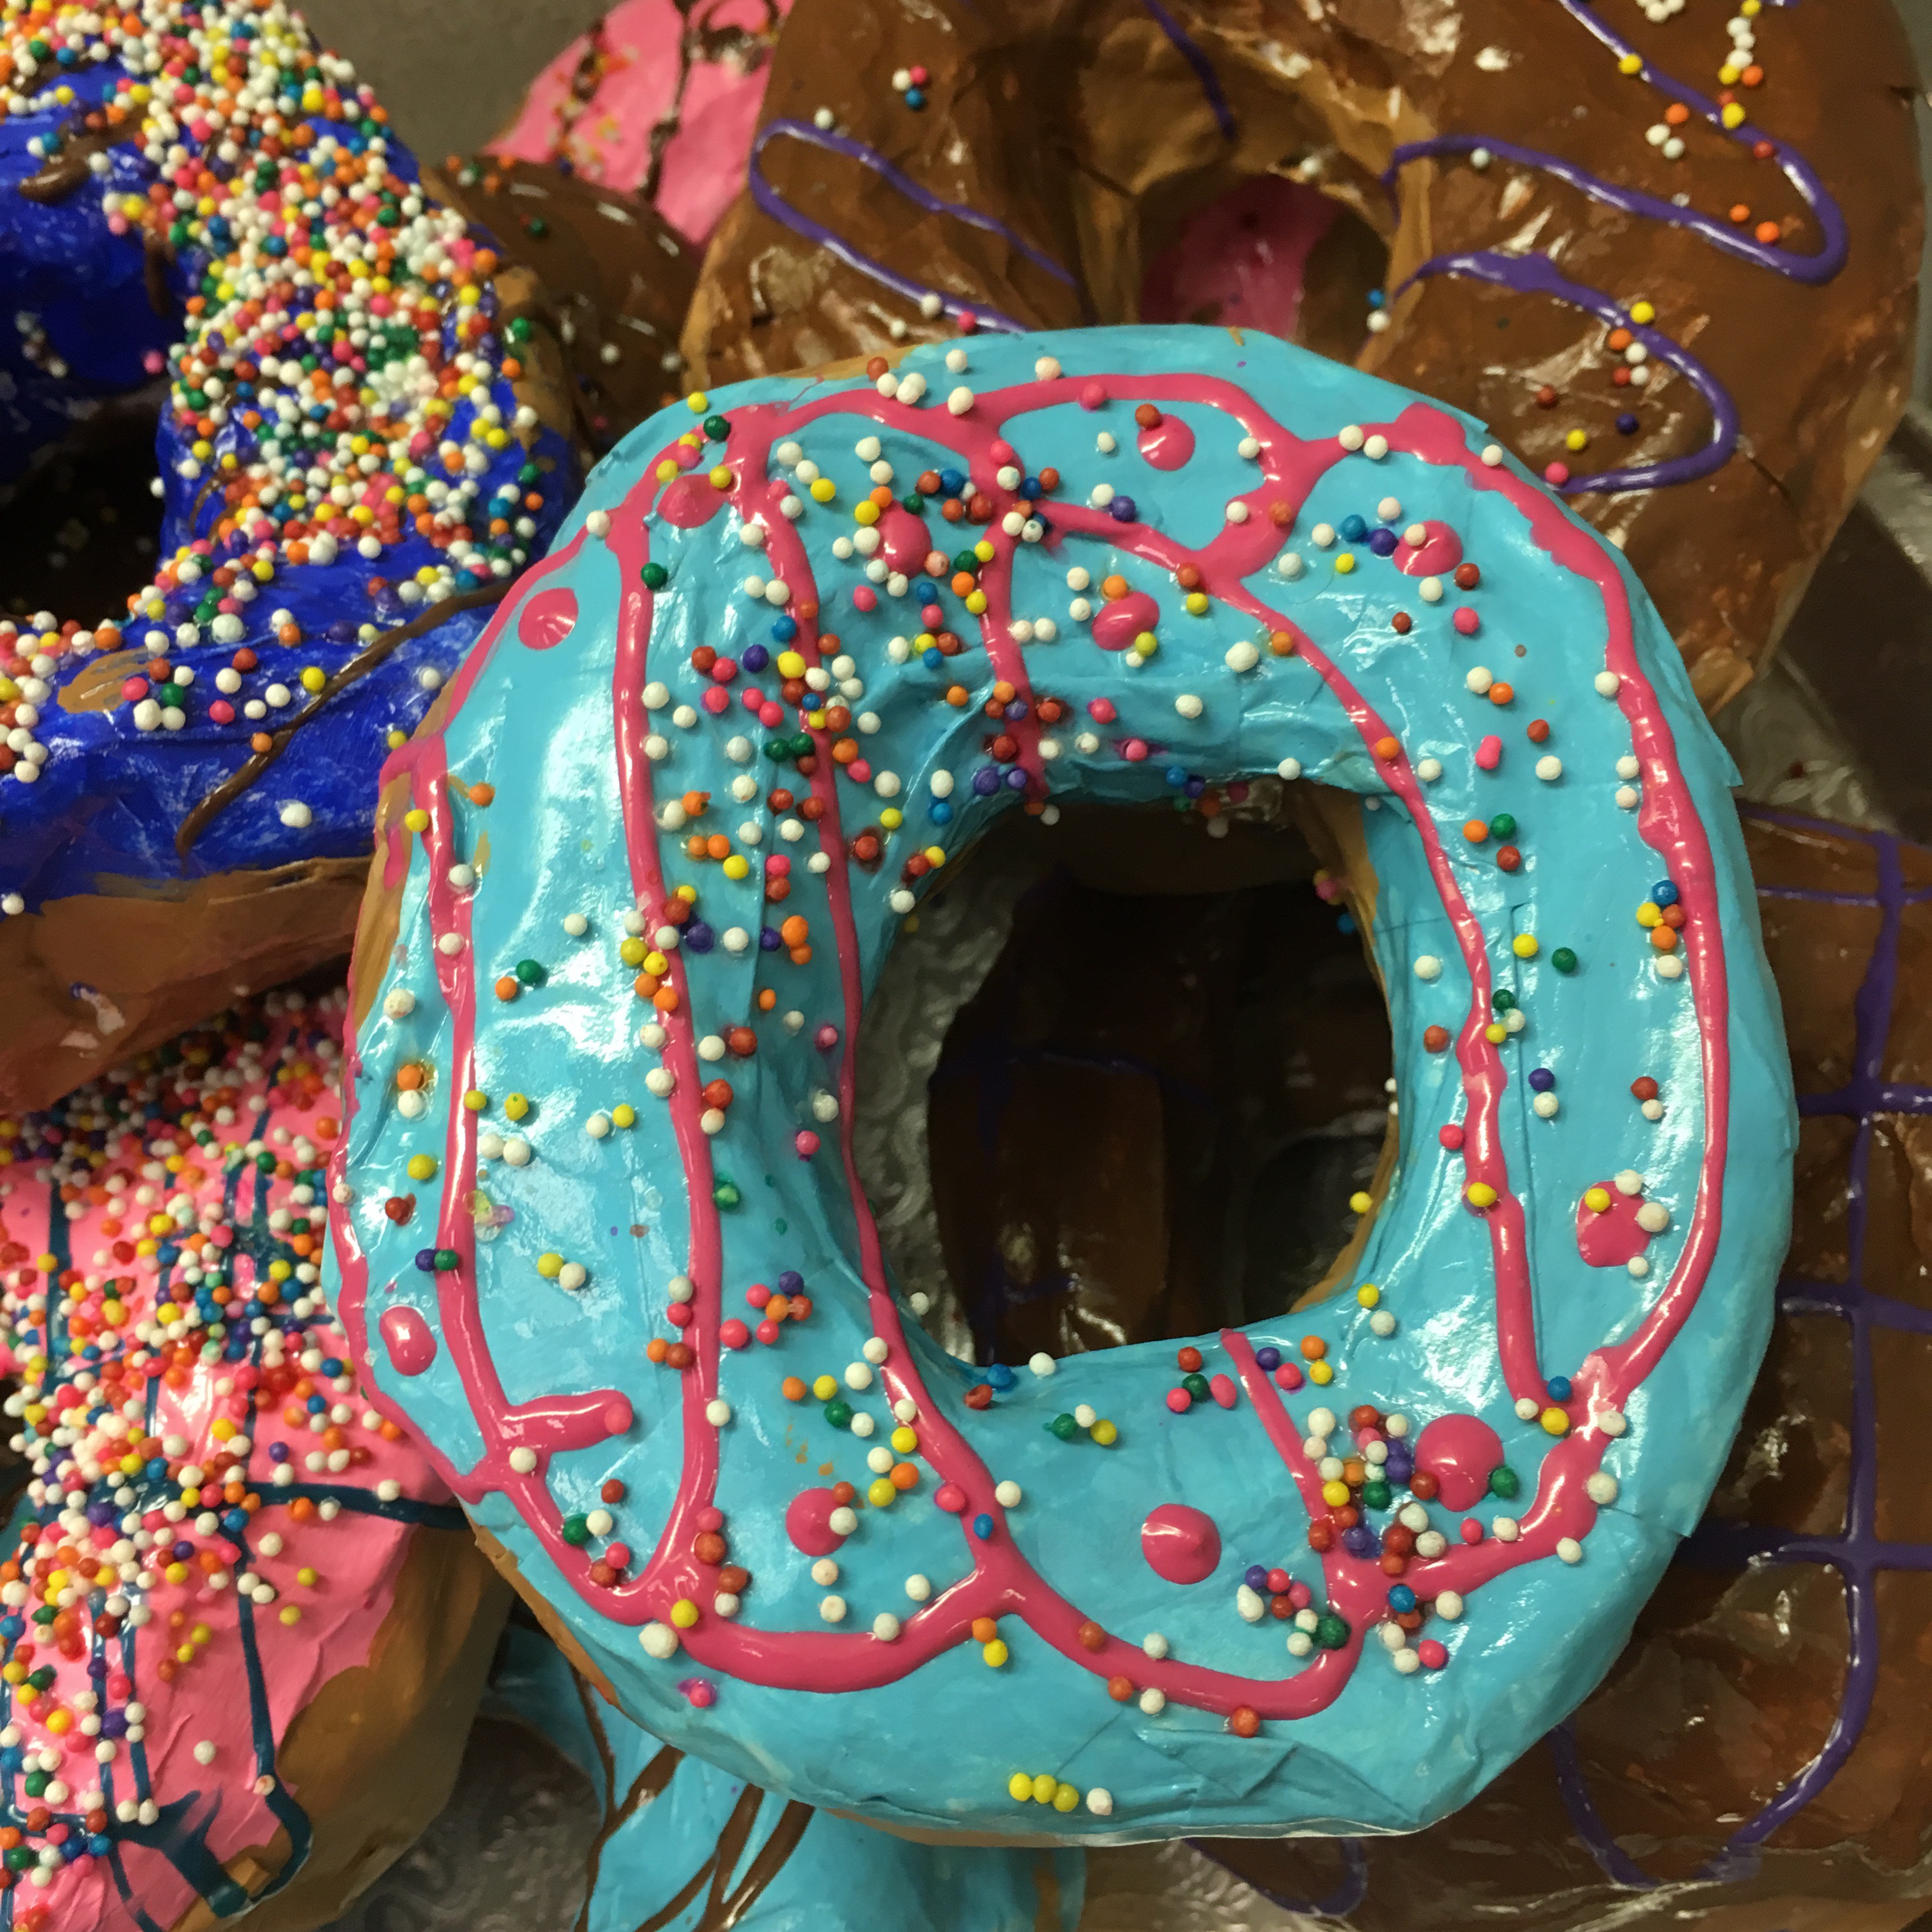
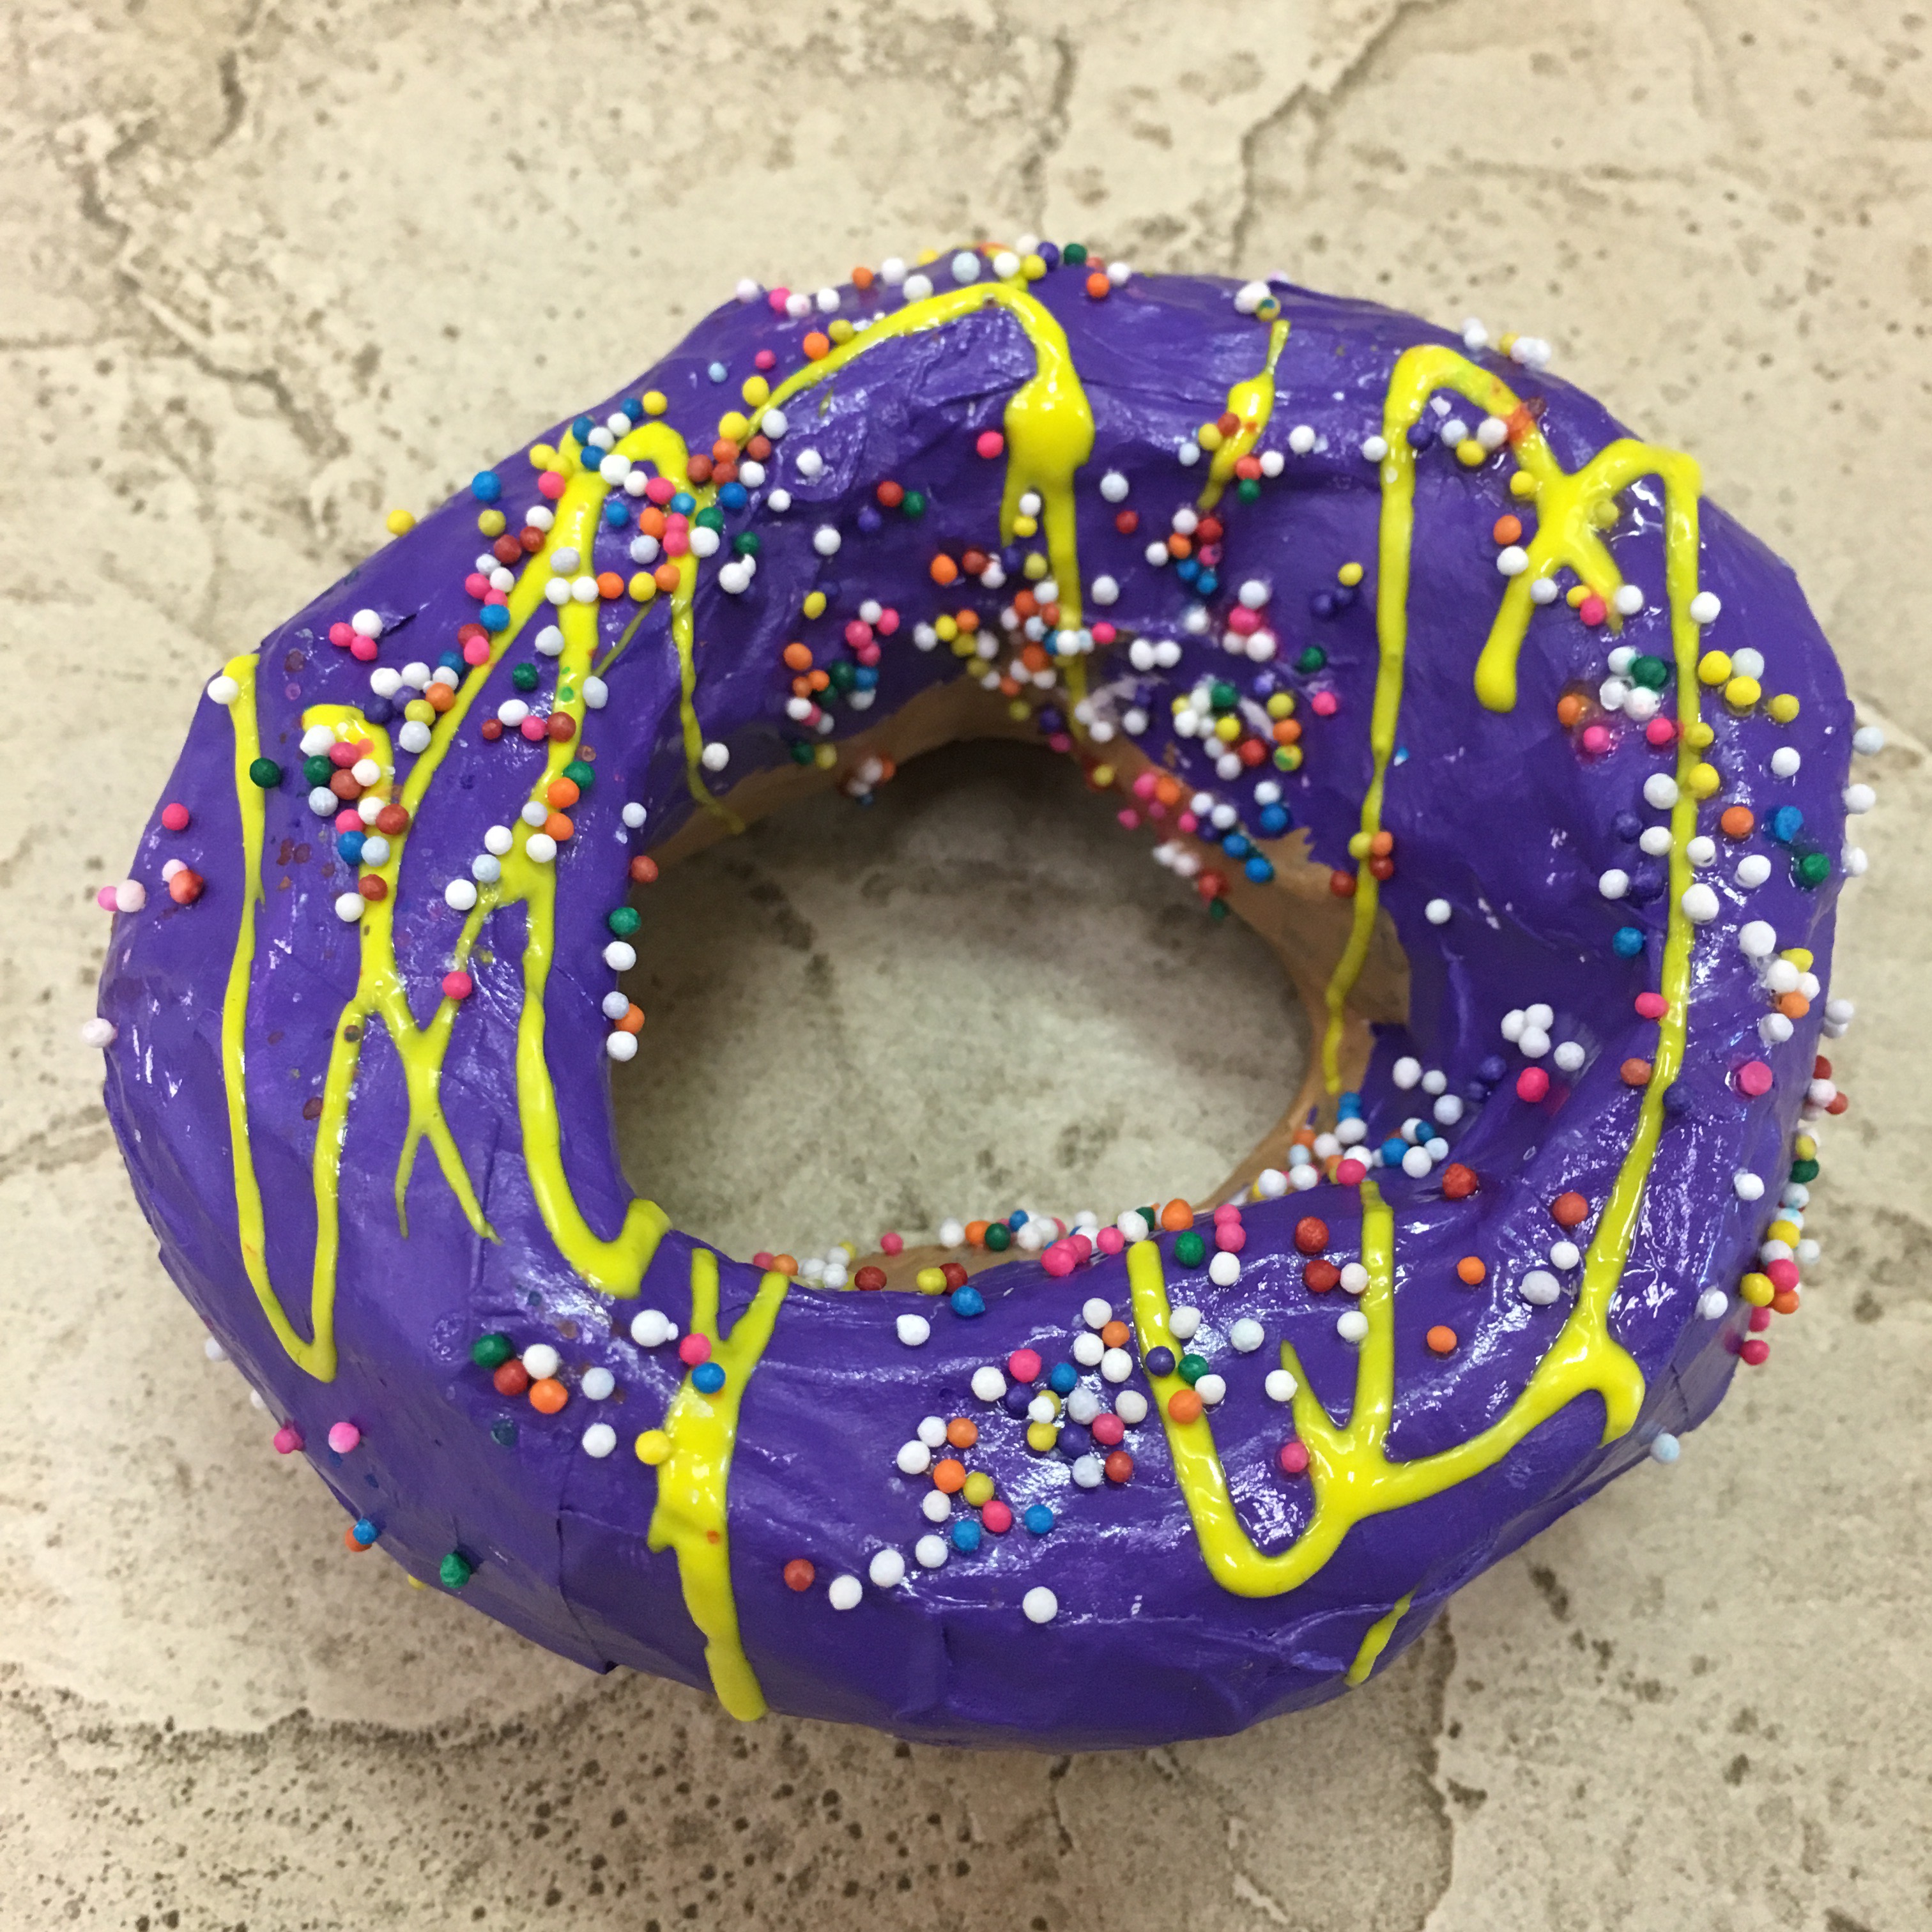
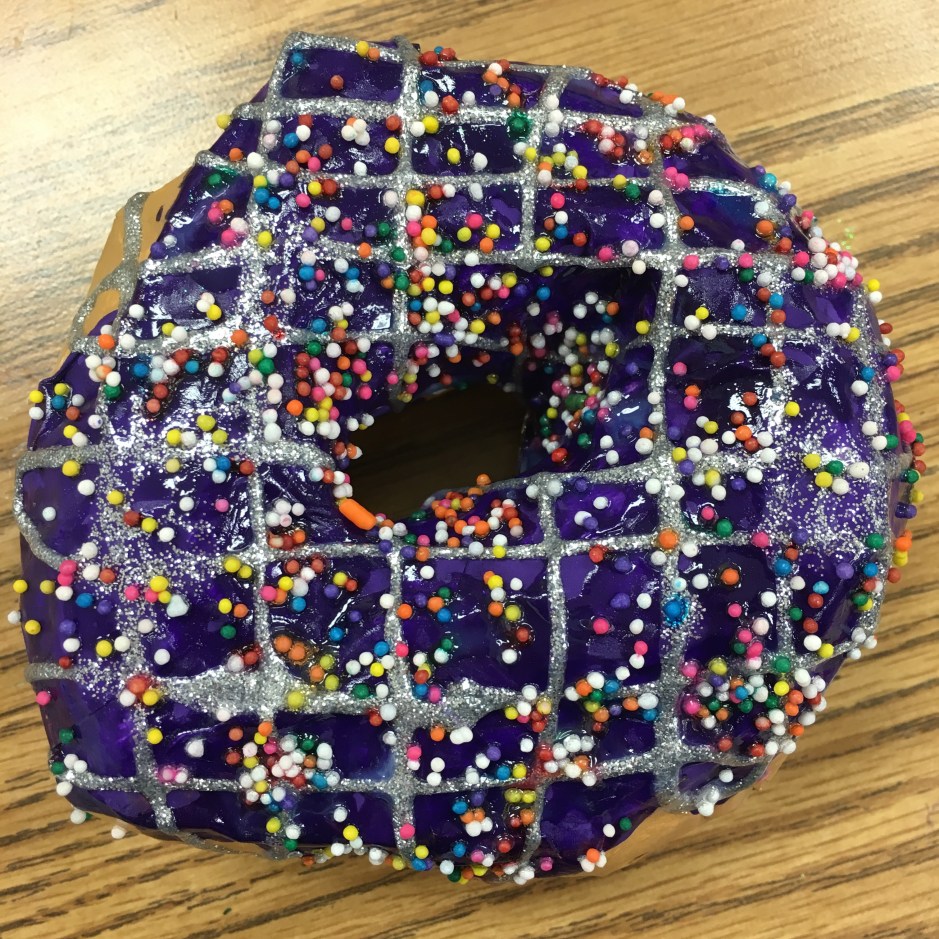
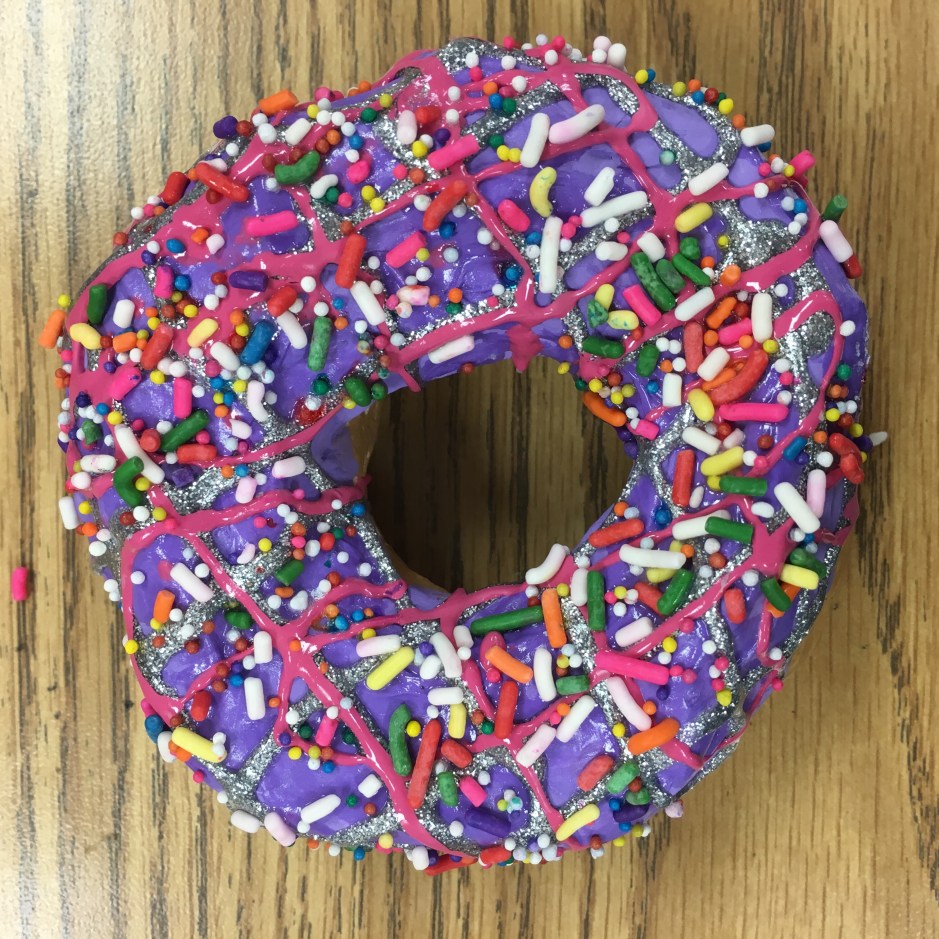
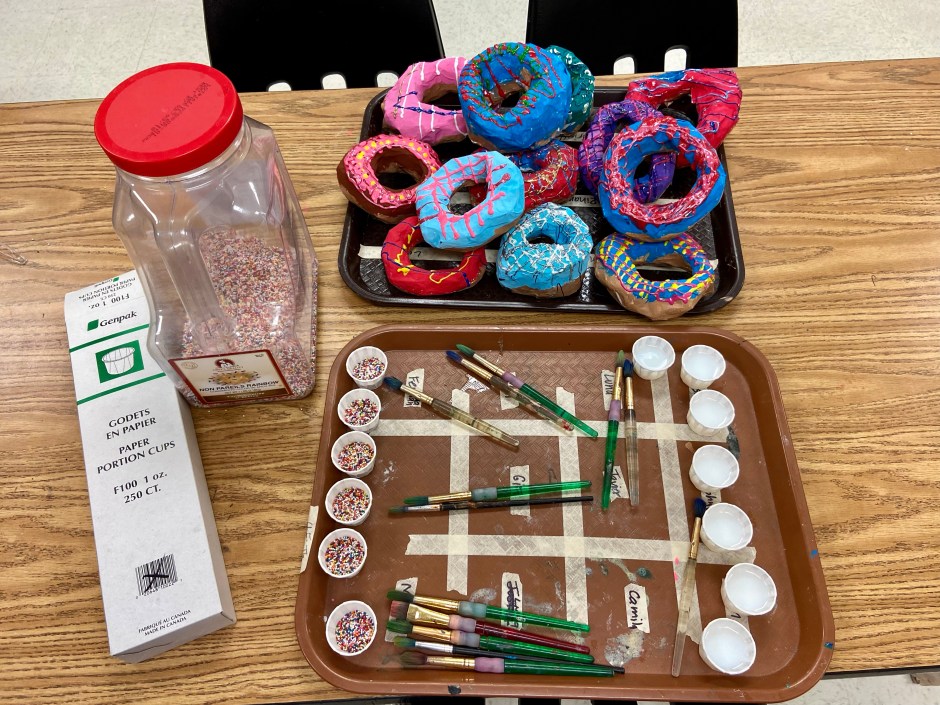
Class period 6: (the last day) – We painted clear shiny fence stain protector (polyurethane) on our painted donuts. I demonstrated how to paint a rainbow-type stroke that starts inside the donut, curves across the top of the donut, then ends where the bottom of the donut begins. We talked about NOT painting the bottom of the donut since it would stick to our trays. Then we sprinkled just a very light dusting of sprinkles on our wet shiny clear coated donuts.
We study Wayne Thiebaud in 2nd grade when we paint a layered cake painting, so it was fun to ask my students 2 years later if they remembered him. Most did but couldn’t recall his name, but a few even easily mentioned his name. I was super-impressed with my smarty pants artists and their awesome memories!
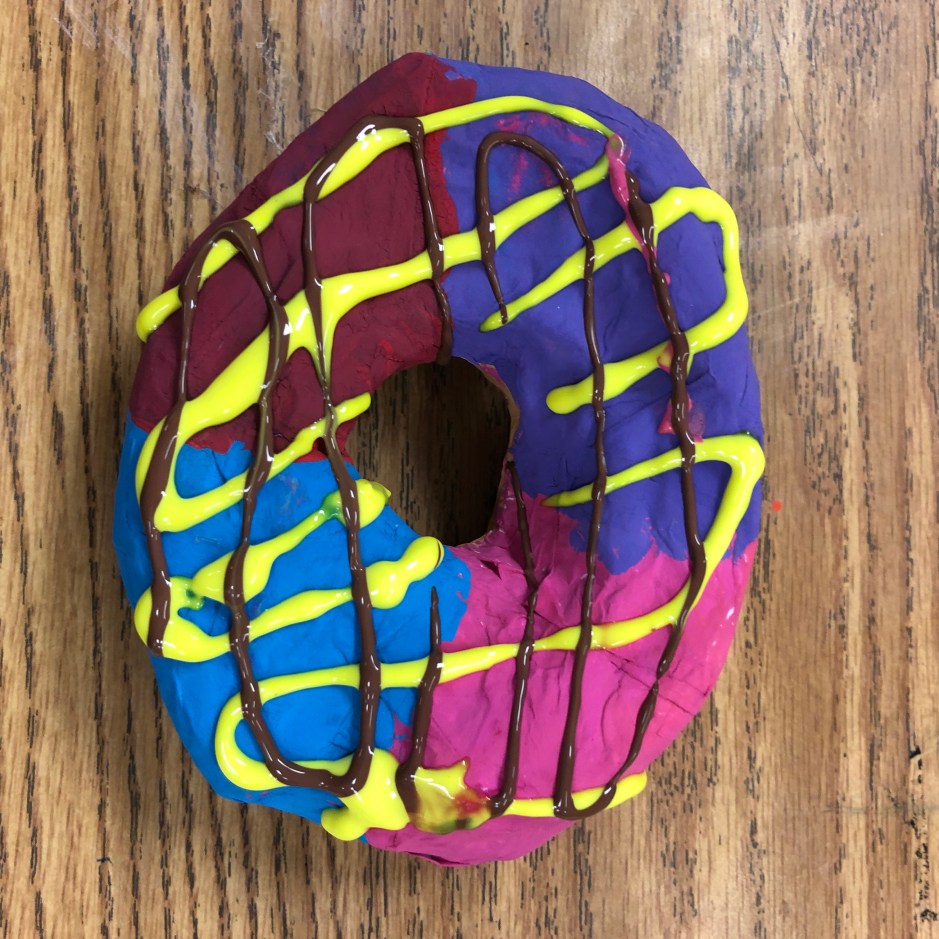
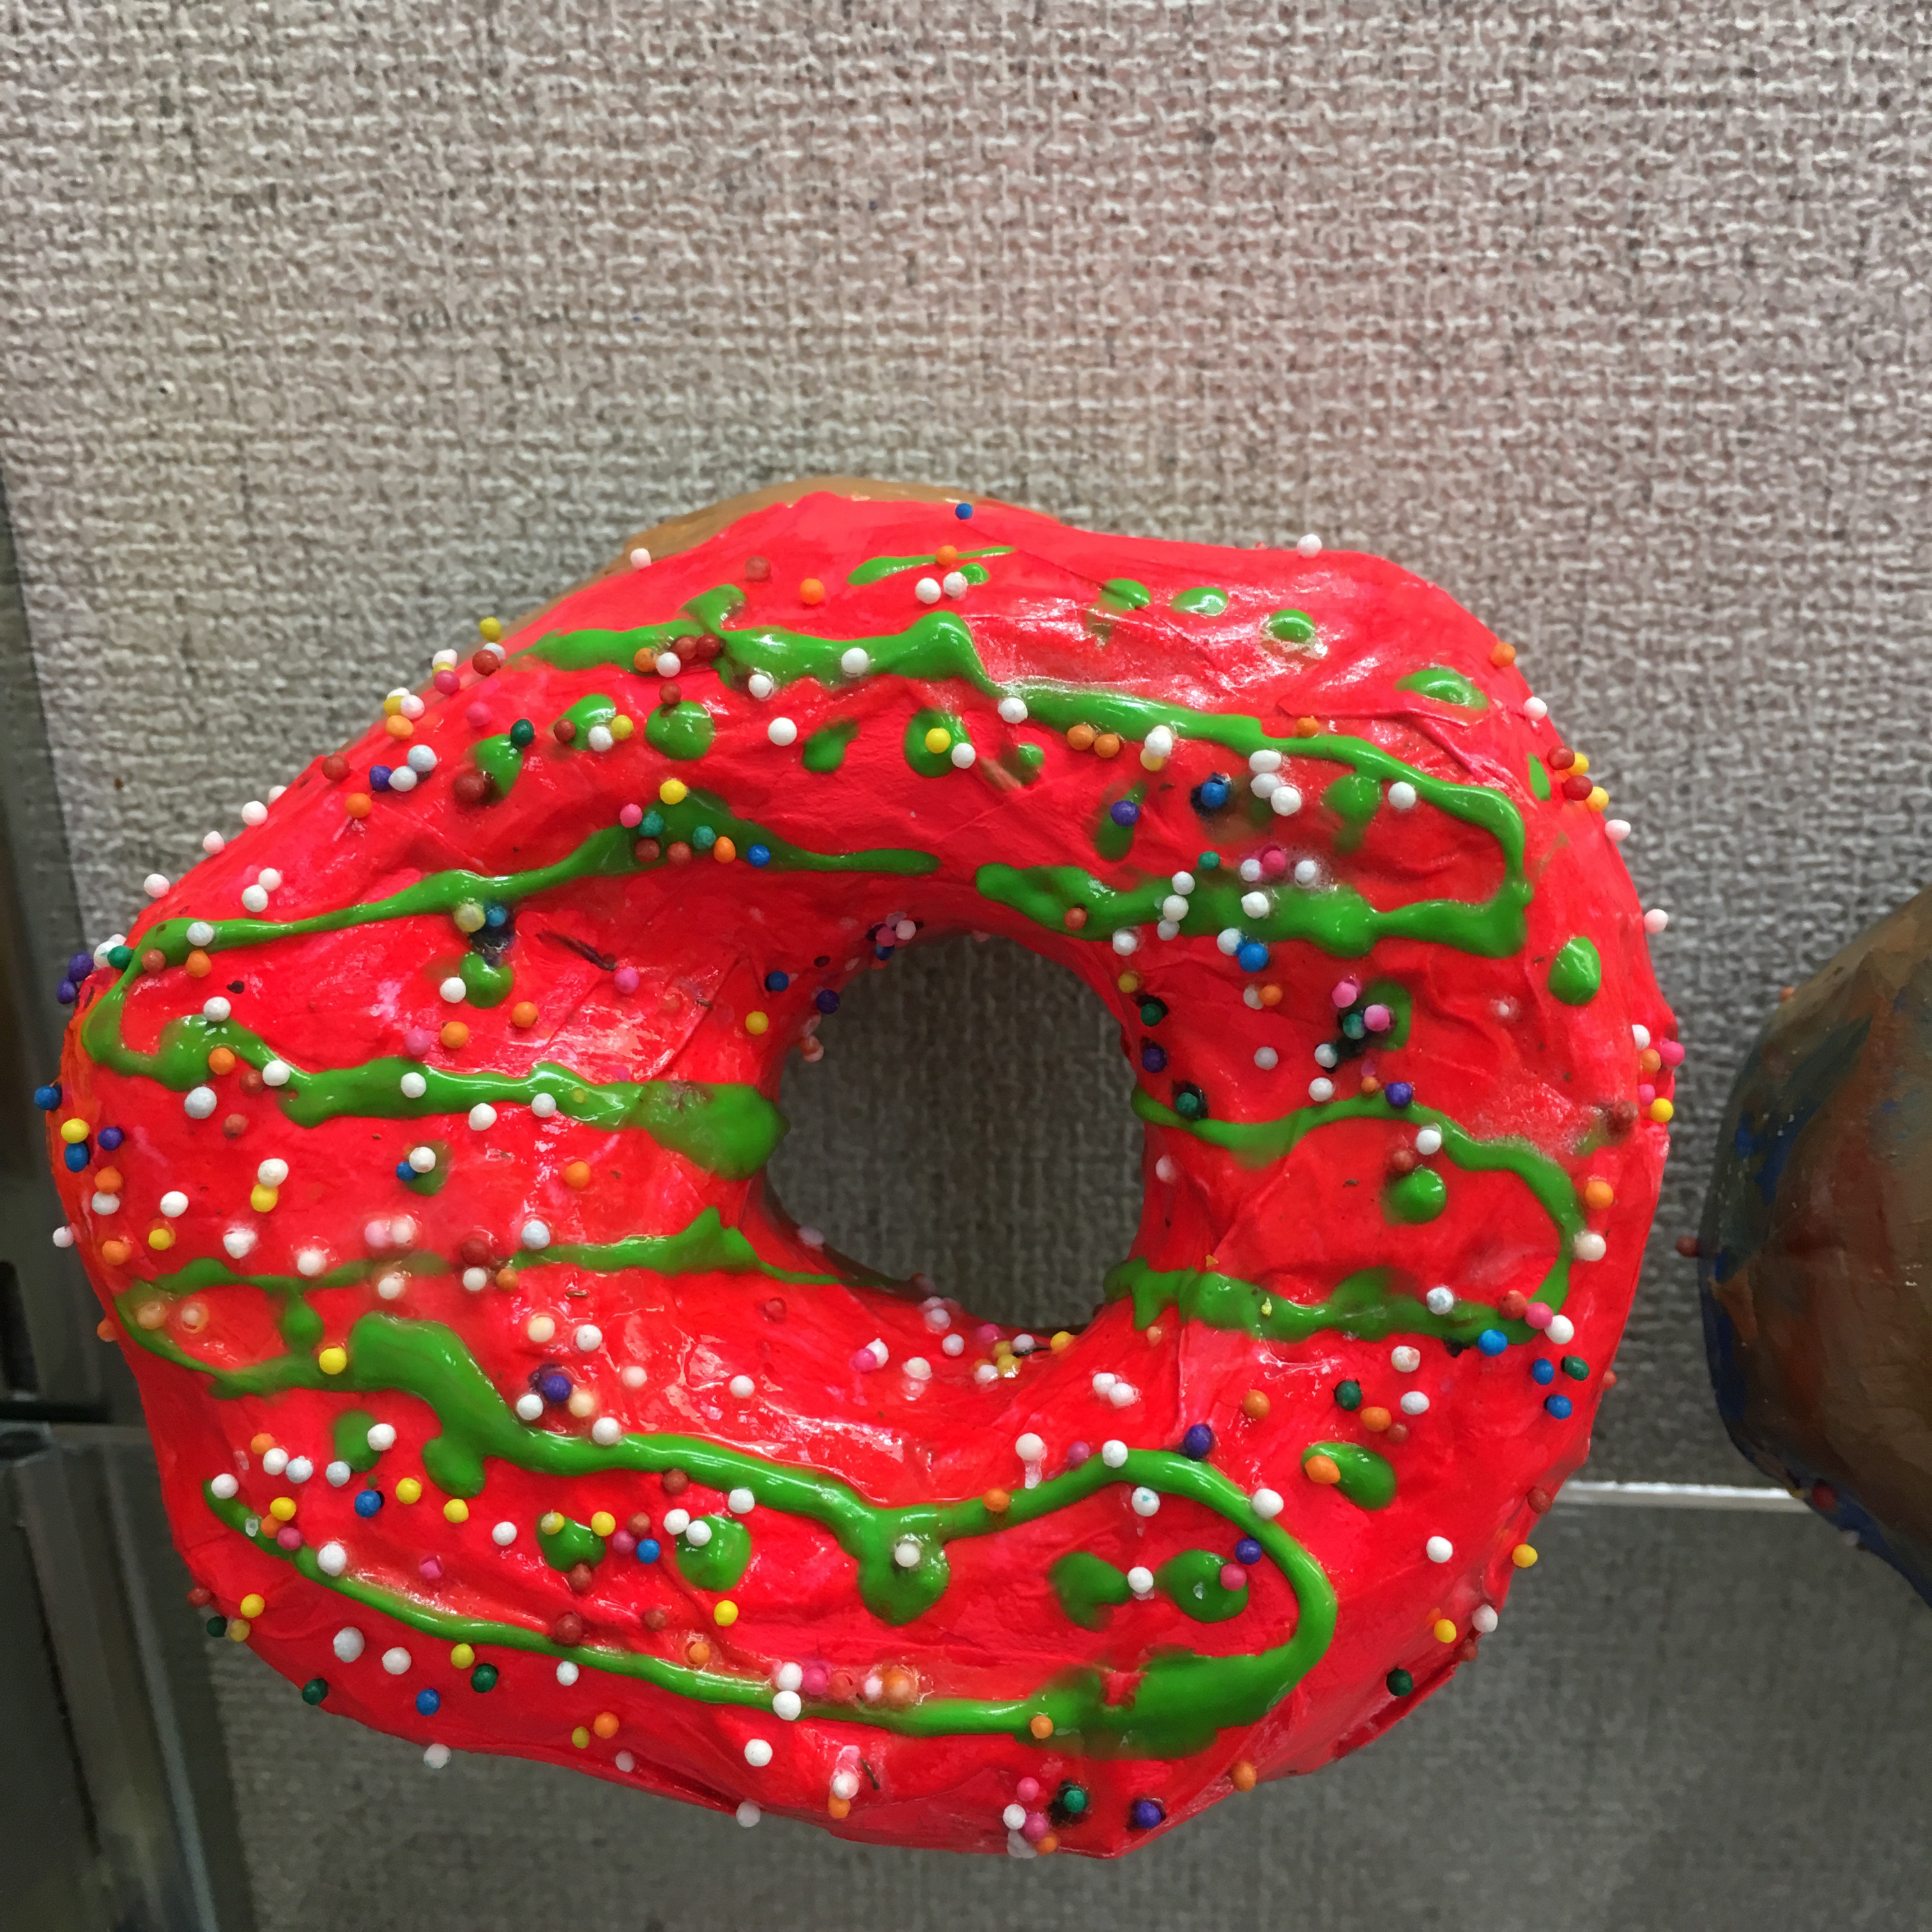
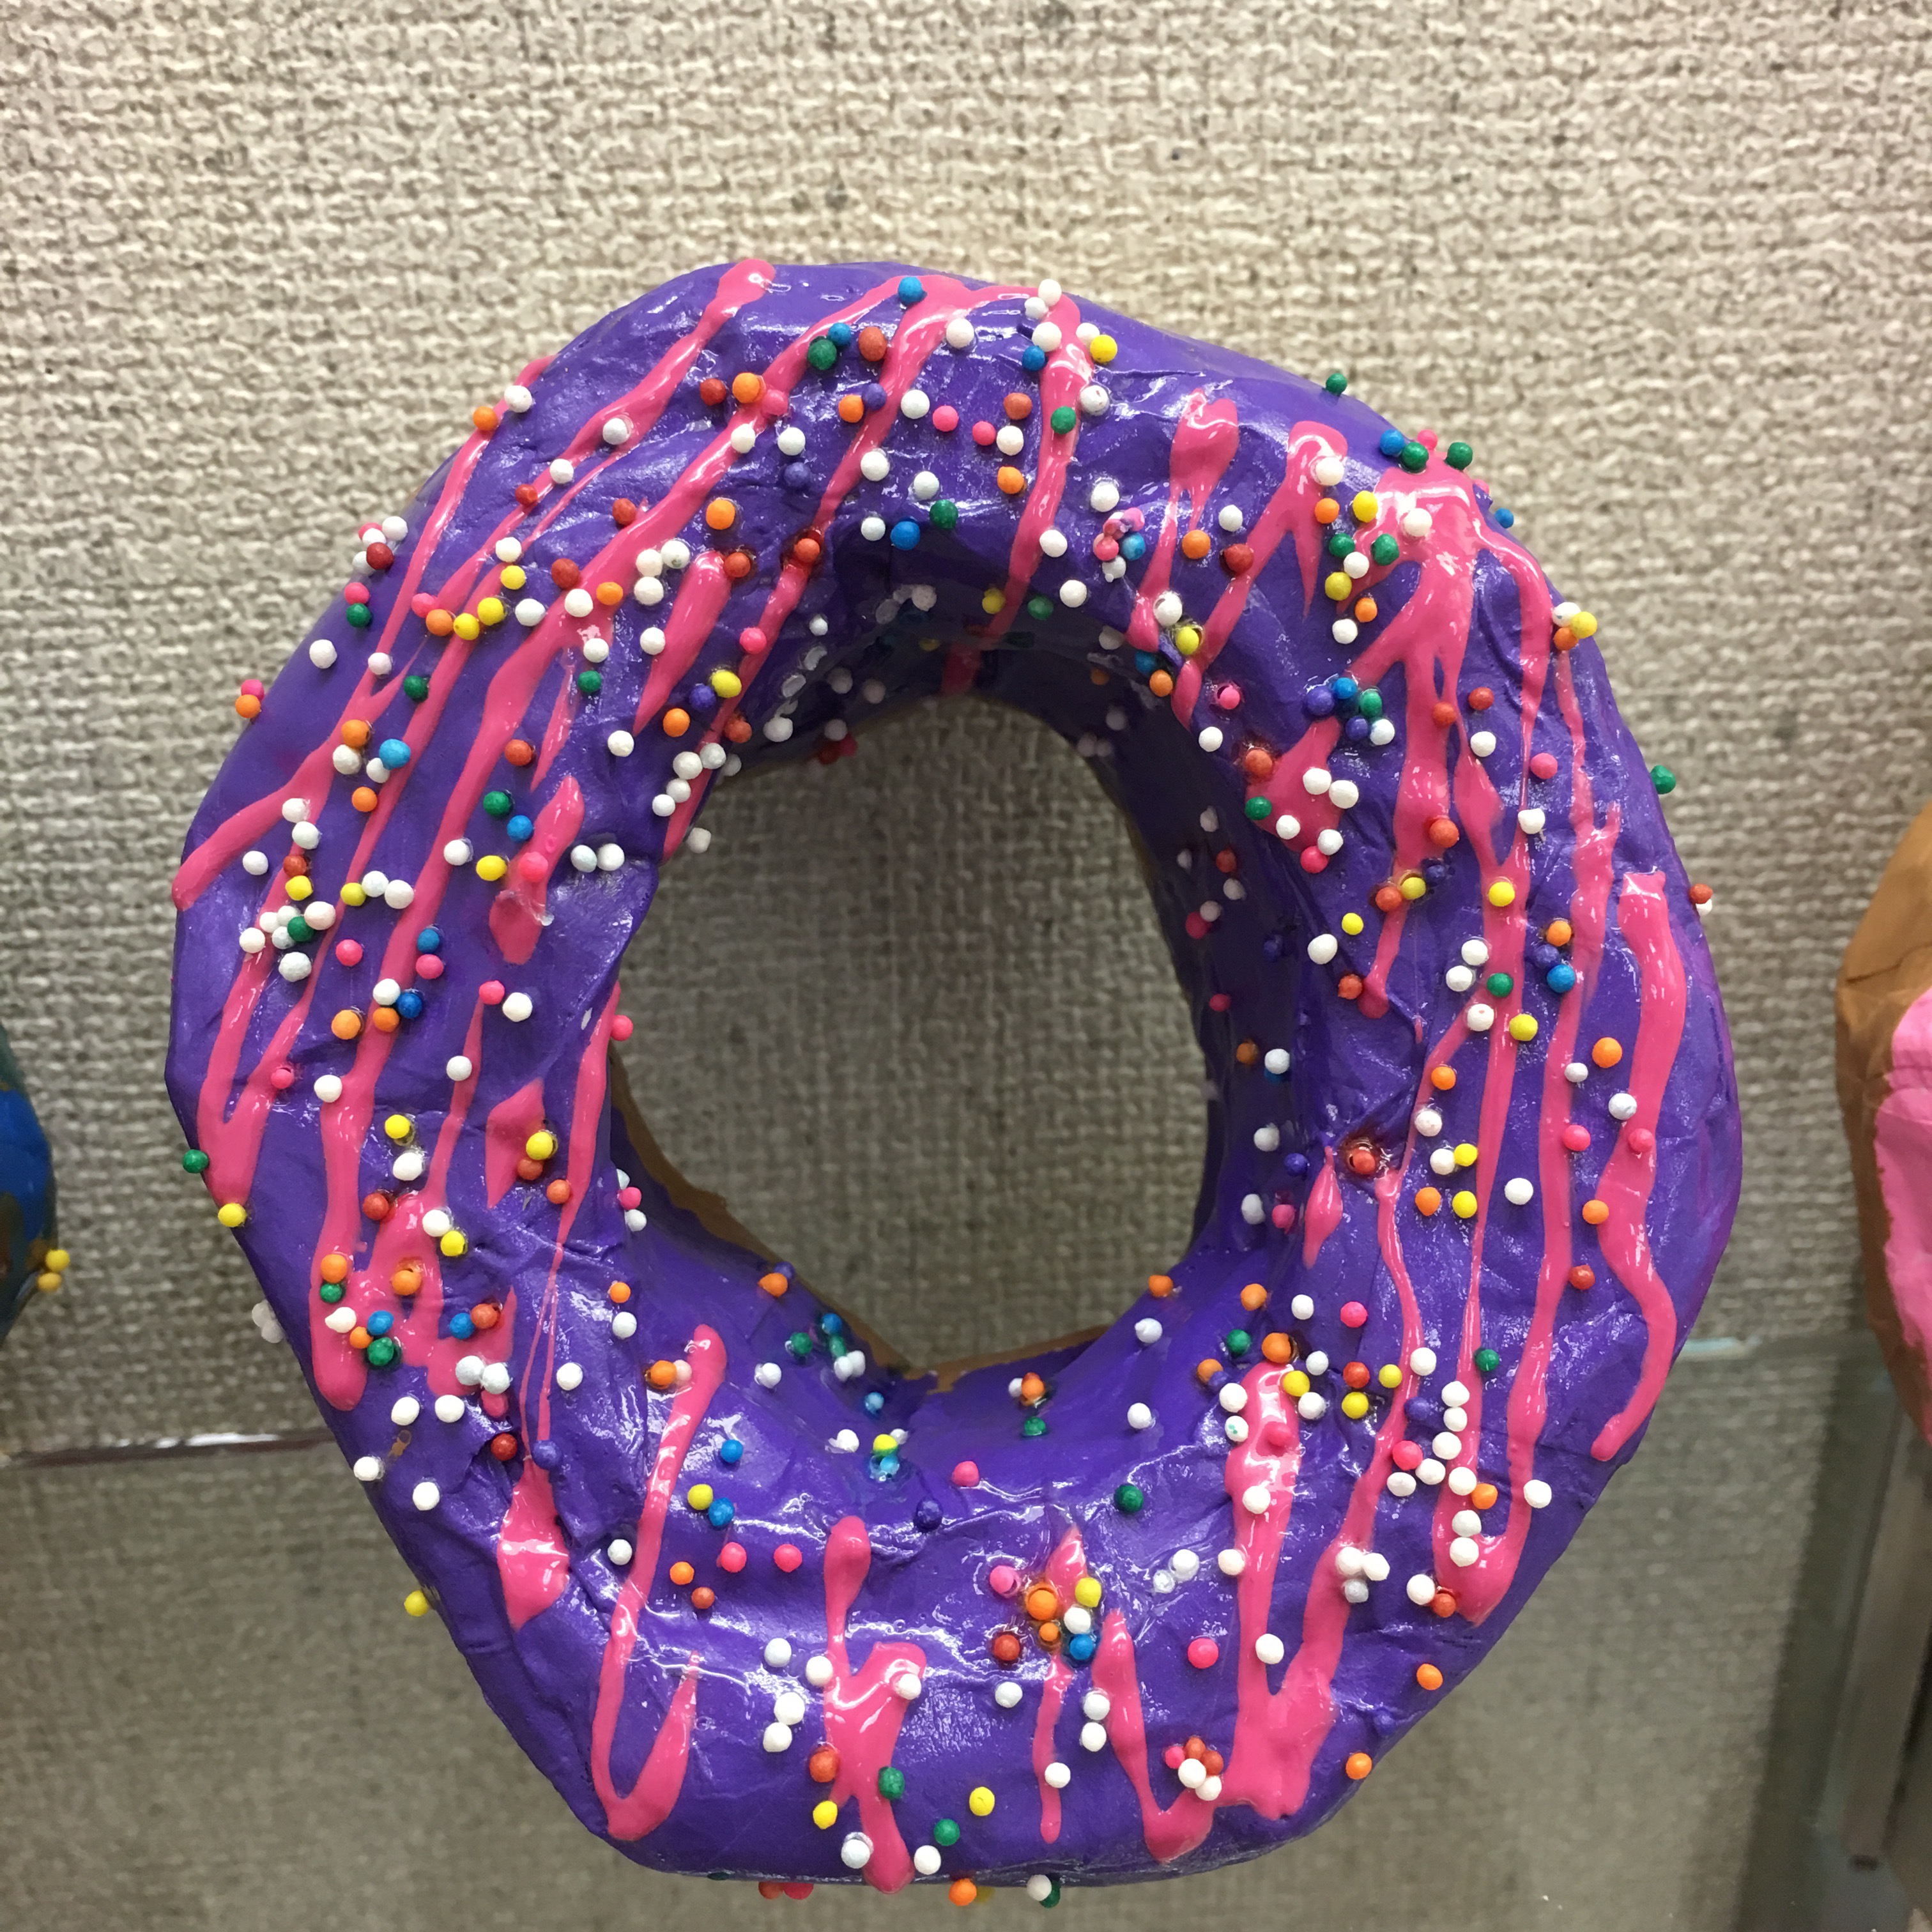
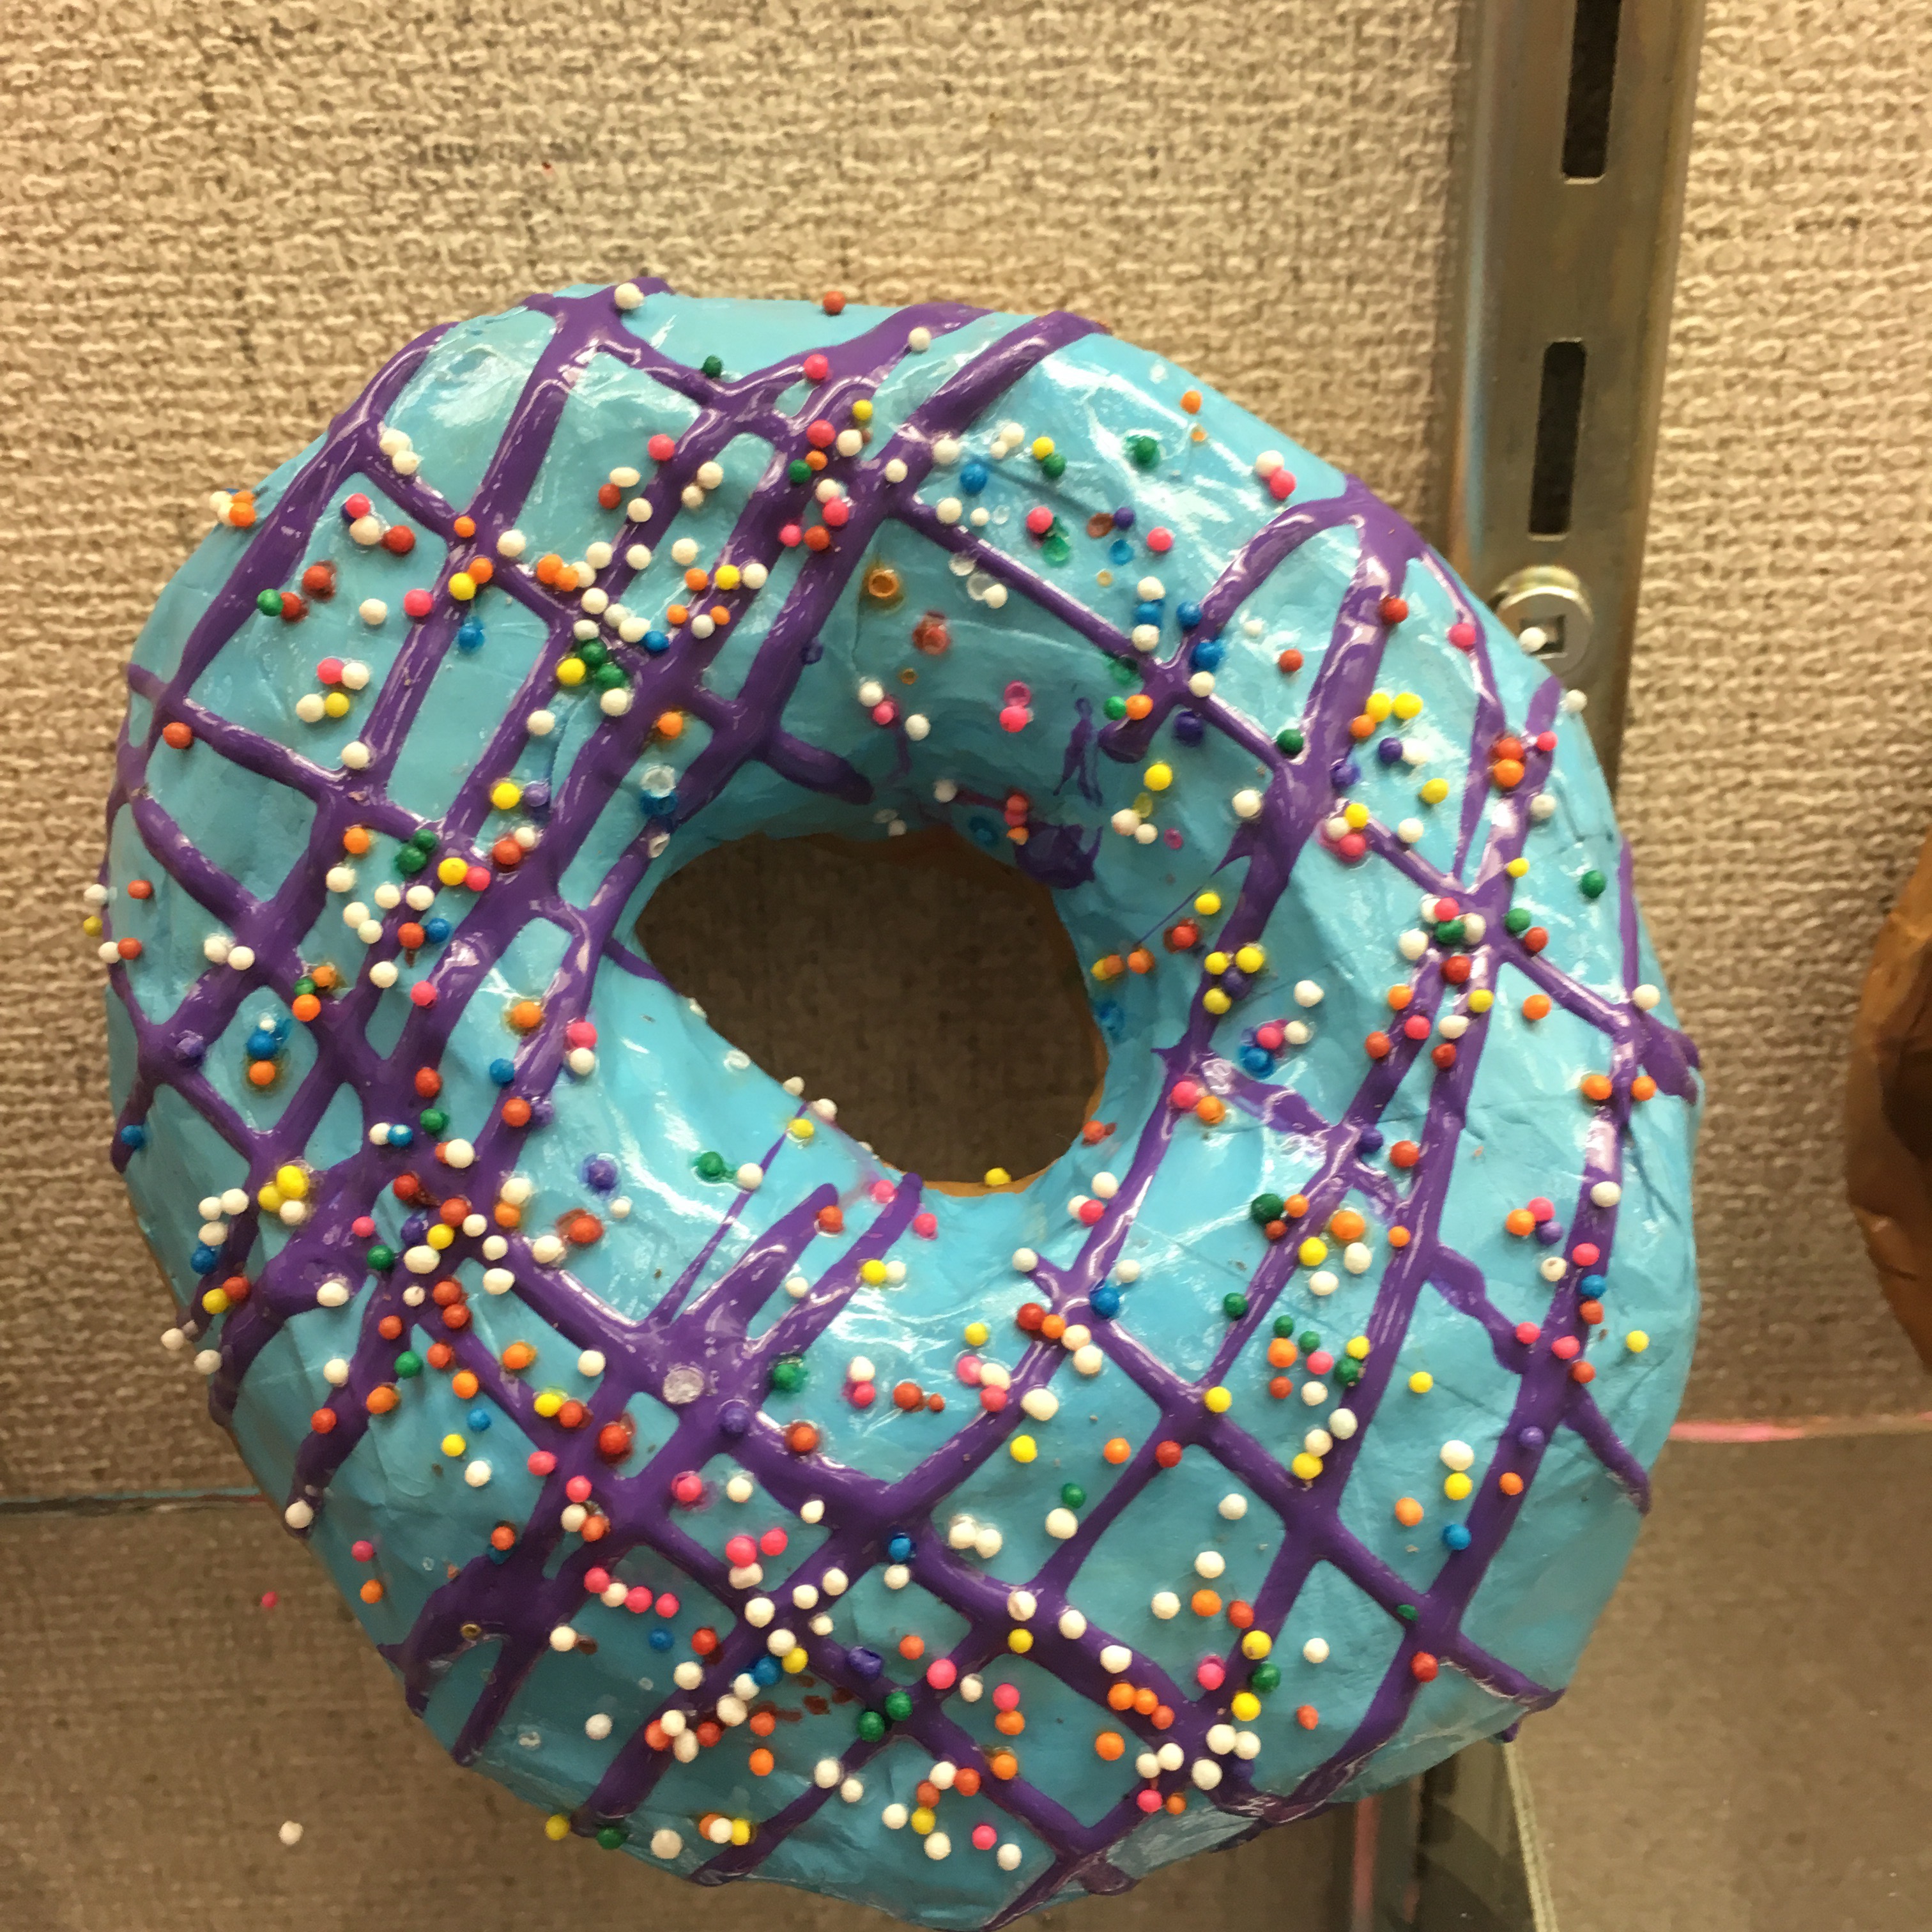
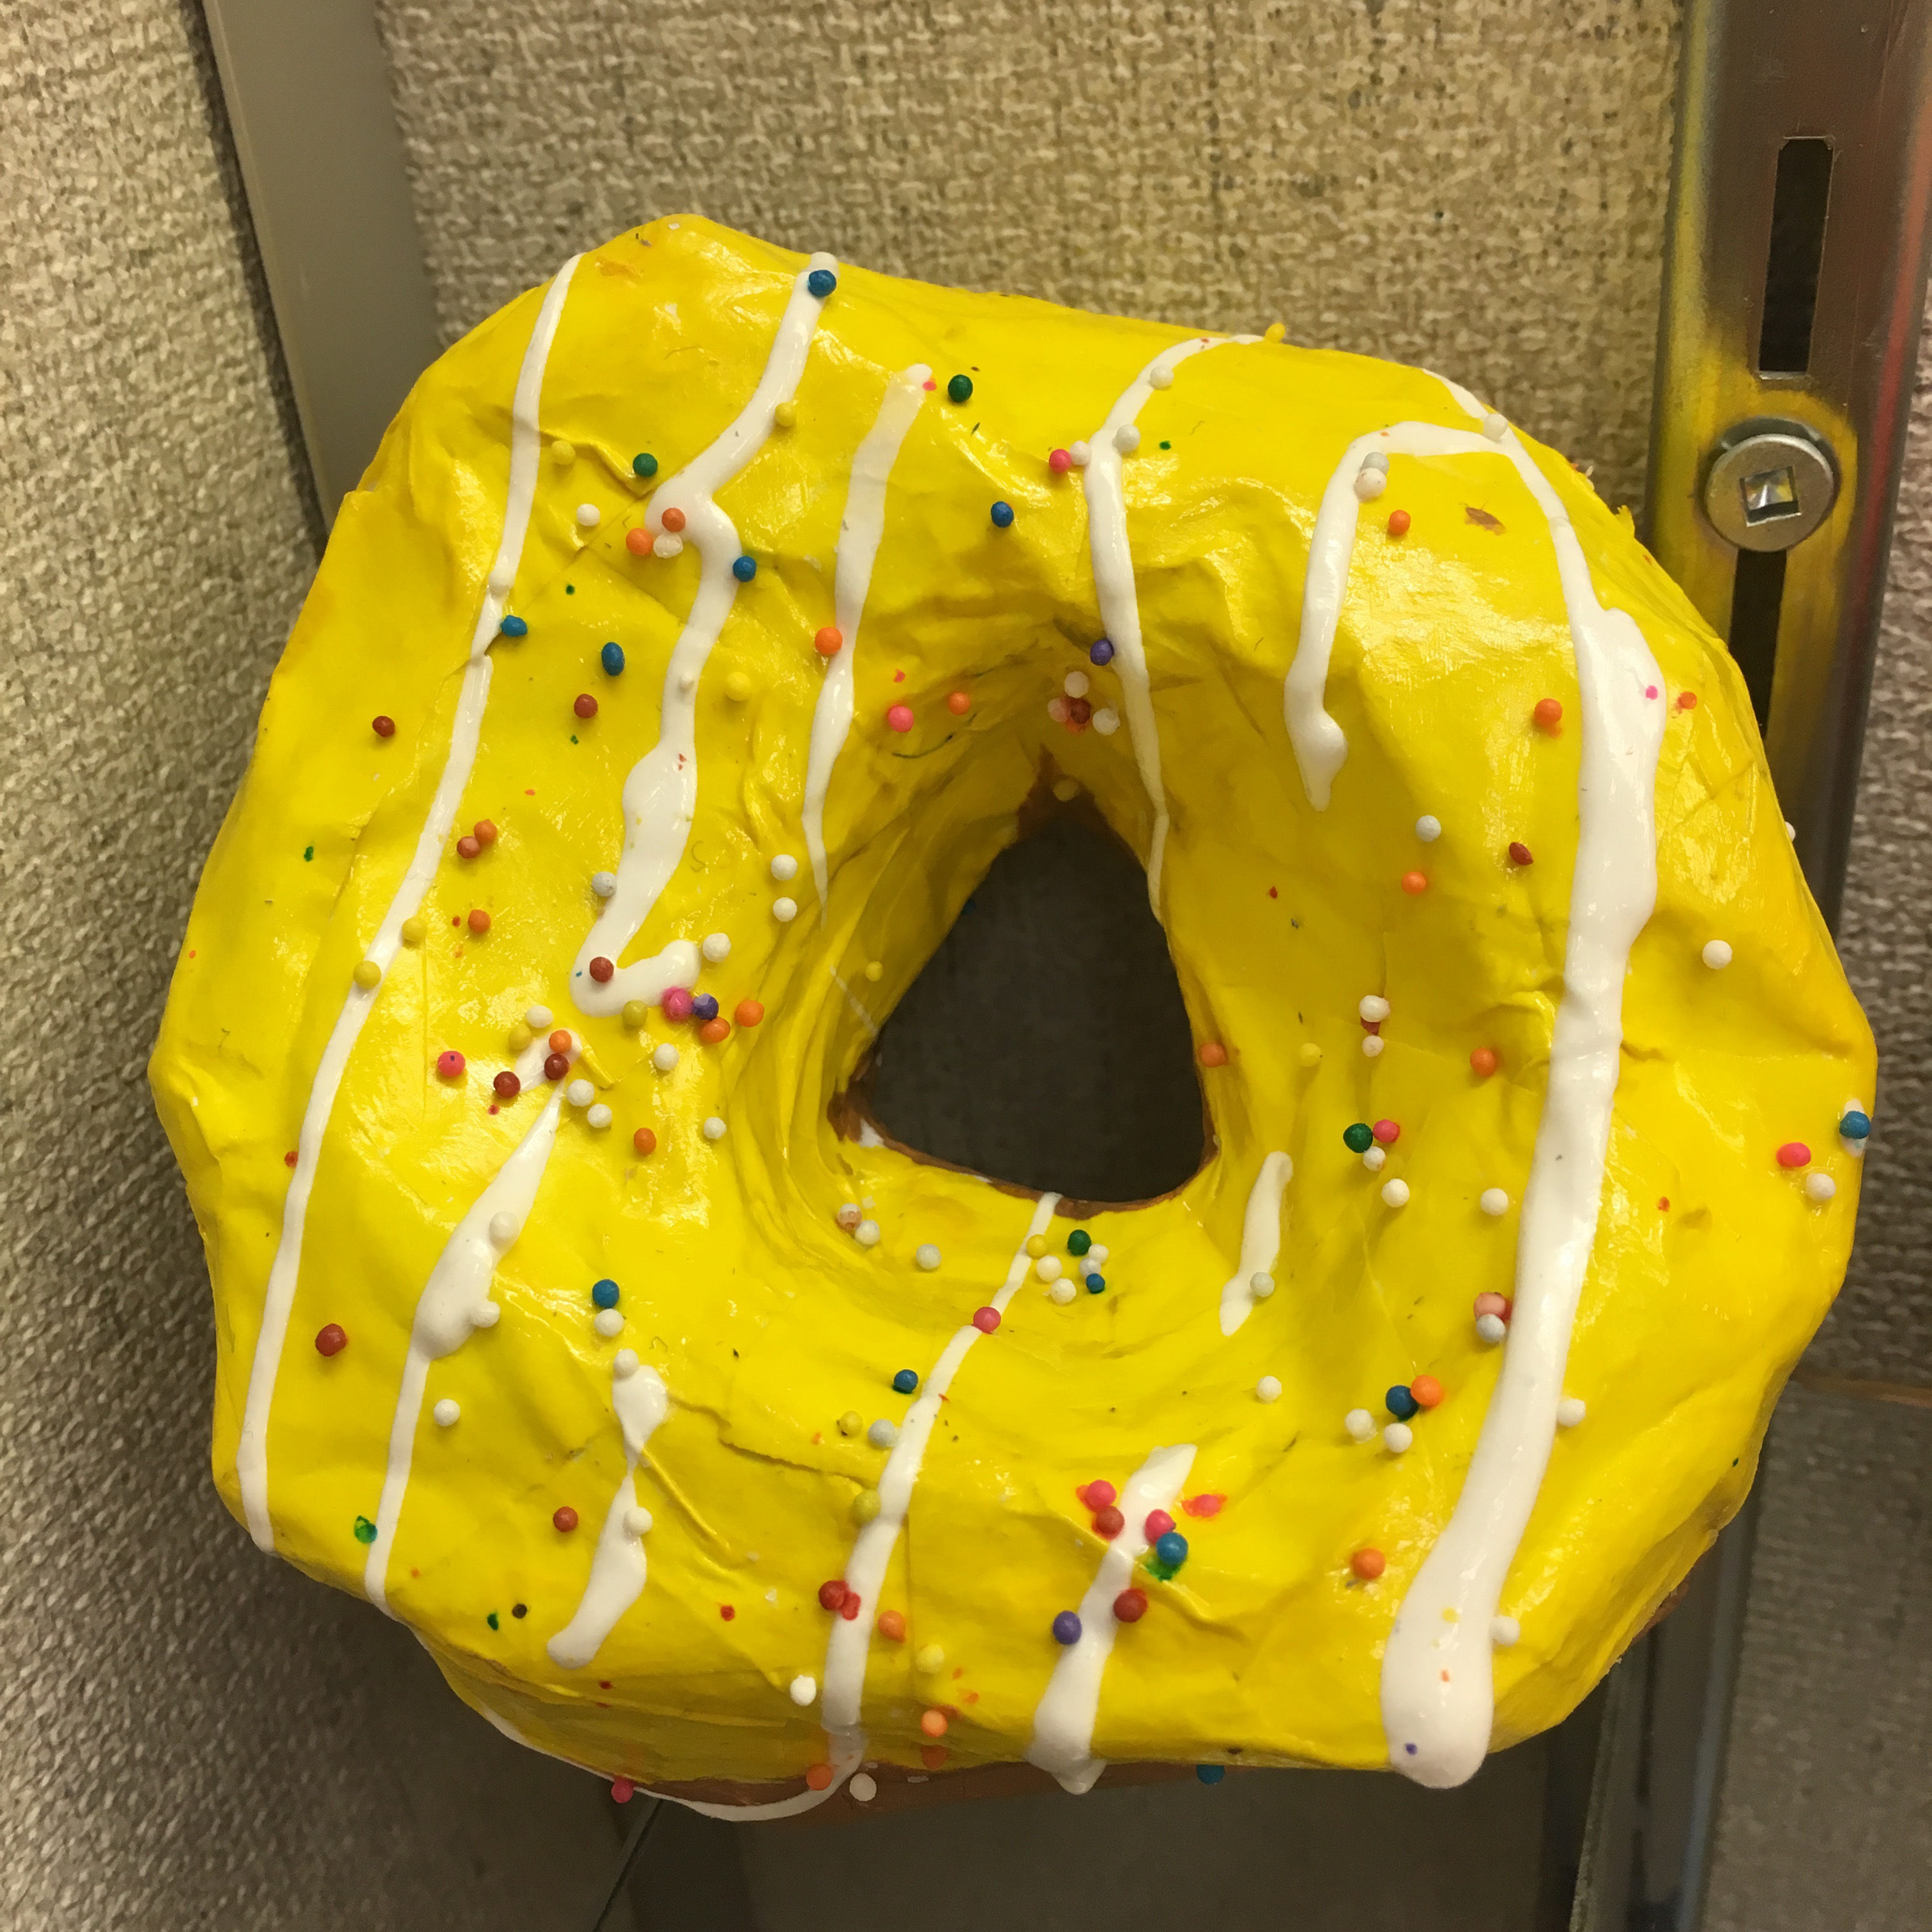
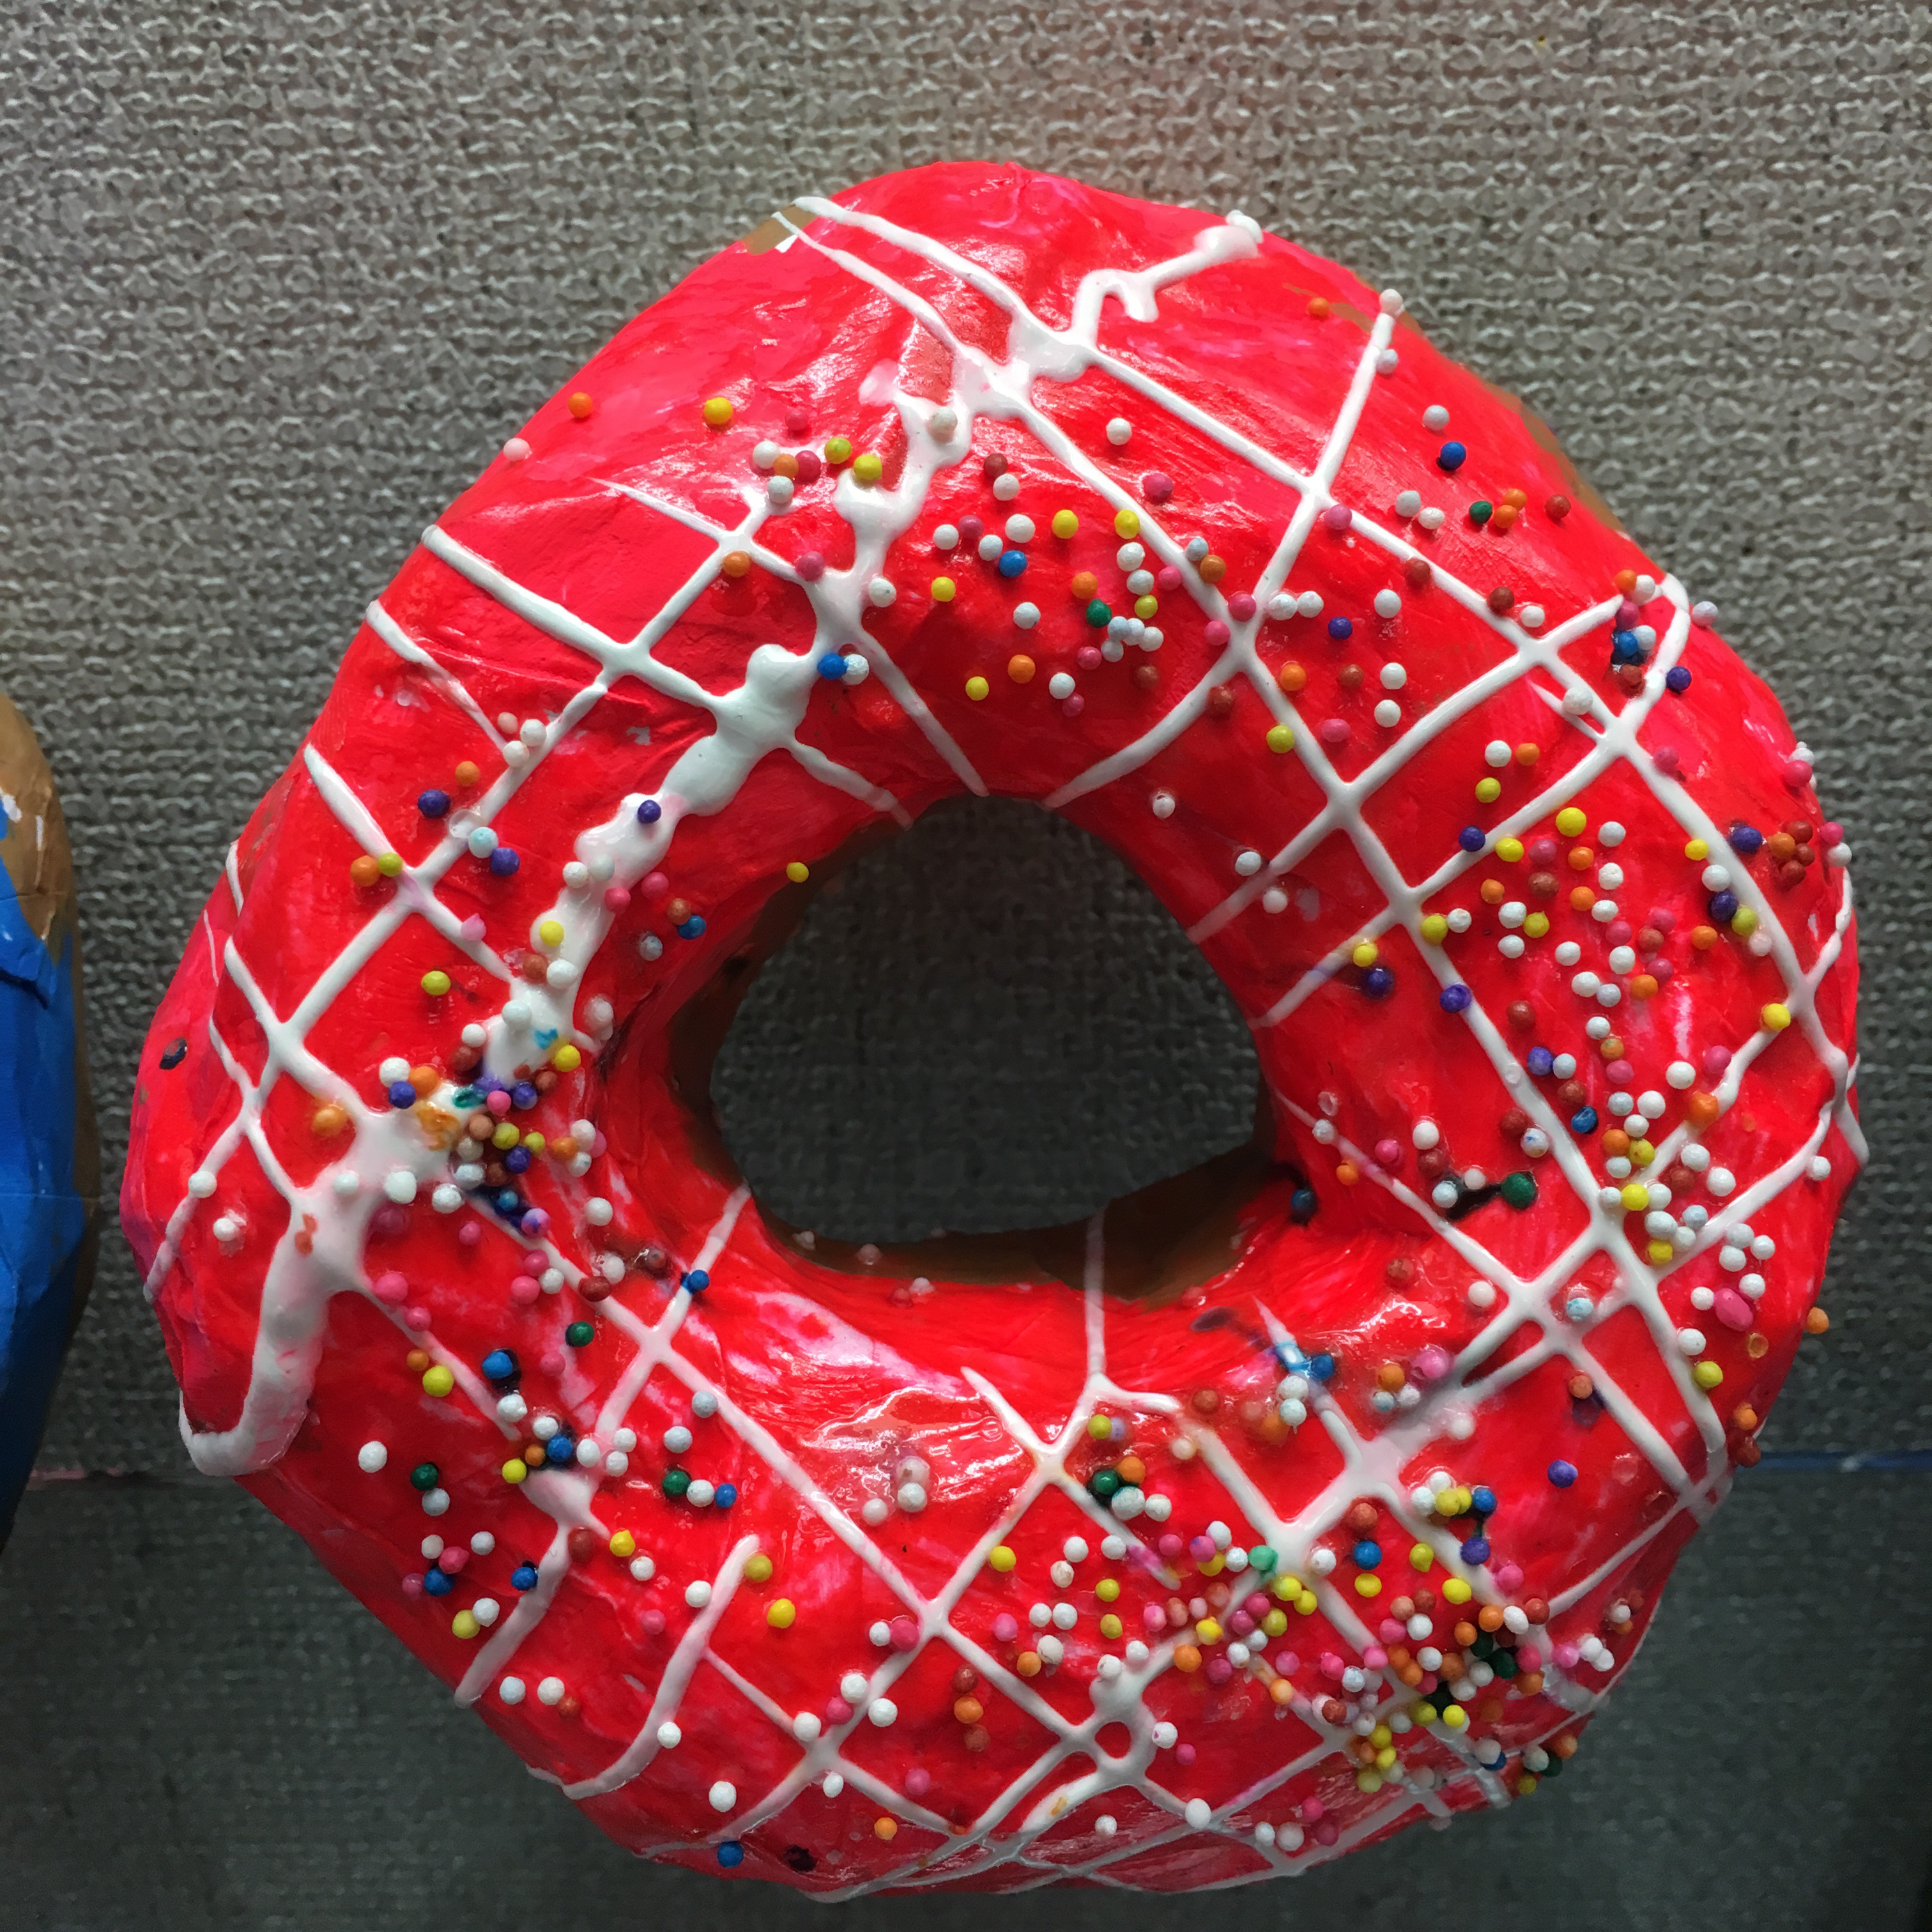
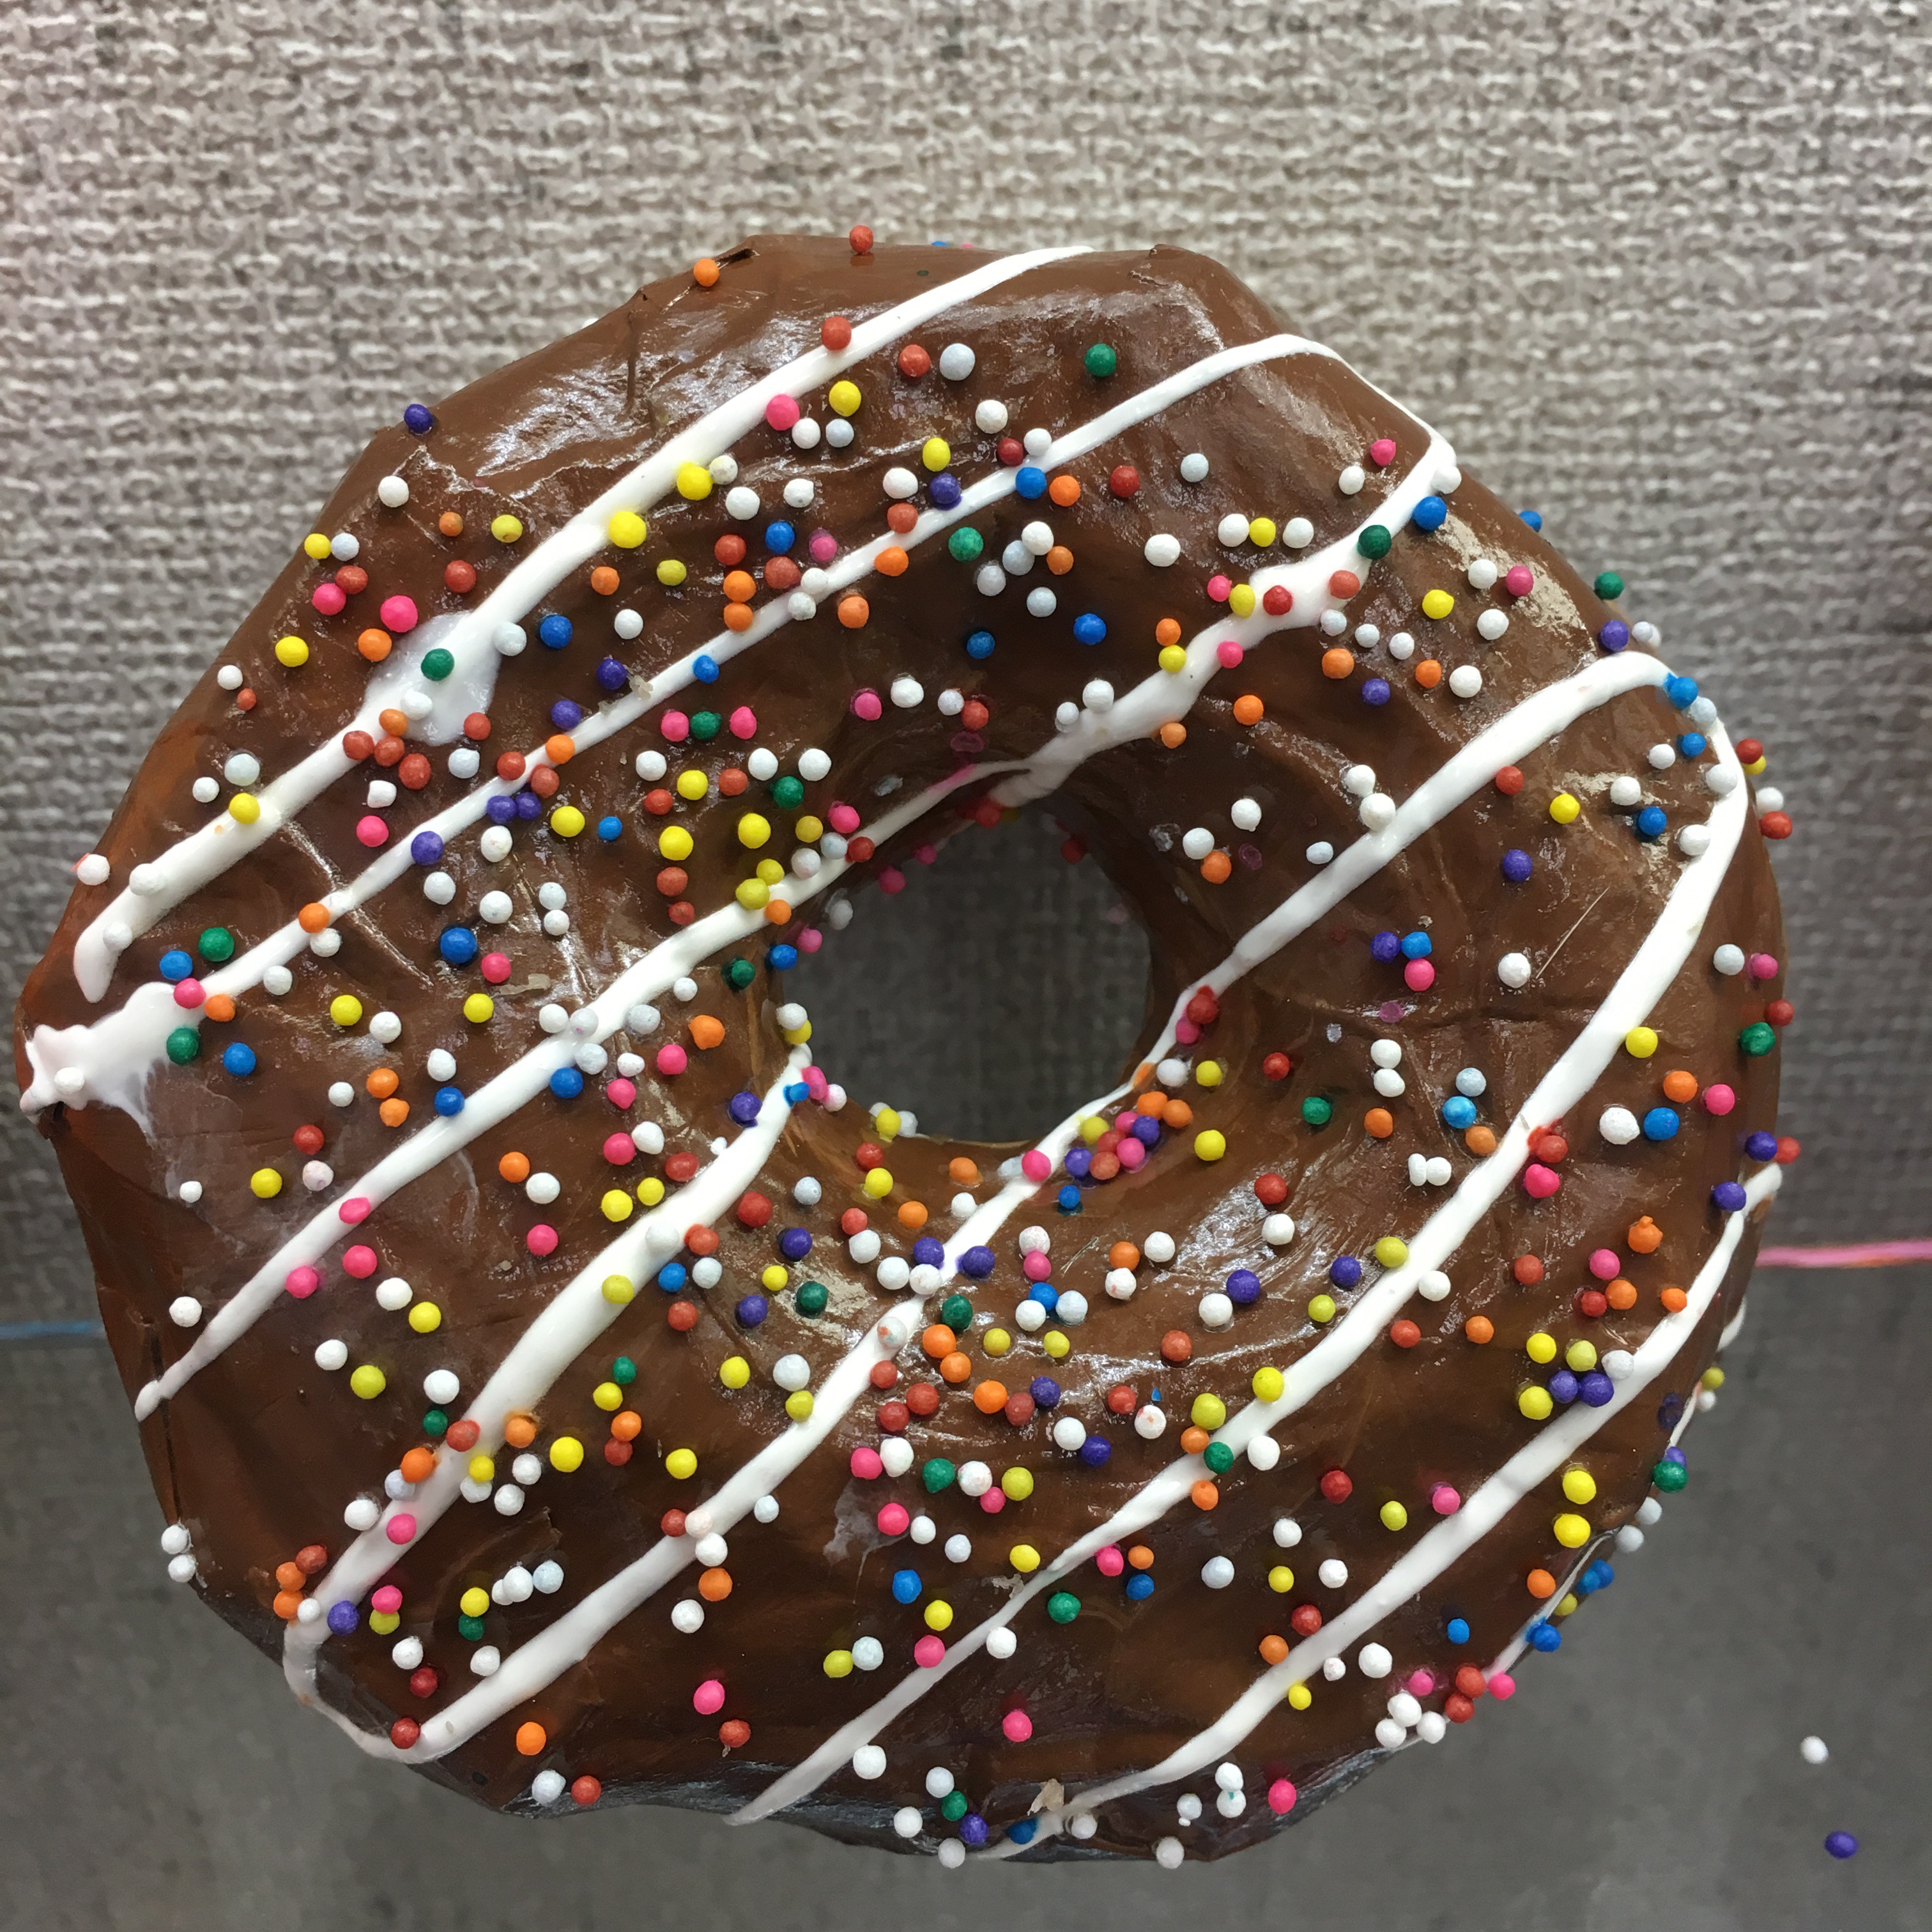
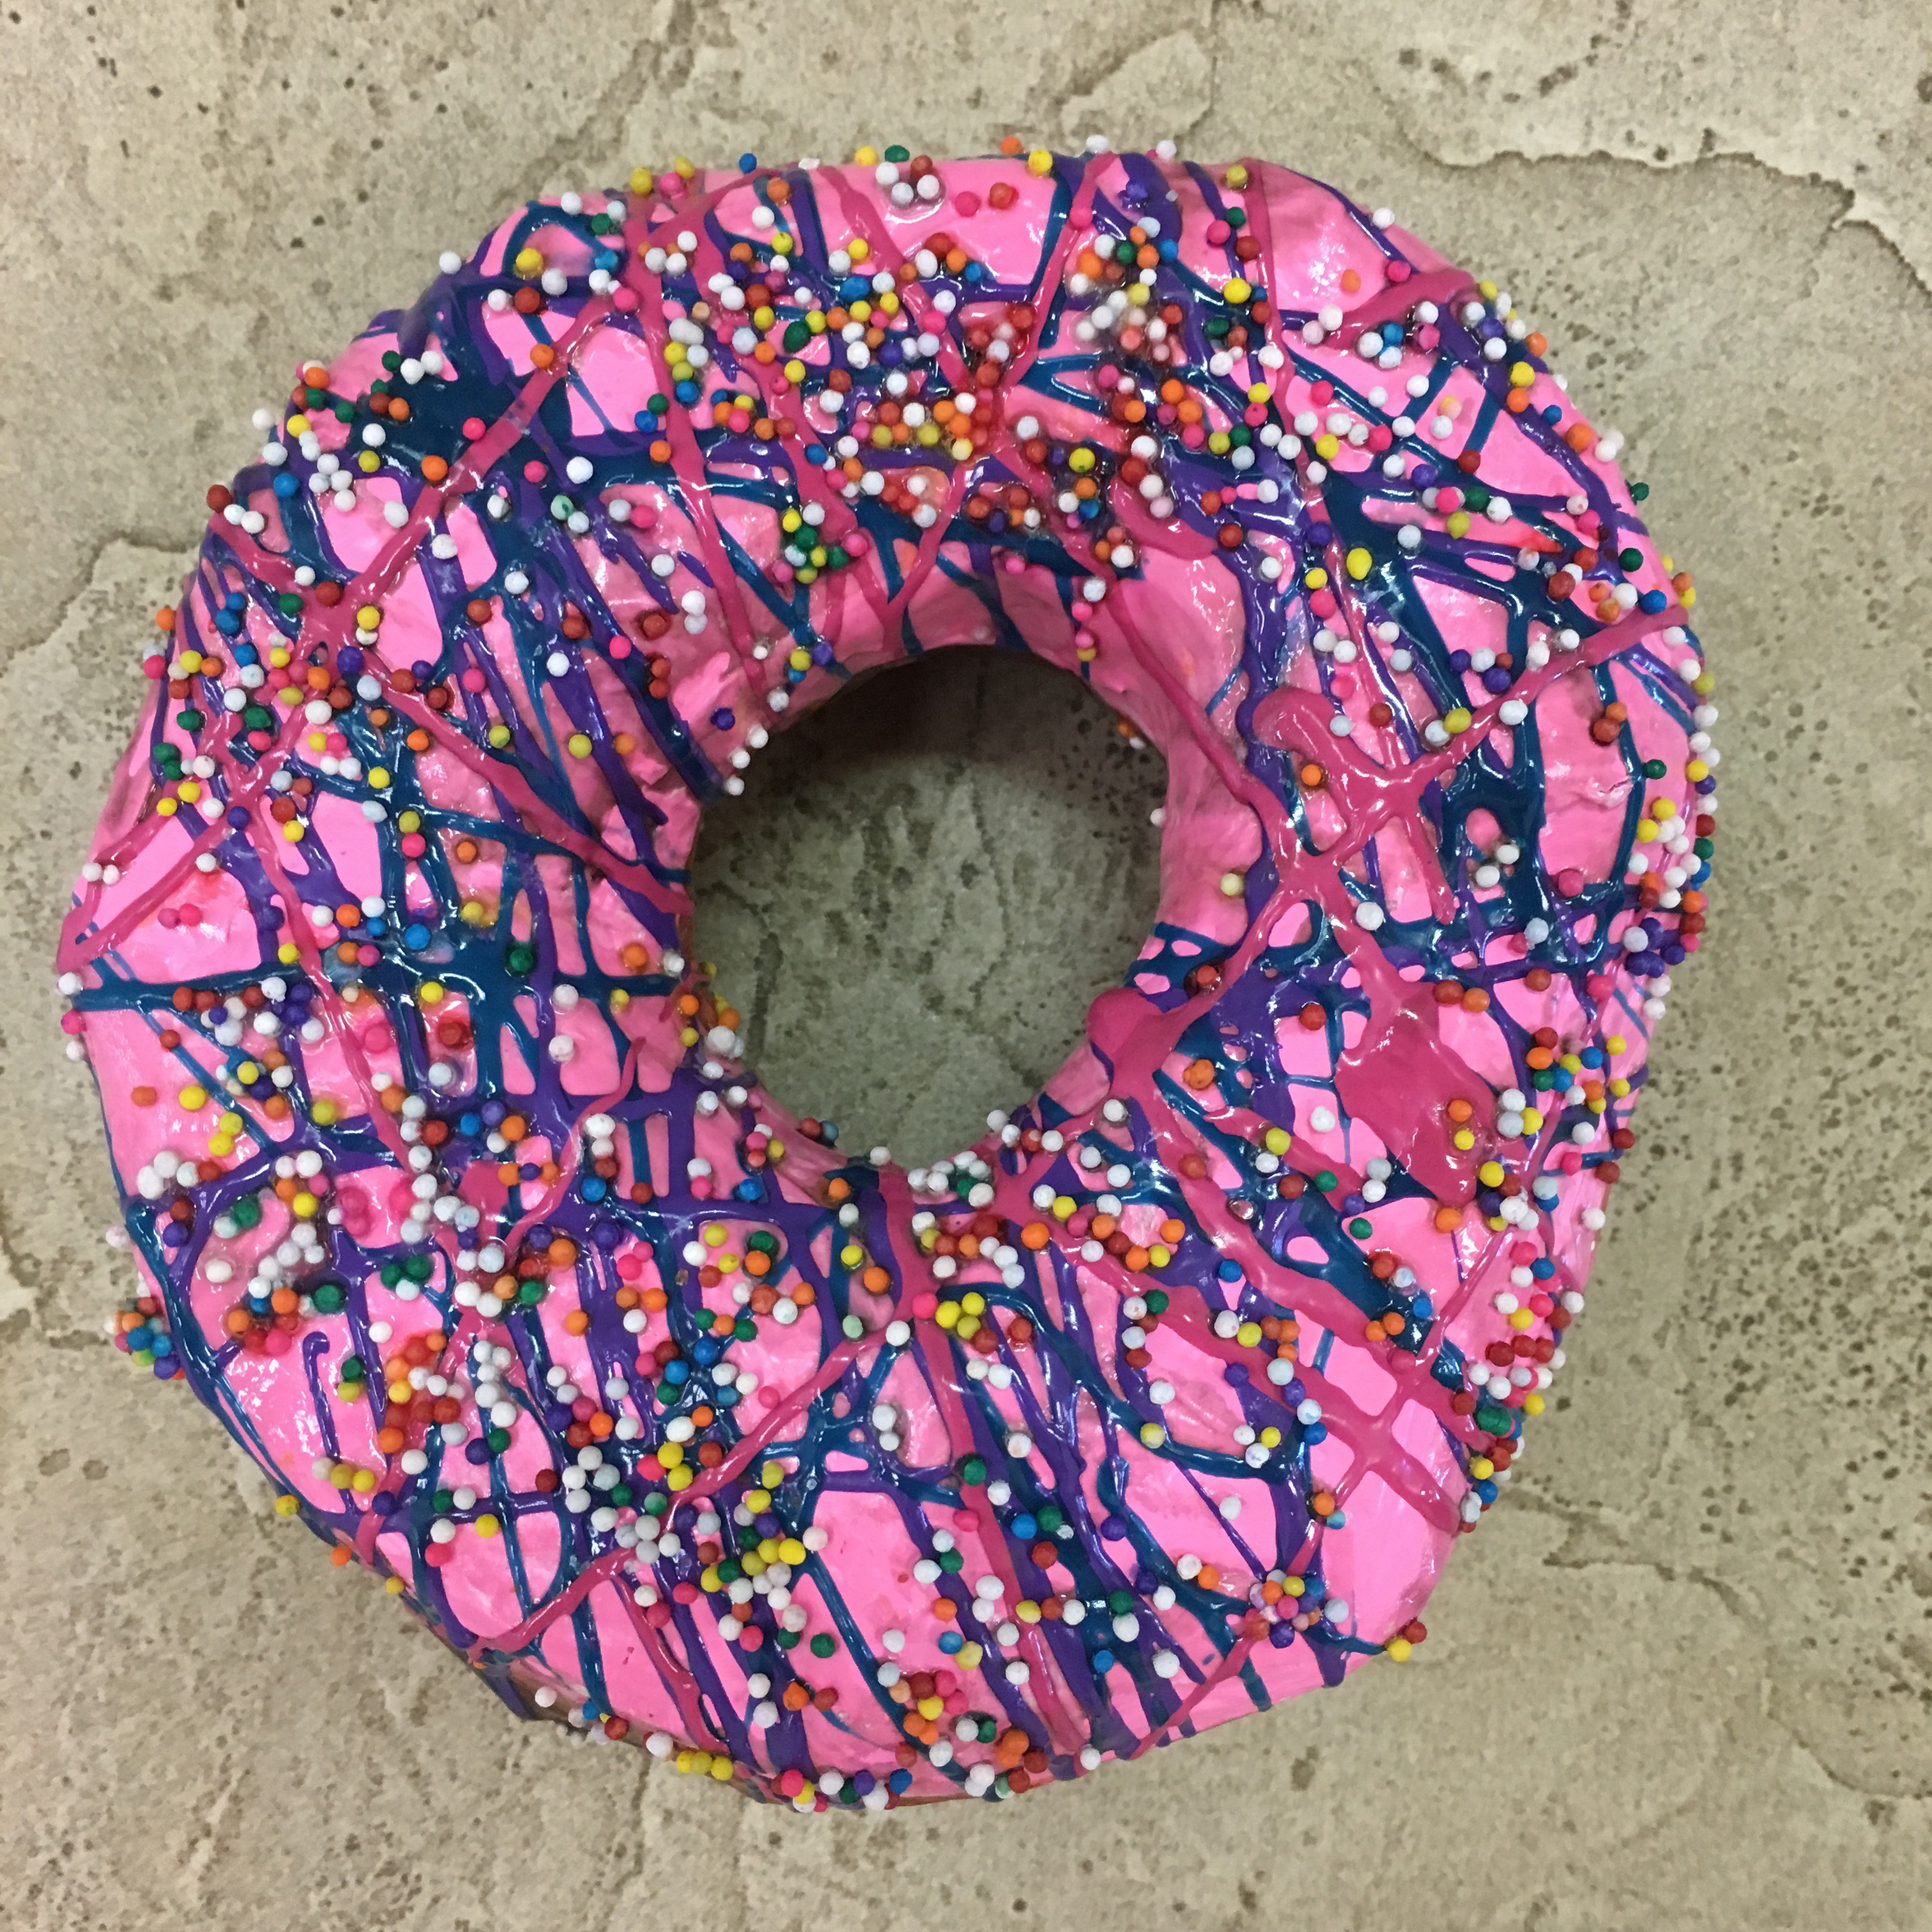
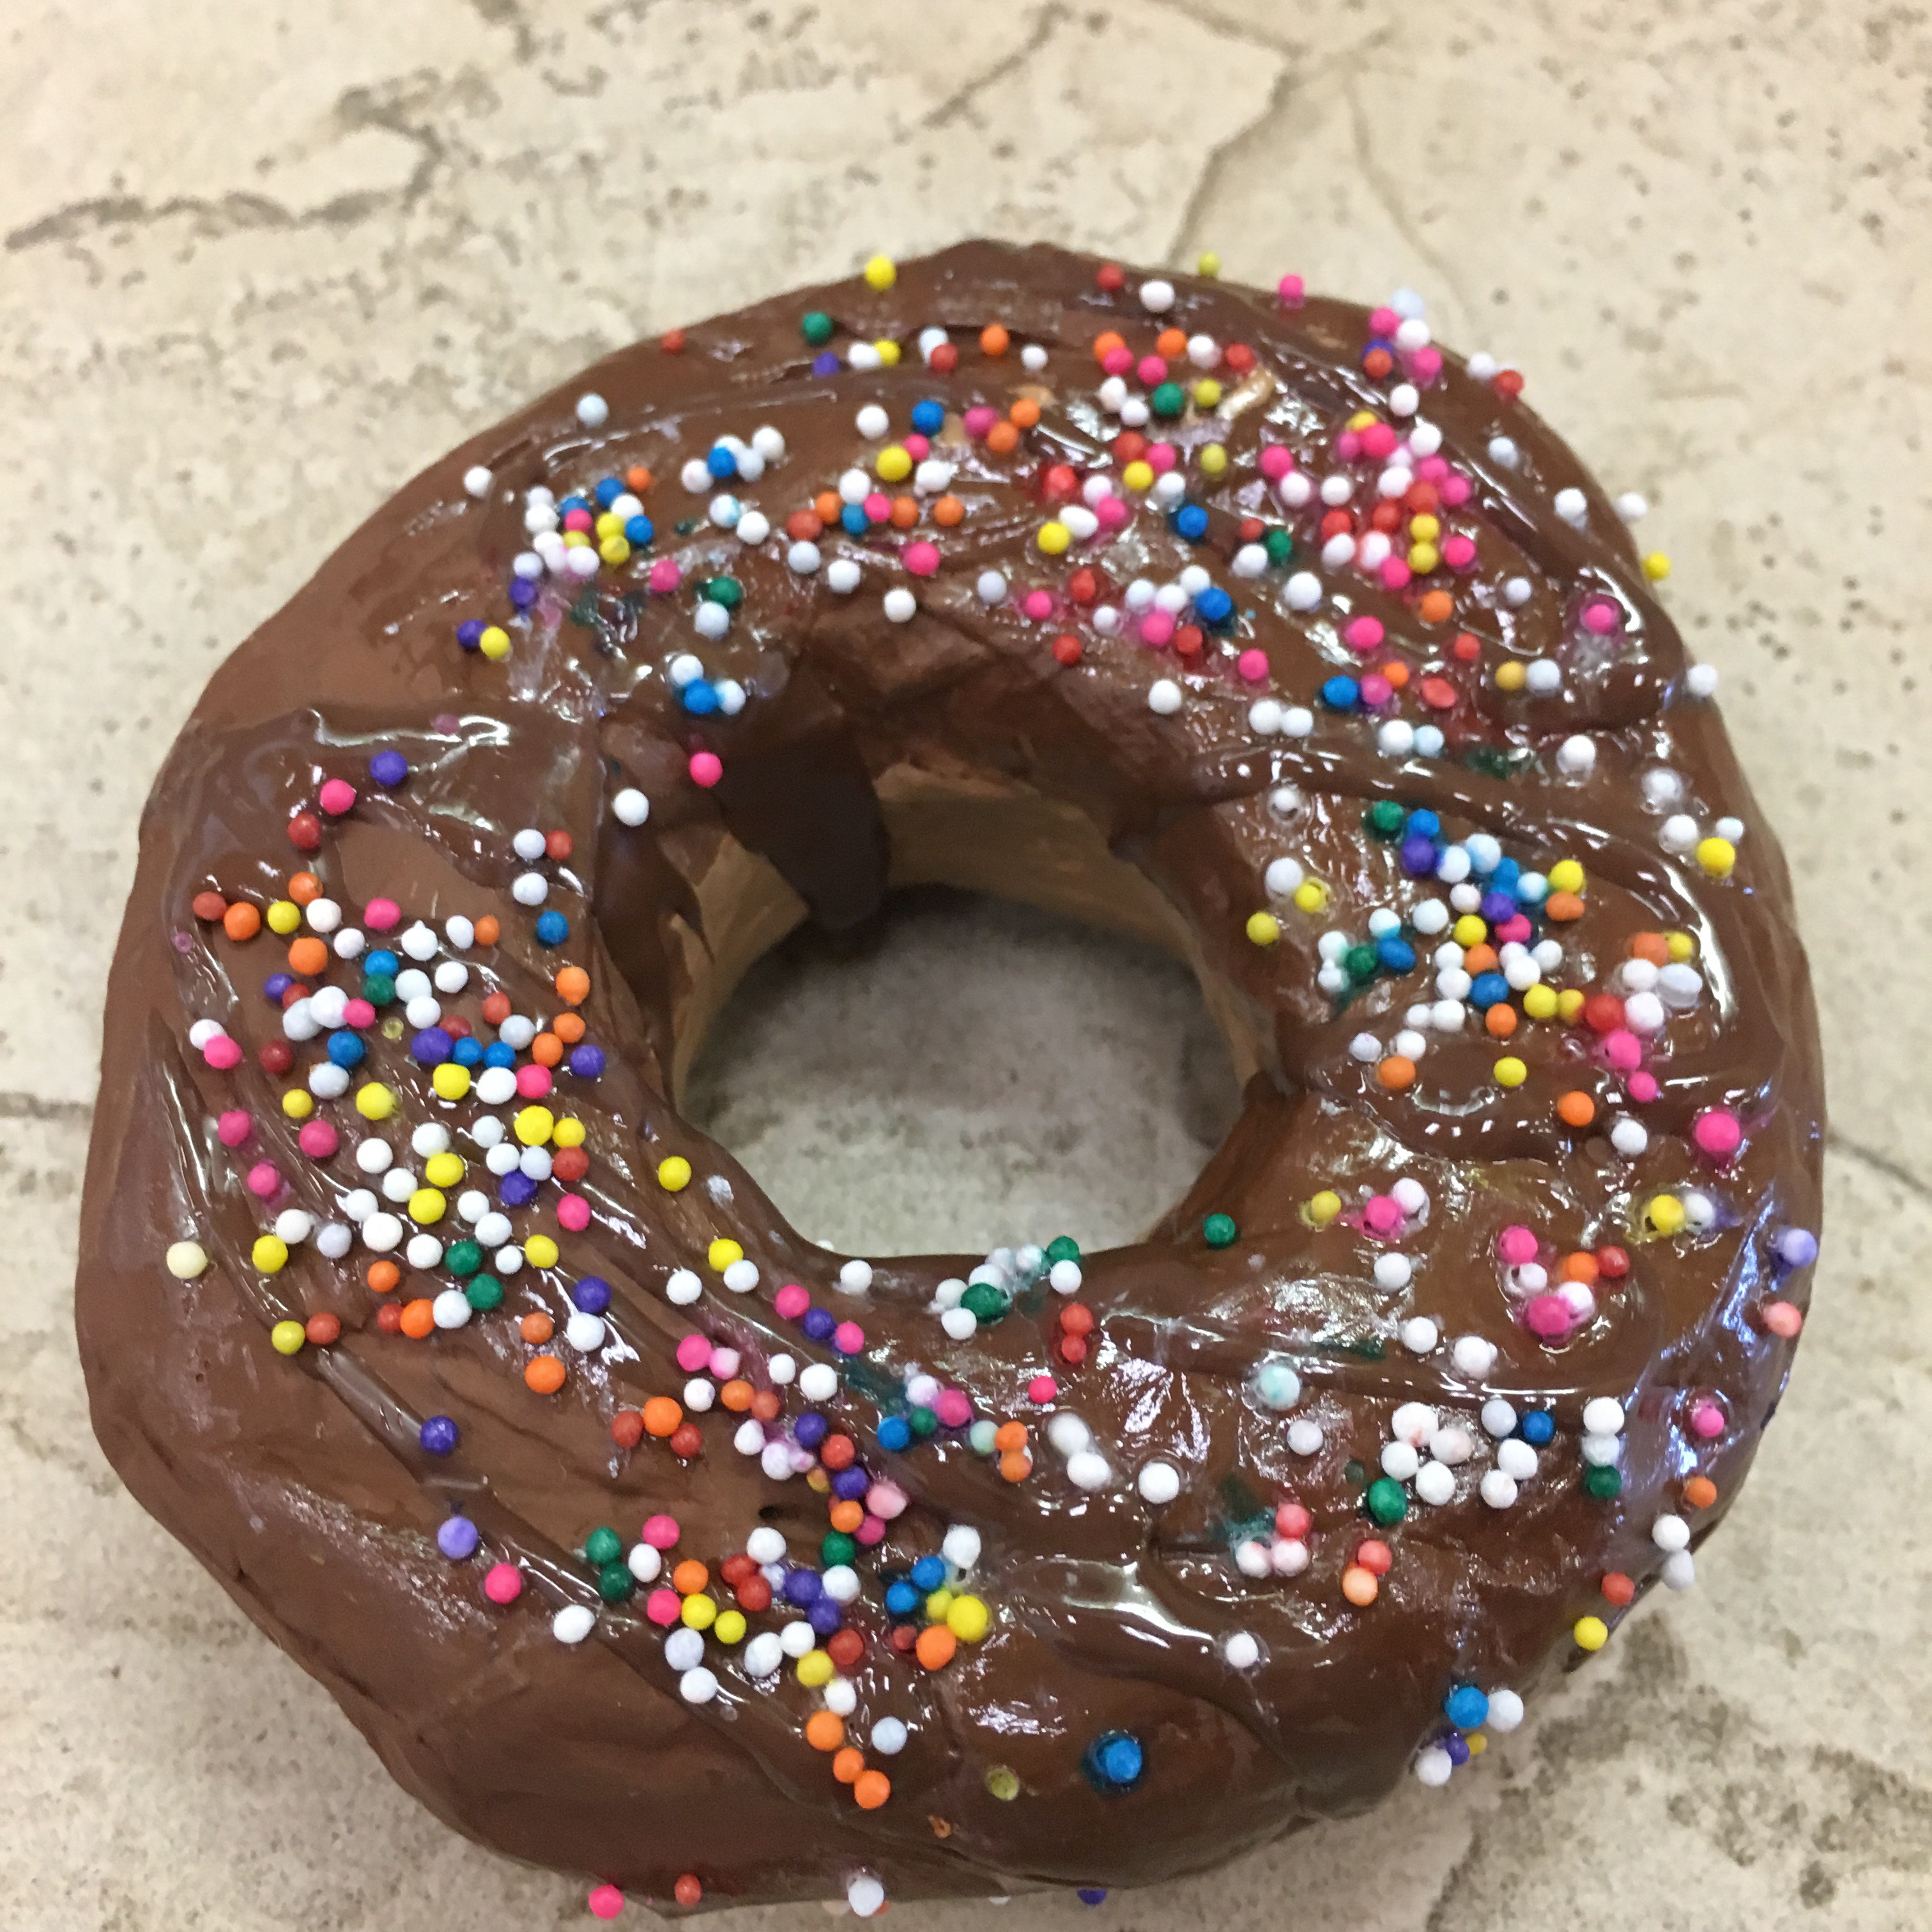
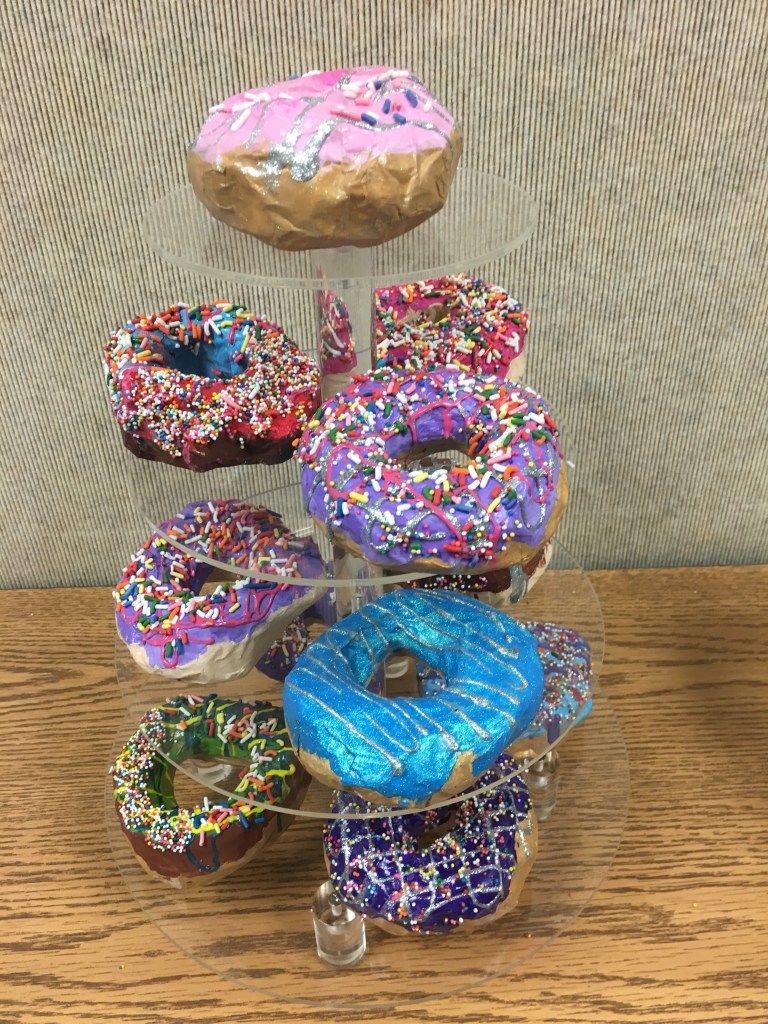
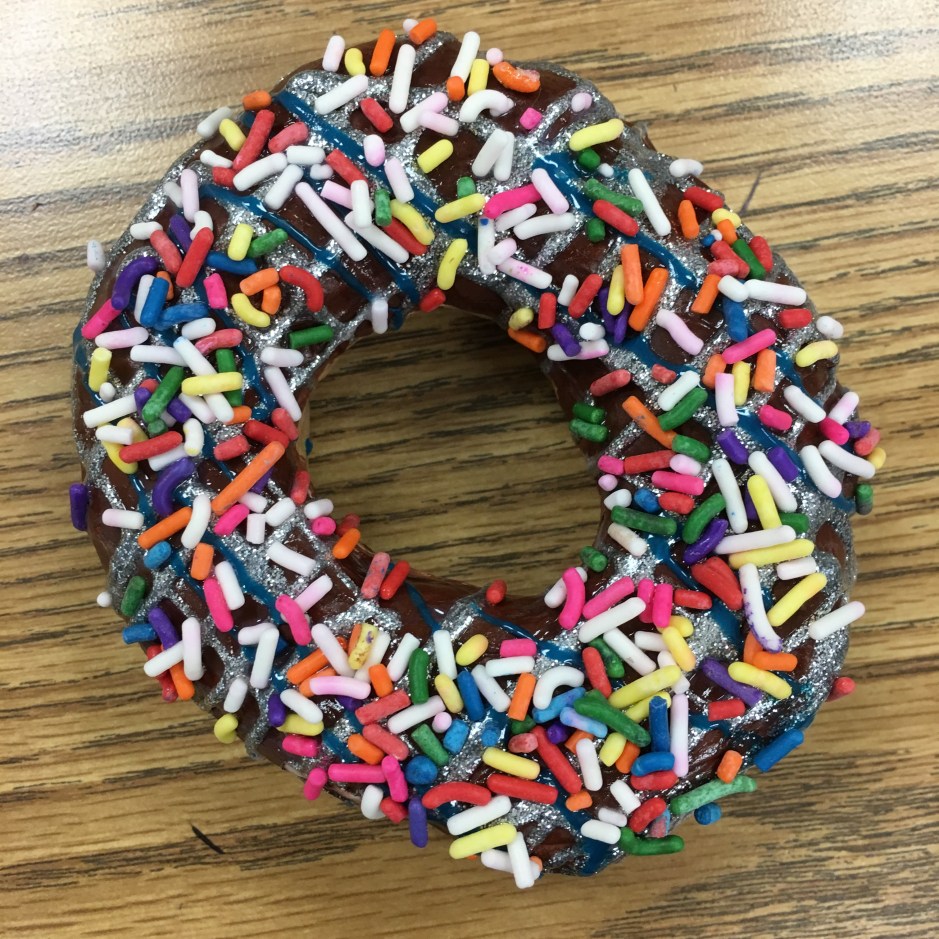
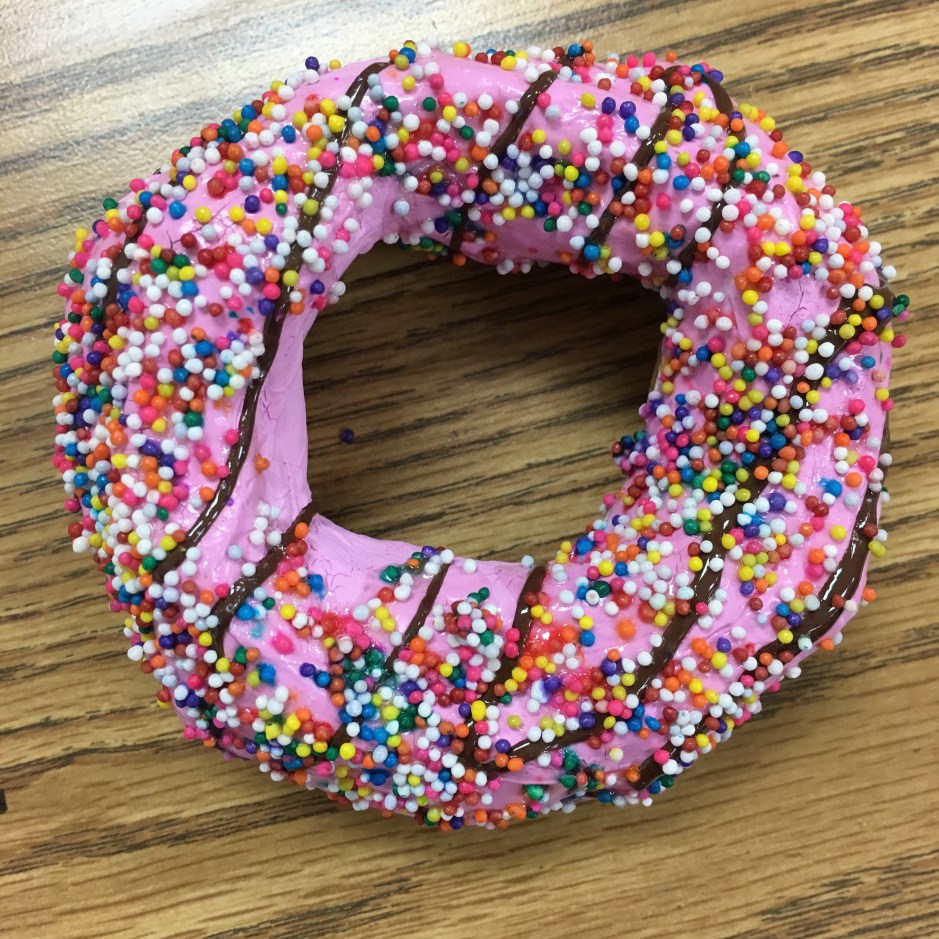
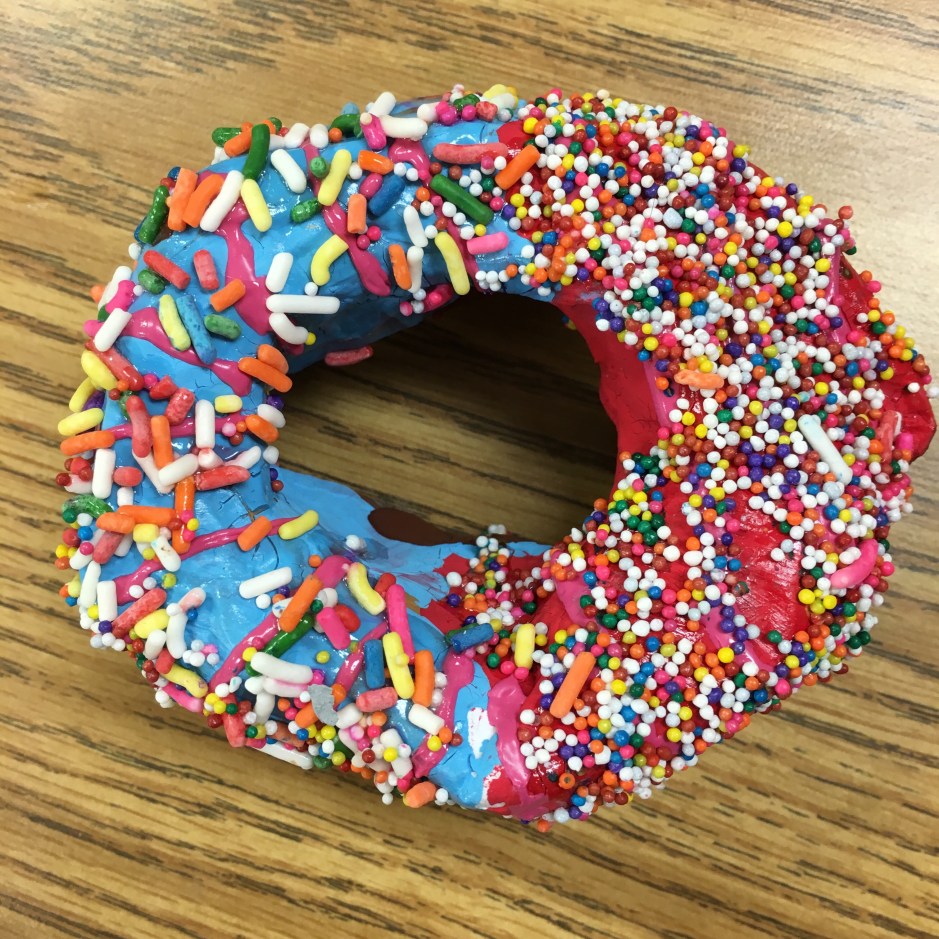
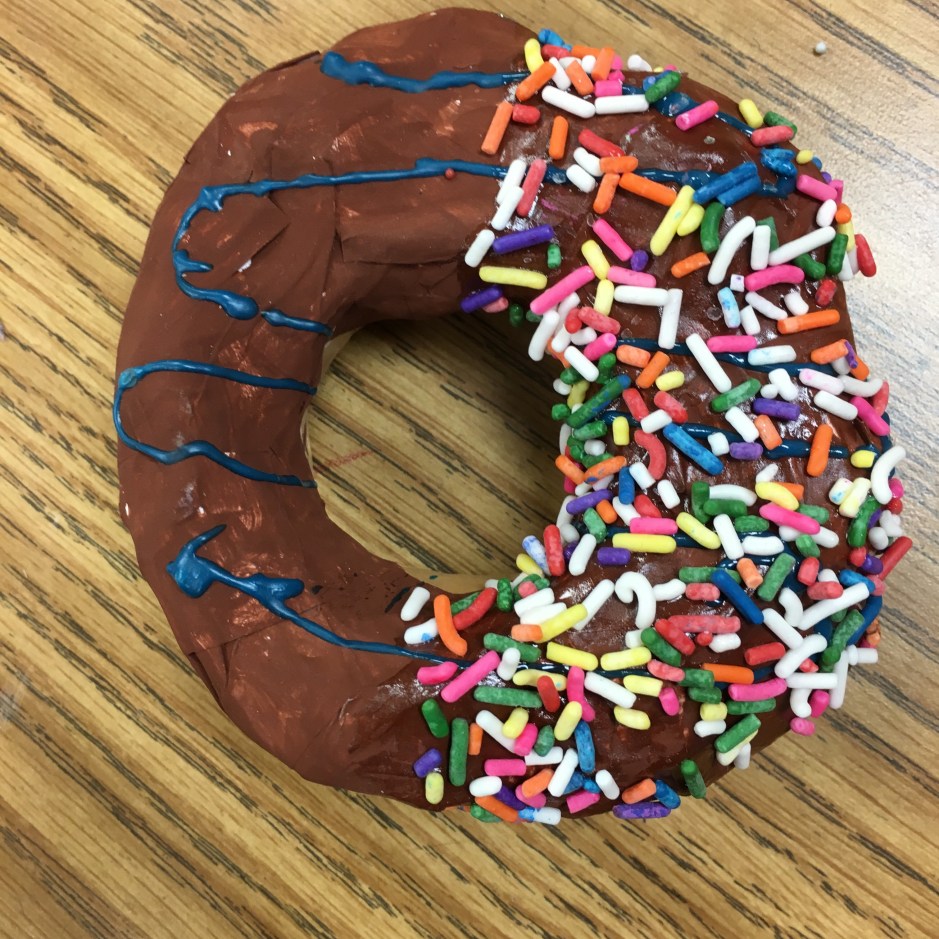
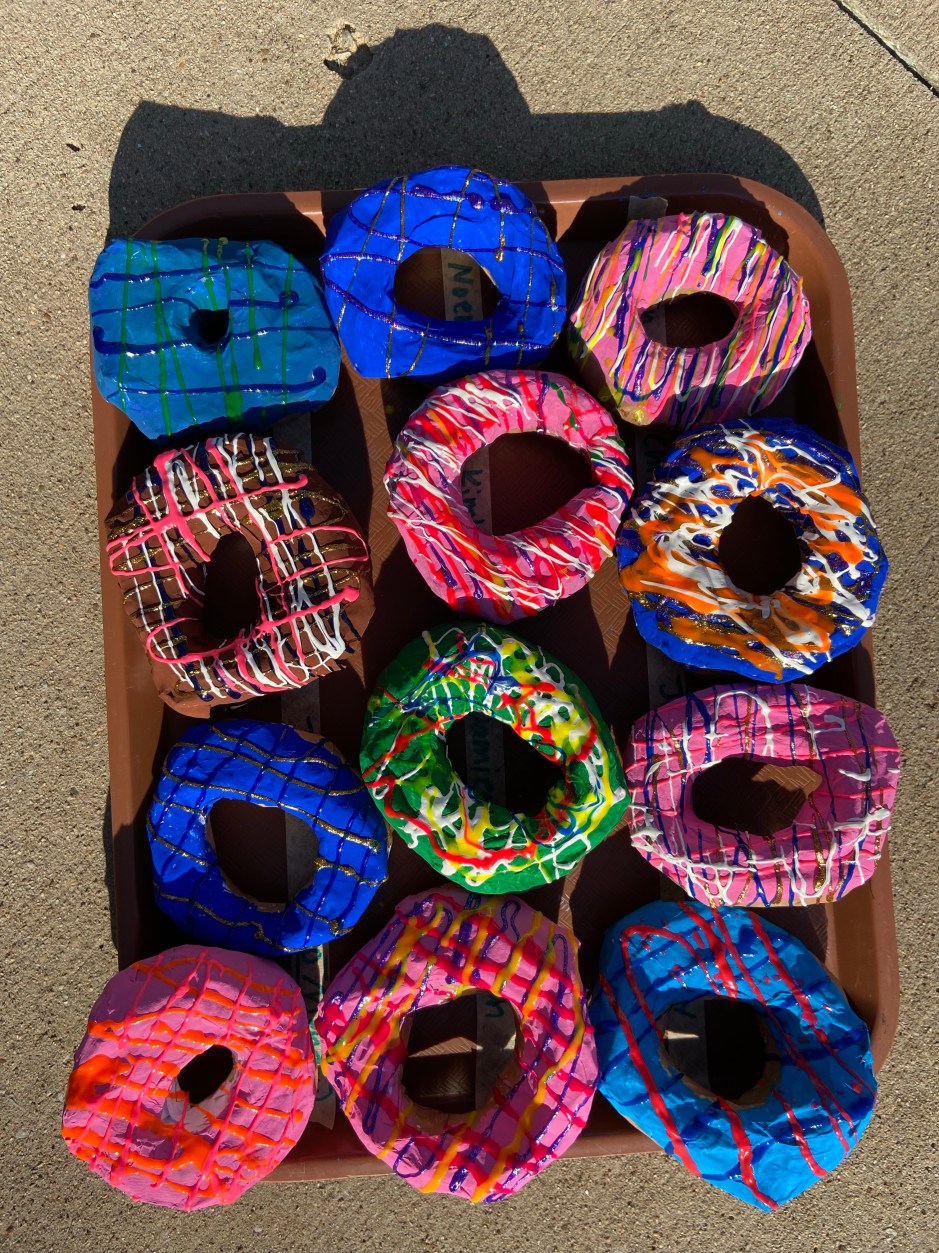
 Finished paper maché donuts!
 Finished paper maché donuts!
 Finished paper maché donuts!
 Finished paper maché donuts!
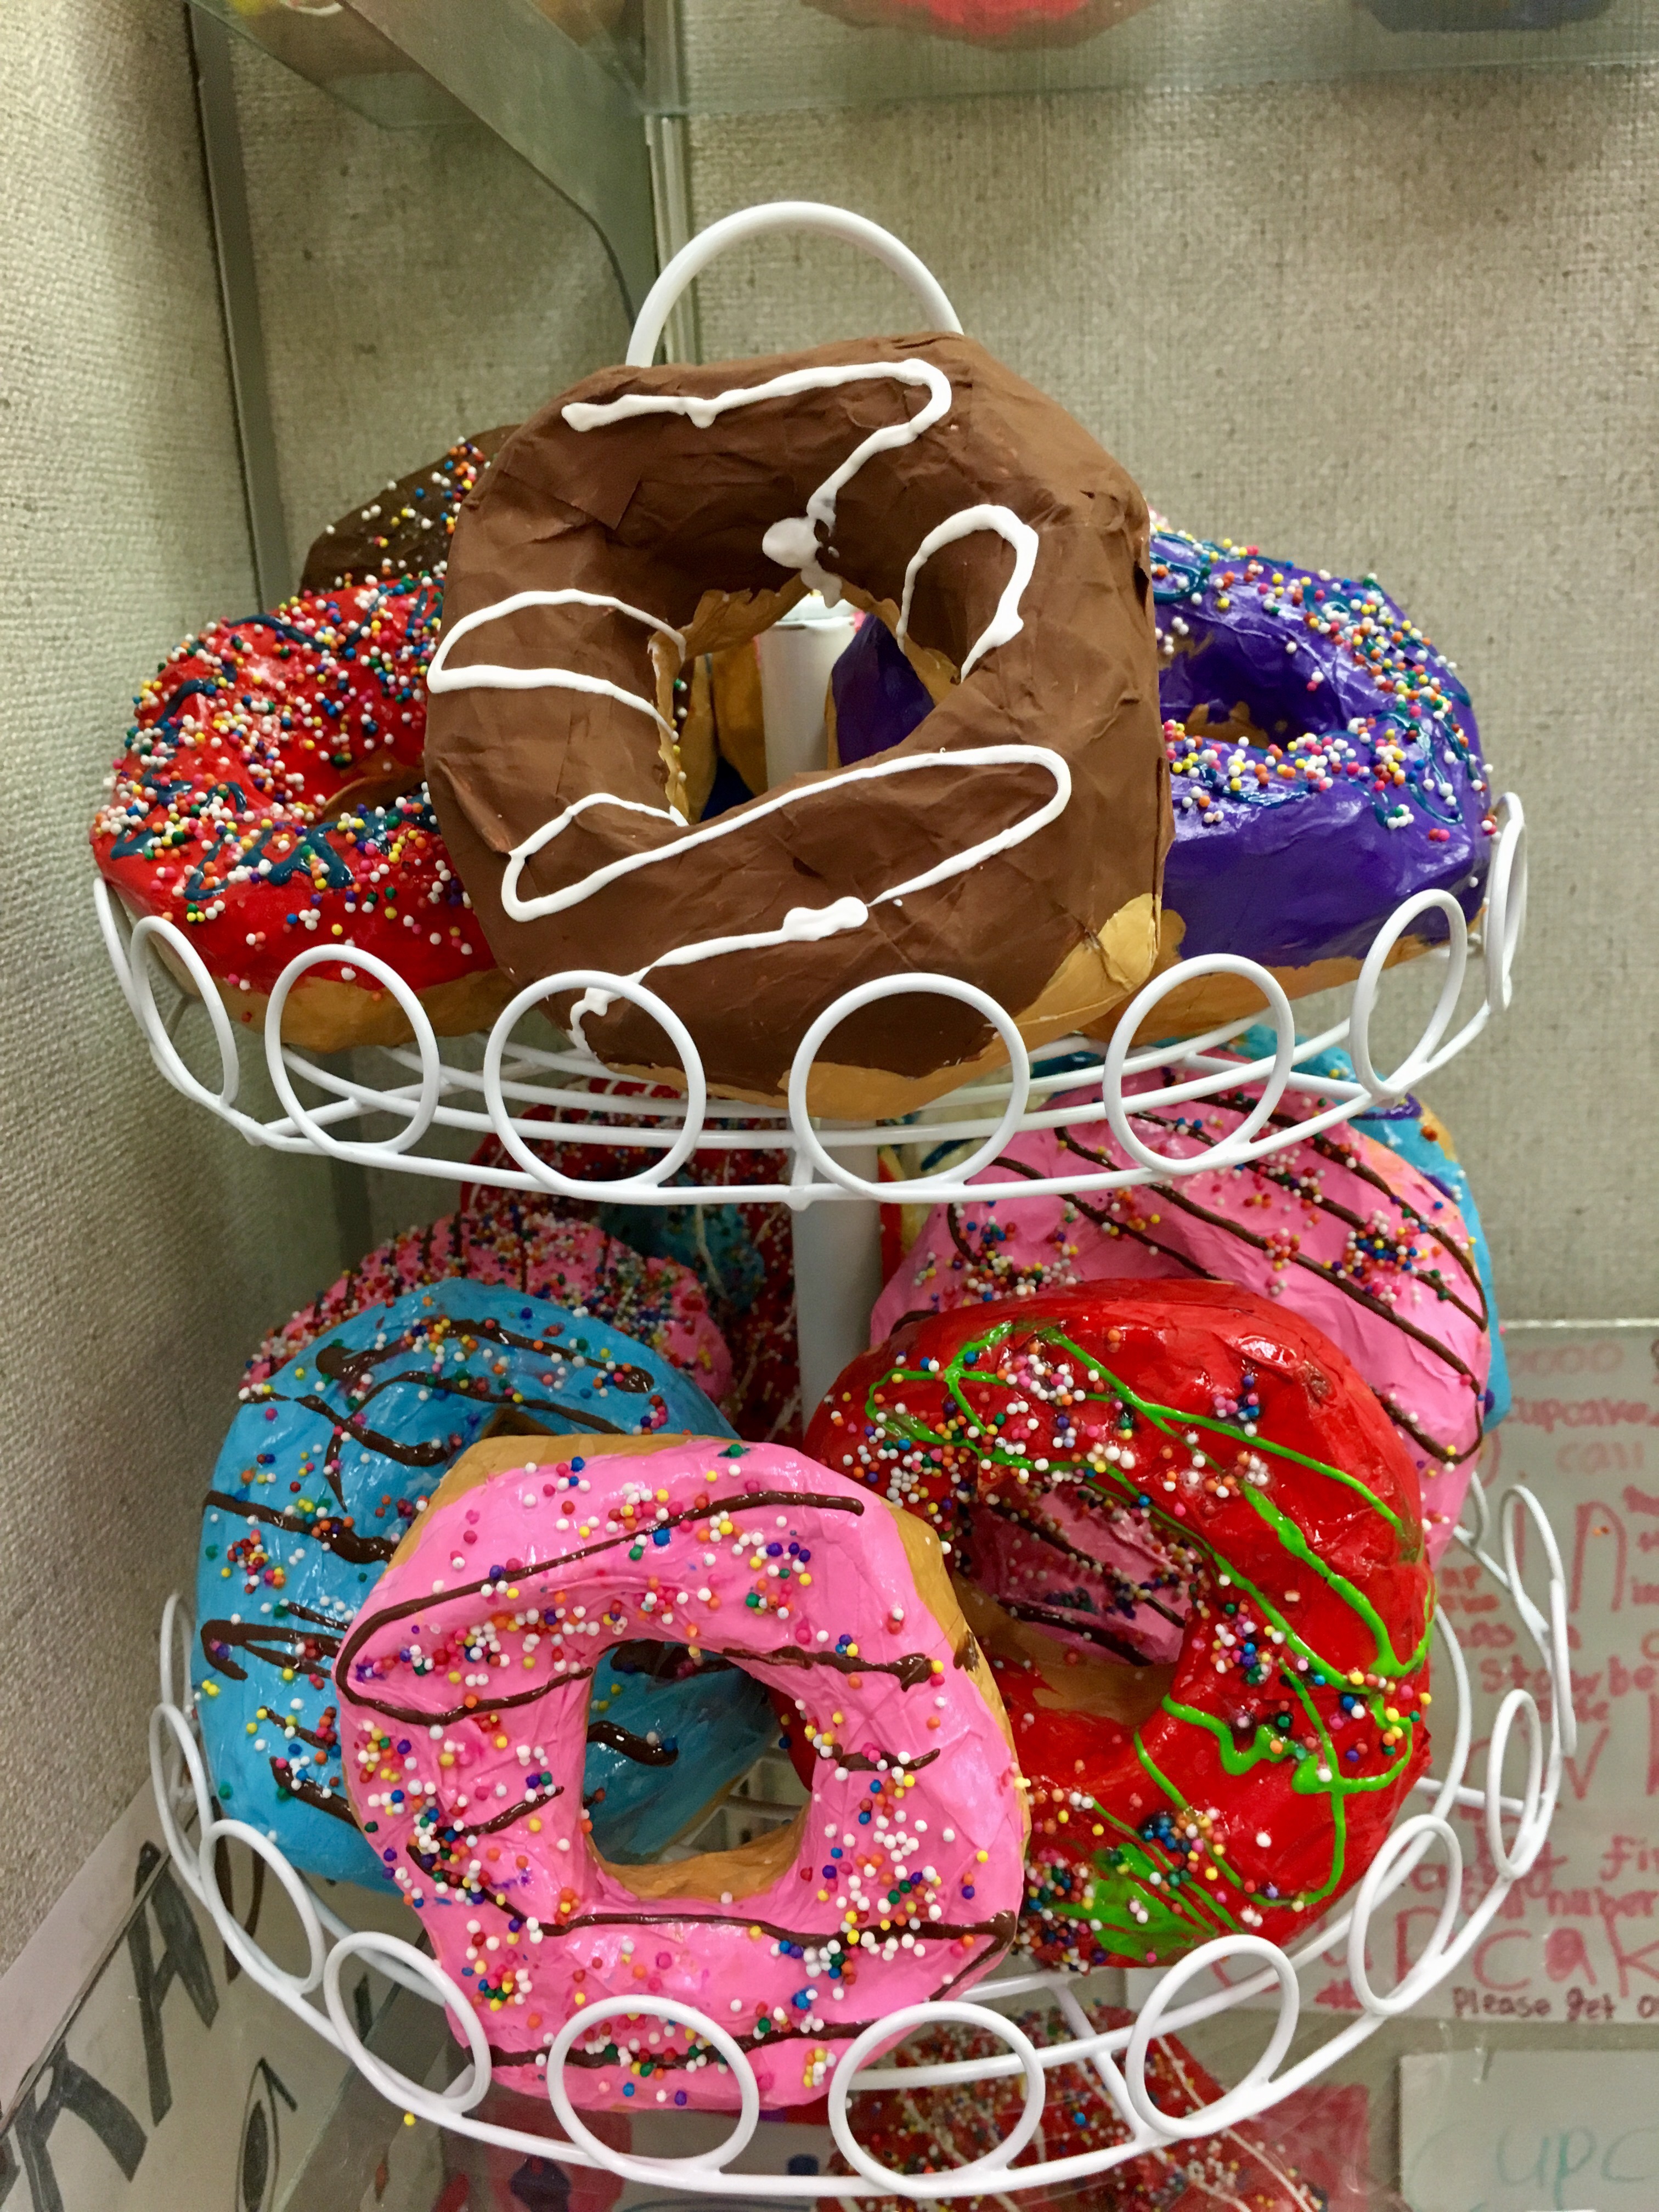 Finished paper maché donuts!
I divided up some dollar store foil cookie sheets into either 6 or 9 squares with masking tape that we labeled with each artist’s name and art address. We just put them back into their own spots throughout all the steps until we finished the whole donut-creating process. I then wrote their names and art addresses on their donuts with a Sharpie and displayed them proudly in our glass case. They stopped traffic in the hall and were a big hit! We got so much positive feedback from teachers, administration, parents, and all the other grades. We’ll be doing this every year. 🍩🍩🍩
Project materials:
- Old newspapers (2 full page sheets per student)
- Large reclosable container of sprinkles (7 lbs.!)
- 10 rolls of masking tape
- Ream of white copy paper
- Puffy paint, multiple colors
- Brown puffy paint
- One coat polyurethane, clear gloss
- Paintbrushes
- Elmer’s Art Paste, paper mache, 2oz.
- Sharpie for labeling donuts
- Various donut display stands (optional but looks so much better)
Let me know how yours turn out! Tag me on twitter at @wowartproject and on Instagram at @juliaforsythart. Happy donut making 😀


These are amazing! We are attempting them today and I’ll show my students your blog post before we start! Thanks for sharing!
LikeLike
Thanks Trina! We’re right in the middle of it at our school right now. Your students are gonna love it. Tag me so I can see their donut! Enjoy
LikeLike
Fabulous lesson. We did these in 5th and 6th and the comment heard most was “those look good enough to eat!”
LikeLike
So glad it was a hit! They’re fun to make, and it took my fear of paper mache away.
LikeLike
How many classes was the supply list for? This is such an awesome lesson!
LikeLike
Thanks! One mixed paper mache art paste solution is enough for about 200 + donuts. I always have a ton leftover. I learned that it’s best to start a fresh solution instead of using months old mixed up paste. Let me know how it goes!
LikeLike
Pingback: 30 Inspiring Fourth Grade Art Projects For Creative Kids - Country Highlights
Pingback: ≫ 30 proyectos de arte creativos de cuarto grado que a todos los estudiantes les encantarán
How do you make the puffy paint?
LikeLike
I bought it 😂
LikeLike
What did you use to stick the sprinkles on?
LikeLike
Clear polyurethane fence stain from Walmart
LikeLike
Did you top-coat the sprinkles or just use the polyurethane to stick on the sprinkles?
LikeLike
Hi Sharon, we brush fresh polyurethane on the donuts and quickly sprinkle on the sprinkles. Then we leave it at least 24 hours to dry. After that, we’ve done it both ways. They can be finished or you can spray some clear gloss spray on top. Have fun!
LikeLike
I’m looking at the Michaels Canada website, and I see Tulip Puffy Dimensional Fabric Paint, or Summer Pastel Puffy Chalk Paint By Creatology.
Do you know which one of these is a better fit for this project? Is there a different product out there that I should be looking for?
LikeLike
I would go with the fabric paint because I don’t know what the chalk paint is. I prefer the 4 ounce bottles versus the tiny 1.25 ounce bottles because they go so fast in a classroom setting.
LikeLike